Two for the price of one !
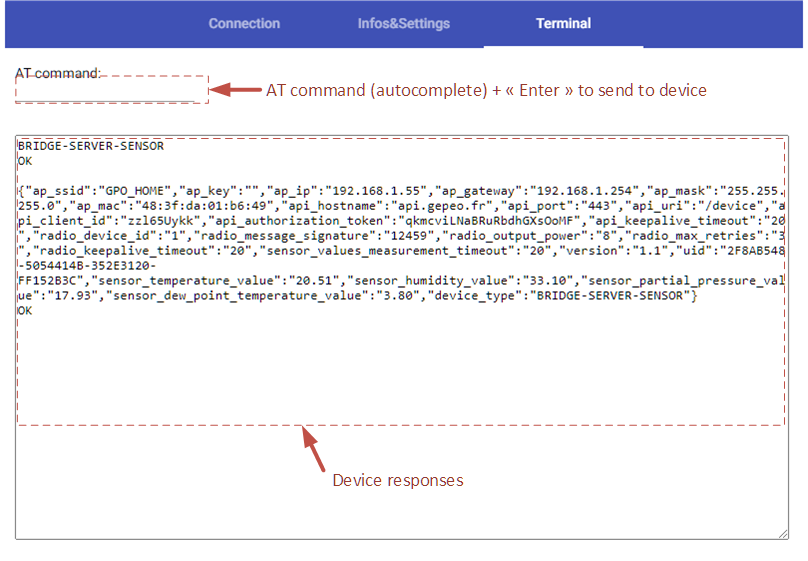
Rather than updating the parameters one by one, the AT+JSONSTATUS and AT+JSONSETTINGS commands respectively allow to retrieve and update the entire devices’ configuration at once. My initial approach was to observe consistency and therefore not to use a heavy client, but a web application – this is theoretically possible thanks to WebUSB which opens access to USB devices to web-browsers (assuming that the USB end-point has been implemented into the device).
Unfortunately, I was unable to implement WebUSB at first. The project launched by reillyeon (Arduino / WebUSB) is blocked, at least as far as SAMD is concerned. I tried to fix the problem myself, but I ran into the limit of my skills when it comes to USB in general.
So I first resigned to finally develop a heavy but multi-platform client. I hesitated between Java and Electron, and it was ultimately JAVA that won the day simply because I had just developed a small application allowing to download firmware on Arduino boards using JAVA-SWING.
But since I’m the guy who does not let go easily, I returned to the topic of WebUSB later and I turned to the TinyUSB library and the implementation proposed by Adafruit for Arduino boards.
Finally it works wonderfully and after having developed a small Web-App (Angular again!), It is now possible to configure the devices without having to install a heavy client – this at the same time resolves the upgrade problems of the settings tool.
And because the SAMD bootloard supports UF2 (drag & drop firmware in quasi-mass-storage mode), nothing is needed other than a web browser (Settings-Tool-Web-App also works on Android Mobile !) to upgrade, configure and monitor (measures access) the devices
General approach
I have not commented the code of the JAVA app. This does not really make sense anymore since the web-app settings tool is now available.
However, I leave this application in open access because it could be of interest to those who wish to customize a JTable (very useful example of overloading AbstractTableModel, AbstractCellEditor, TableCellEditor and TableCellRenderer).
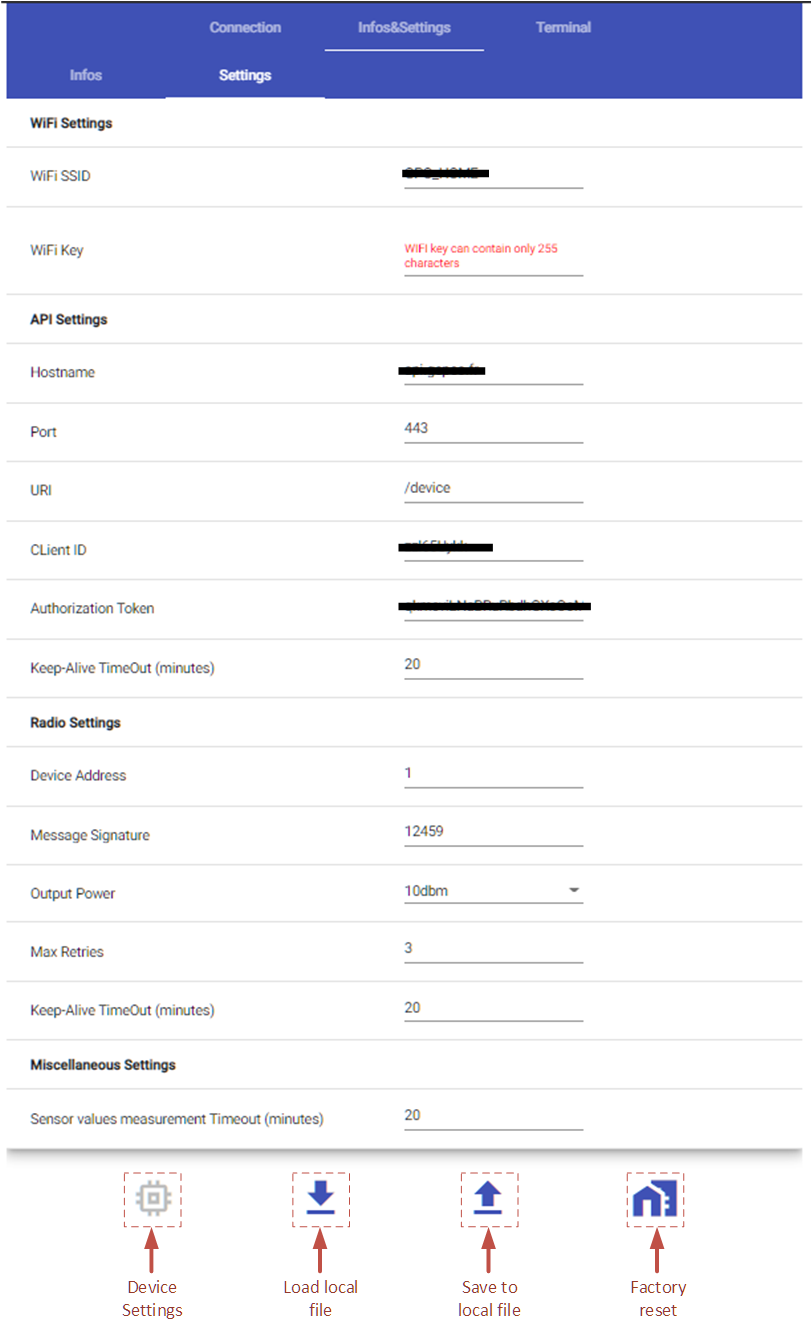
However, the Java app and the web-app work on the same principle: in order to avoid having to re-design the UI when adding or removing a device’s parameter (let’s consider using the same settings-tools for other kind of devices – using AT commands), I decided to use tables (JTable for Java Swing and Angular Material mat-table for Angular web-app). Rows and columns are populated with the data (Info and Settings) provided by the device, crossed and enriched with a ‘schema.json ‘ configuration file.
AT+JSONSTATUS returns all device’s infos and settings at onces into a simple json 1-level, meaning that arrays and encapsulated json are forbidden. The JSON only contains keys and values. The role of the ‘schema.json‘ consists on adding additional information to the key/values pairs providing a human-readable way, and also attaching categories as well as specifying display order for better visibility.
In addition, data validation (before sending to devices by using AT+JSONSETTINGS) is performed by RegEx patterns which are also specified into the schema file. That is nice !
1) JAVA-SWING App
I made the choice of Eclipse just because it supports for free the plug-in WindowBuilder to easily design the UI . As I mentioned previously, the UI is developed with SWING and the whole is based on JAVA J2SE 1.5. The project is a MAVEN type. Sources are available here
2) Angular Web-App
Again, WebUSB is definitly a boon ! When I was younger, the standad – or at least the most common – to configure hardware, it was via the serial port. The generalization of USB in the industry took a little longer, but anyway, configuration tools are for the most part still heavy clients that technicians’ teams must keep up to date.
Thanks to WebUSB, that’s one less worry. No heavy client even in our case no need for an internet connection because the web-app works in standalone mode, ie using the cache of the last transfer (I tested and it works on Chrome – even on MacBook !).
I did not implemented authentification process because this POC development is just constrained by time-to-publish. Authentication should ideally be connected with the ‘clients’ table of the API database.
a. Structure
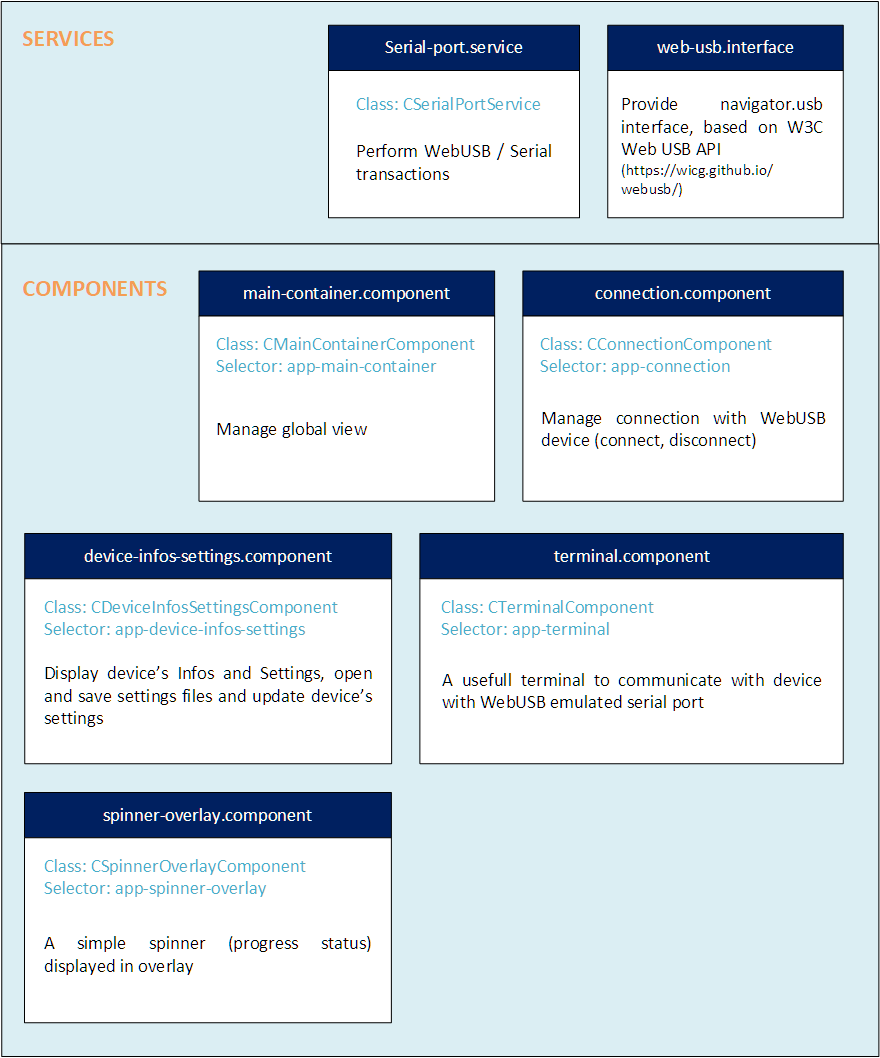
The Web-App has been developped with Angular 11 and is quite simple:
- serial-port.service supports WEBUSB communication. Because the navigator.usb property is not natively implemented, an interface should be added. I have to confess that I failed to make the @types/w3c-web-usb package working properly. This is the reason why I simply copy/paste the classes and interfaces into a web-usb.interface.ts file and added the export declarations.
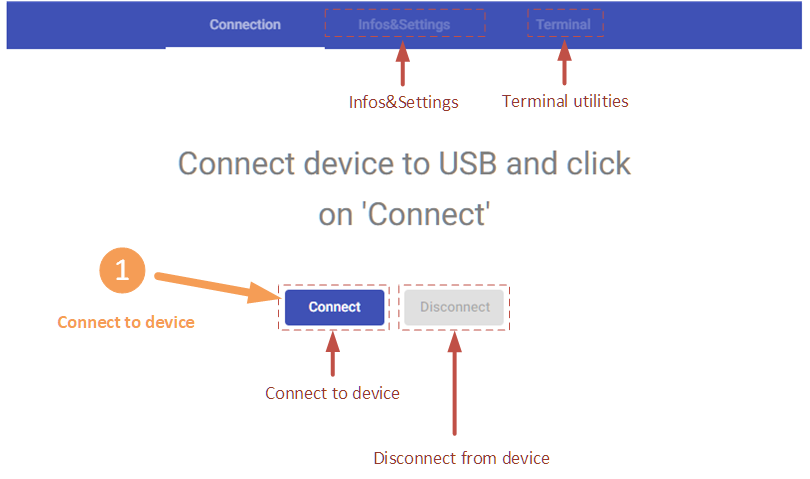
- connection.component manages connect, disconnect operations with the device. It also retreives device-type in order to allow or not access of the device-infos-settings component.
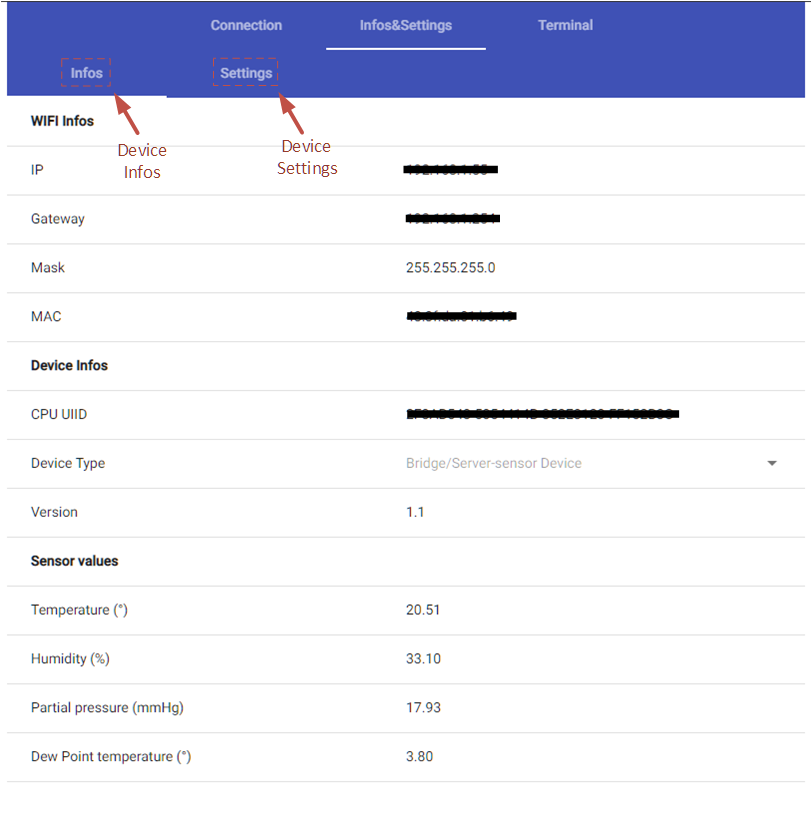
- device-infos-settings.component is in charge of displaying the information and settings returned by the device (data enriched by schema.json file). It also allows the modification and validation of the settings and send them back to the device. As a bonus, the settings can be saved locally into a JSON file and of course recovered. A factory-reset operation is also proposed in order to empty the EEPROM of the device but also and above all to reset the wifi access point credentials (these are saved into the ESP8266 module) ..
- terminal.component is a usefull tool to communicate with the device as if it were connected to a serial port.
- main-container.component controls the 3 previous ones.
- spinner-overlay.component is just a simple spinner (a progress status) displayed above all components in an overlay way..
b. Environment
let’s assume that the settings-tool-web-app will be installed into the same environment as the main web-app. In fact, Apache2 is already configured. It is therefore necessary to create another virtual host and install the files.
Create Virtual Host folder (assuming Web App URL is device-settings.mydomain.fr):
Create public_html folder in order to host the Web-App:
Create Virtual Host configuration file:
and copy following lines:
<VirtualHost *:80>
ServerName device-settings.mydomain.fr
ServerAlias device-settings.mydomain.fr
redirect permanent / https://device-settings.mydomain.fr/
</VirtualHost>
<VirtualHost *:443>
ServerName device-settings.mydomain.fr
ServerAlias device-settings.mydomain.fr
DocumentRoot /var/www/device-settings.mydomain.fr/public_html
ErrorLog /var/www/device-settings.mydomain.fr/error.log
CustomLog /var/www/device-settingst.mydomain.fr/requests.log combined
SSLEngine on
SSLCertificateFile /<path-to-ssl-certificats>/mydomain.fr.cert.pem
SSLCertificateKeyFile /<path-to-ssl-certificats>/mydomain.fr.key.pem
SSLCertificateChainFile /<path-to-ssl-certificats>/mydomain.fr.fullchain.pem
</VirtualHost>
Enable site:
Restart Apache:
c. Installation
Install GIT if not already done, and clone API App (cf GITHUB)
Move /dist folder’s content to Virtual Host folder:
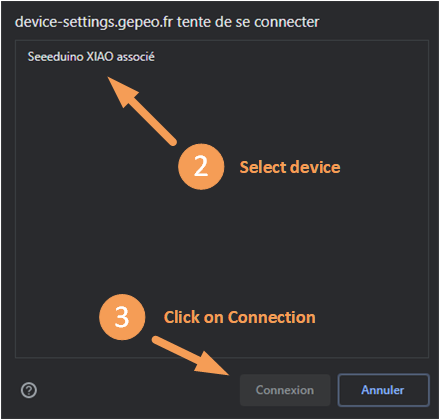
Open web browser and enter the settings-tool-web-App URL
d. OPTIONAL – Install development environment
Assuming that the Settings-Tool-Web-App has already been cloned into PUB-DEVICE-SENSOR-SETTINGS-TOOL-WEBAPP, cf above.
Move to sources folder:
Install libraries from package.json file (it will also install Angular CLI):
After modifications, build project:
We have boards, Web-App, Web-Tool…project is almost finished. There remains the case setting-up.