Display meeting-room bookings
The display device is assigned to;
- drive the e-paper screen and display the meeting room bookings informations.
- manage the time scheduling according to the time ranges of bookings, and update the screen.
After booting, the display device attempts to register to server. It doesn’t matter if is has already been registered ot not, the server send it back the up-to-date bookings list for the current day.
The display device is also in charge of managing the booking time slots in order to update the screen with real-time informations provided byb the server.
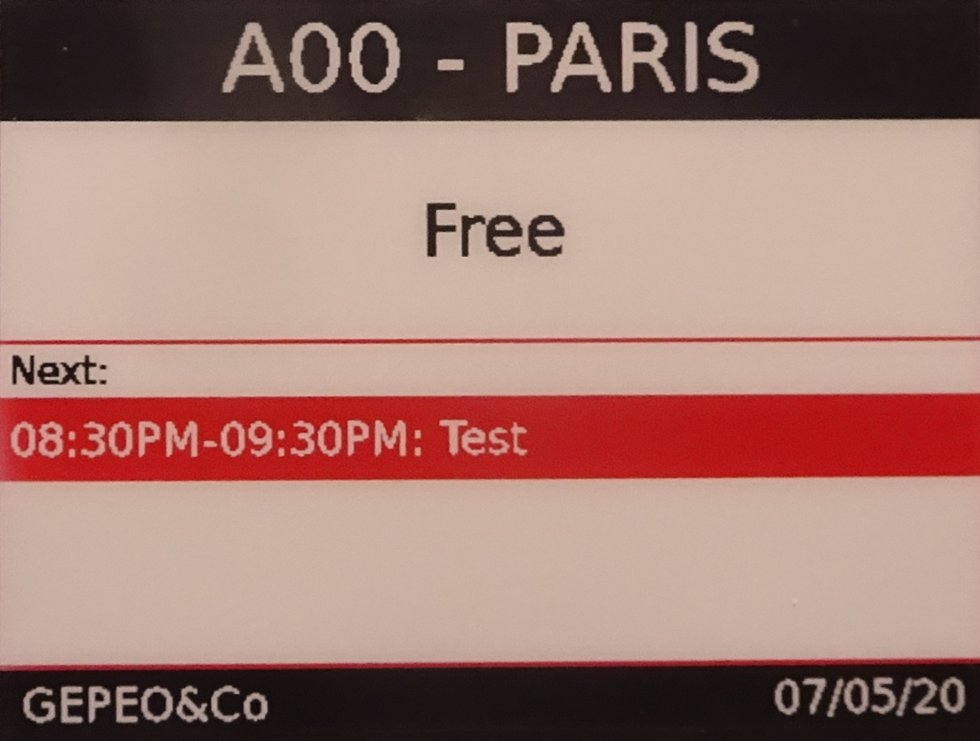
- header: display meeting room name. User defined.
- current meeting: details of the current meeting or b/w if free (eventually with user defined message).
- next meeting label: this is also used defined.
- pending meetings: list of the next 3 pending bookings.
- footer: company name (user defined) on the left. Date of the current day on the right.
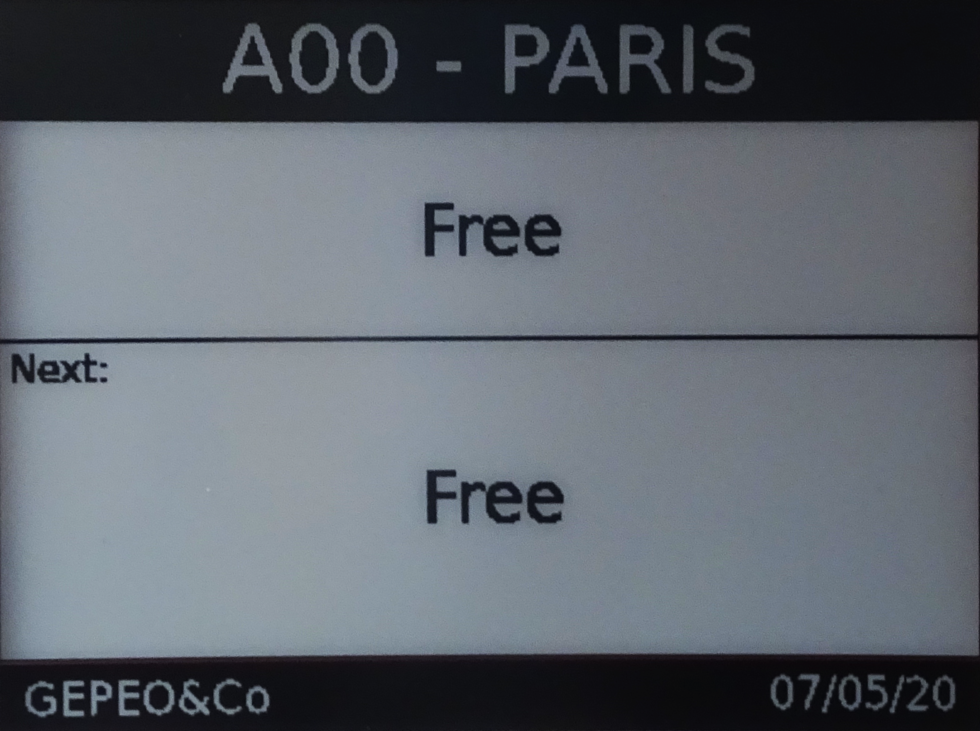
Screenshots below represent the 3 different displays:
- 1 meeting in progress and 1 (maximum 3) pending meetings

- no meeting in progress (meeting room is free) and 1 (maximum 3) pending meetings

- no meetings in progress and pending. Meeting room should free for a while.

1st step: Download package
1) Move to home directory
pi@raspberrypi: ~$ cd /home/pi/
2) Copy project from Github with Subversion
pi@raspberrypi: ~$ svn checkout https://github.com/gpelizzo/PUB-RASPI-MEETING-ROOM-DISPLAY.git/trunk/dist
2) Create new folder to host /dist files
pi@raspberrypi: ~$ mkdir /home/pi/raspi-meeting-room-display
3) Move /dist content to the new folder
pi@raspberrypi: ~$ mv PUB-RASPI-MEETING-ROOM-DISPLAY/dist/ /home/pi/raspi-meeting-room-display
2nd step: install dependencies
1) Move to server directory
pi@raspberrypi: ~$ cd /home/pi/raspi-meeting-room-display
2) Install depedencies from package.json file
pi@raspberrypi: ~$ npm install
After a while, a new directory named node-modules will appear including all dependencies modules.
3rd step: set display parameters
Open config.json file
pi@raspberrypi: ~$ nano /home/pi/raspi-meeting-room-display/config.json
and fill-out the settings, e.g.:
{
}
- logs-path: full path to the logs file.
- log_level: level of the logs as defined into winston package.
- meeting_room_name: meeting room name displayed on the screen 1.
- meeting_room_id: meeting room ID must fit with one of the IDs set into the server events_config.json file.
- company_name: company name displayed on the screen 5.
- tcp_token: Baerer token required for incoming TCP message. Corresponds to tcp_device_token into config.json server file.
- udp_token: Baerer token required for UDP utilities messages (see below).
- tcp_listening_port: TCP port Corresponding to tcp_device_port into config.json server file.
- udp_listening_port: UDP listening port for UDP utilities (see below).
- event_server_ip: IP address of the server. If server is hosted on the same device, IP is 127.0.0.1.
- event_server_port: listening ot the server corresponding to tcp_server_port into config.json server file.
- tcpip_server_token: Barer token required by the server to tcp_server_token into config.json server file.
- time_format: format of the time displayed on the screen. “24h” (hh:mm) or “12h” (hh:mmAM/PM).
- date_format: format of the date displayed on the screen. “FR” (dd/mm/yyyy) or “US” (mm/dd/yyyy).
- free_message: message to display when current booking area 2 and pending bookings list 4 are empty.
- next_title: label to displayed on 3.
4th step: enable PM2 to run and manage the display app
1) Install PM2 as described here
2) Create and start a new process.
pi@raspberrypi: ~$ sudo pm2 start /home/pi/raspi-meeting-room-display/CMain.js —name display
3) Save current PM2 process (required for auto-run at boot time)
pi@raspberrypi: ~$ sudo pm2 save
Nice to know:
List all running process
pi@raspberrypi: ~$ sudo pm2 list
pi@raspberrypi: ~$ sudo pm2 stop
Restart process
pi@raspberrypi: ~$ sudo pm2 restart
Delete process
pi@raspberrypi: ~$ sudo pm2 delete
5th step: create a cron job
In order to avoid any disruption caused by memory leaks or unexpectable dysfunction (let’s talk about bugs !), I strongly recommand to automatically restart the display app every day during night. This can be perform by adding a cronjob. Then, open the crontab:
pi@raspberrypi: ~$ sudo crontab -e
and add following similar line (e.g. restart display app every day at 5AM). It makes maybe more sense to restart the display app after the server.
0 5 * * * /sbin/shutdown -r now6th step: tiny API
A tiny API is provided in order to perform some technical operations. I recommend using postman.
Regarding TCP-IP, it can be address from http://display-ip-adress:tcpip_listening_port. Don’t forget to add the Bearer Token as defined into the config.json file (tcpip_token).
Details are commented into the CMain.ts file (check sources).
- GET ‘/settings’: retreive config.json content file.
- POST’/settings’: update config.json file.
- POST’/events’: update bookings list for the current day.
- POST ‘/reboot’: reboot the display device.
- POST ‘/utilities/unregister-push-notification-subscription’: unregister a push notification channel.
Some UPD commands are also available mainly to identify the display devices fleet (also a UDP token is manatory):
- UDP ‘display_config’: display the current config, incl. IP address, MAC address, metting room id, etc.
- UDP ‘display meeting’: switch back to the bookings display.
7th step(optional): Install source files (visit GITHUB repository)
This step is mandatory only if you have expected to update the source files (bug fixing, improvement, etc.). It requires typescript command (see how to install here).
Again, Raspberry Zero W is definitly not the right device to manage development operations, as typescript compilation which requires processor and memory resources. I rather recommand to use a Raspberry pi B+.
1) Move to home directory
pi@raspberrypi: ~$ cd /home/pi/
2) copy source files from Github with Subversion
pi@raspberrypi: ~$ svn checkout https://github.com/gpelizzo/PUB-RASPI-MEETING-ROOM-DISPLAY.git/trunk/src
3) rename folder
pi@raspberrypi: ~$ mv src/ raspi-meeting-room-display
4) move to the source folder
pi@raspberrypi: ~$ cd raspi-meeting-room-display
5) Install depedencies from package.json file
pi@raspberrypi: ~$ npm install
After a while, a new directory named node-modules will appear including all dependencies modules.
6) compile project in order to initialize /dist folder. Move to the source folder and run tsc command:
pi@raspberrypi/raspi-meeting-room-server: ~$ tsc
7) eventually, create and set config.json as described above. this file must be placed into the new /dist folder.
pi@raspberrypi/raspi-meeting-room-server: ~$ nano dist/config.json
pi@raspberrypi/raspi-meeting-room-server: ~$ nano dist/events_config.json