So simple and fast !
Creating a Microsft Graph App is very simple and quite faster compared to a Google API project. This tutorial describes all the steps that lead to the desire result.
Prerequisite is as follow:
- Microsoft Azure Directory admin account
You will get 3 outputs:
1st step: register a new App
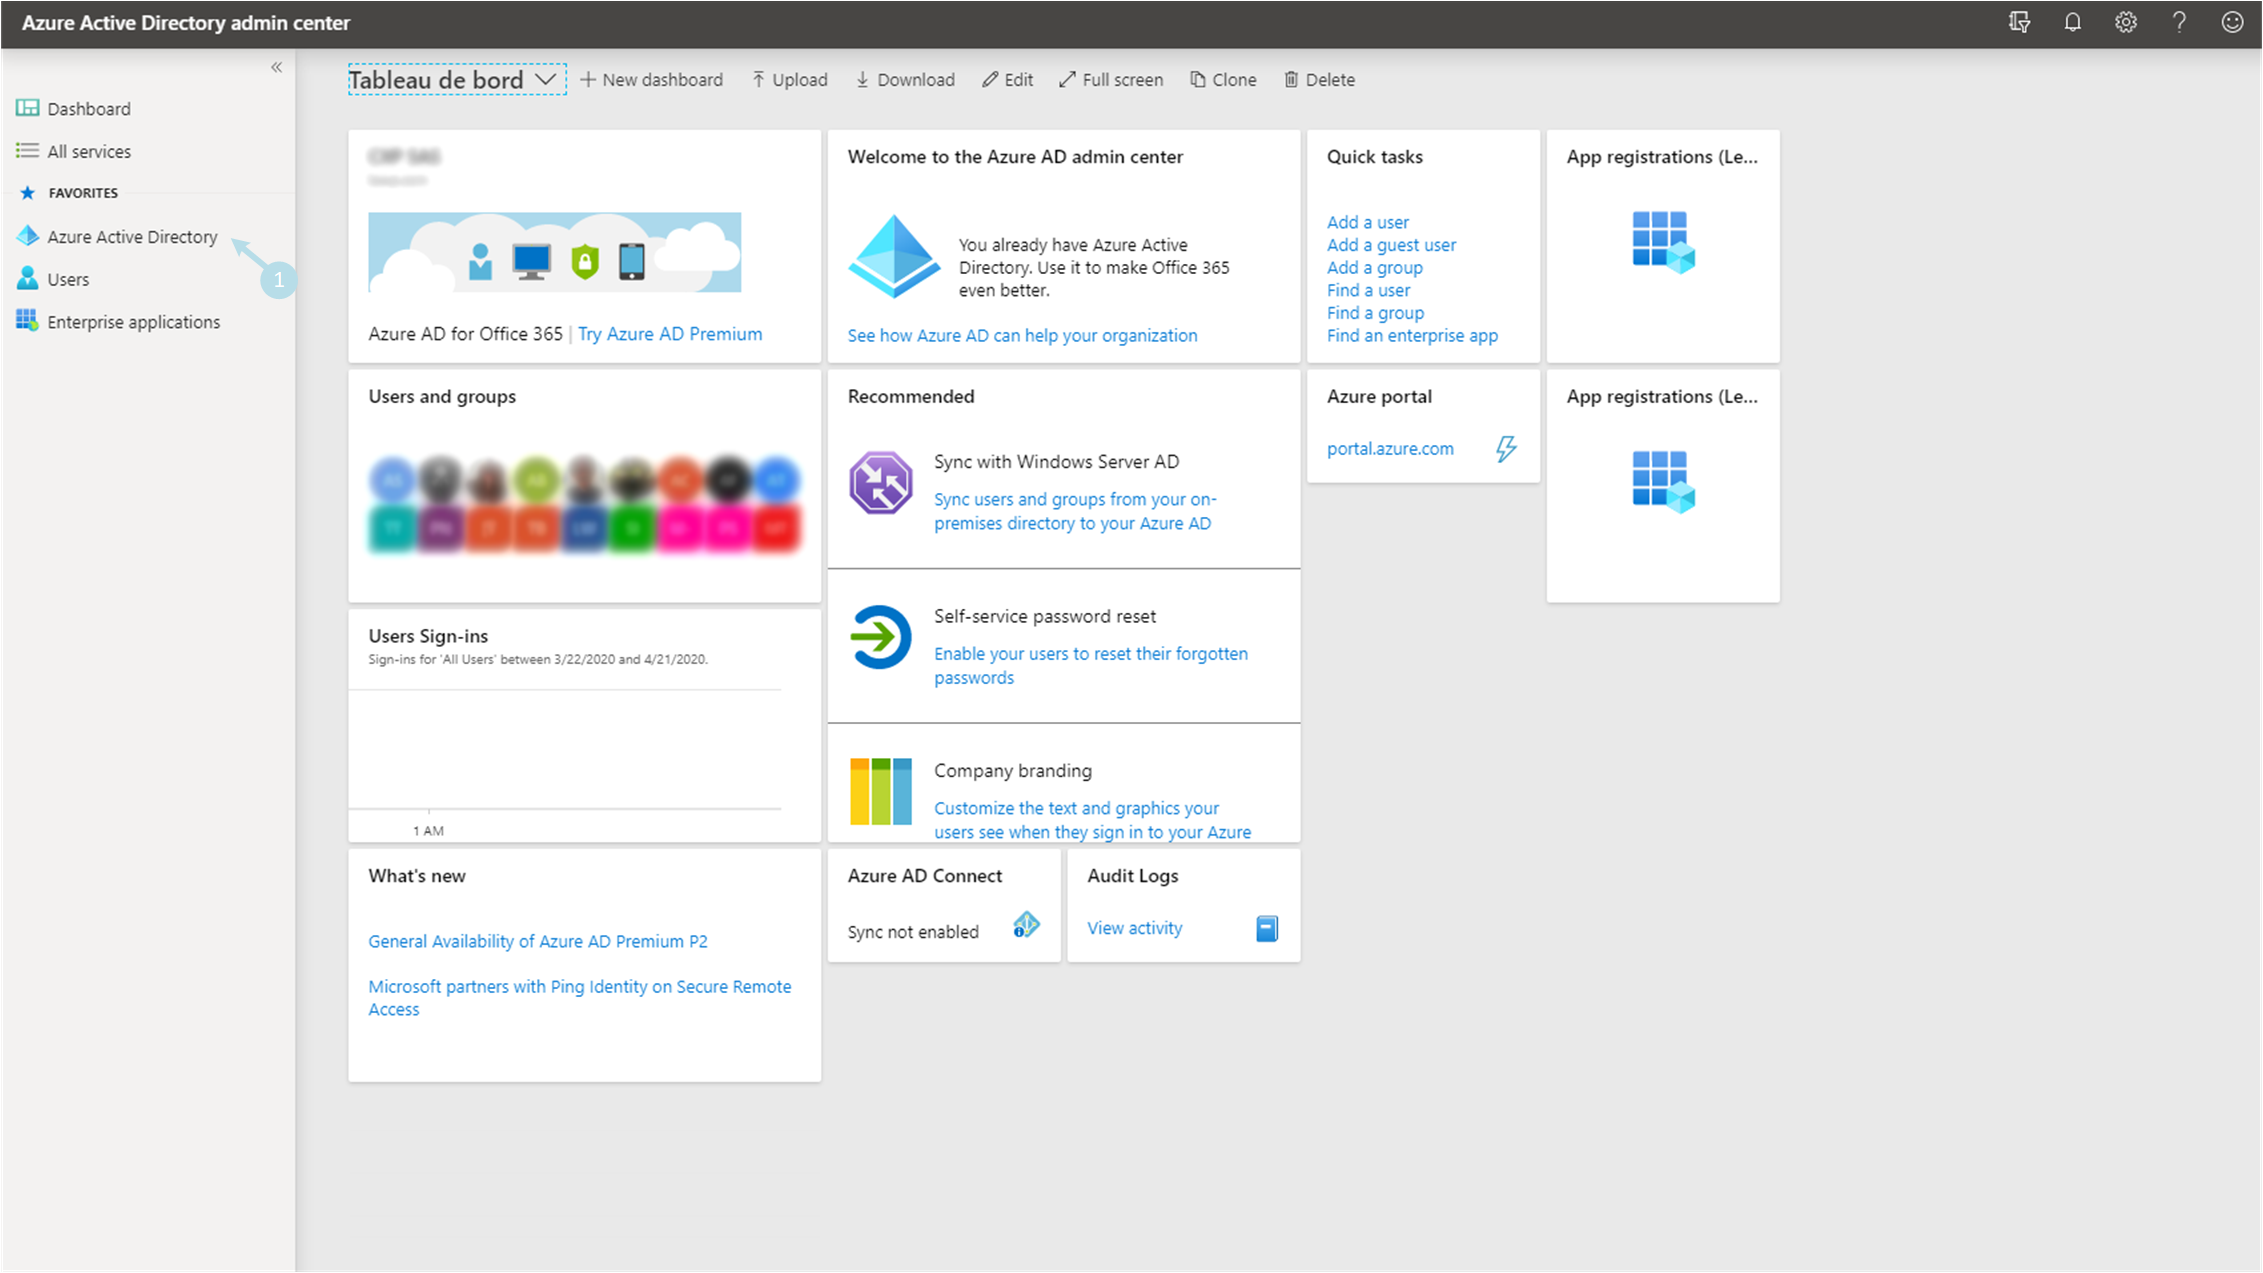
1) Click on Azure Active Directory menu 1
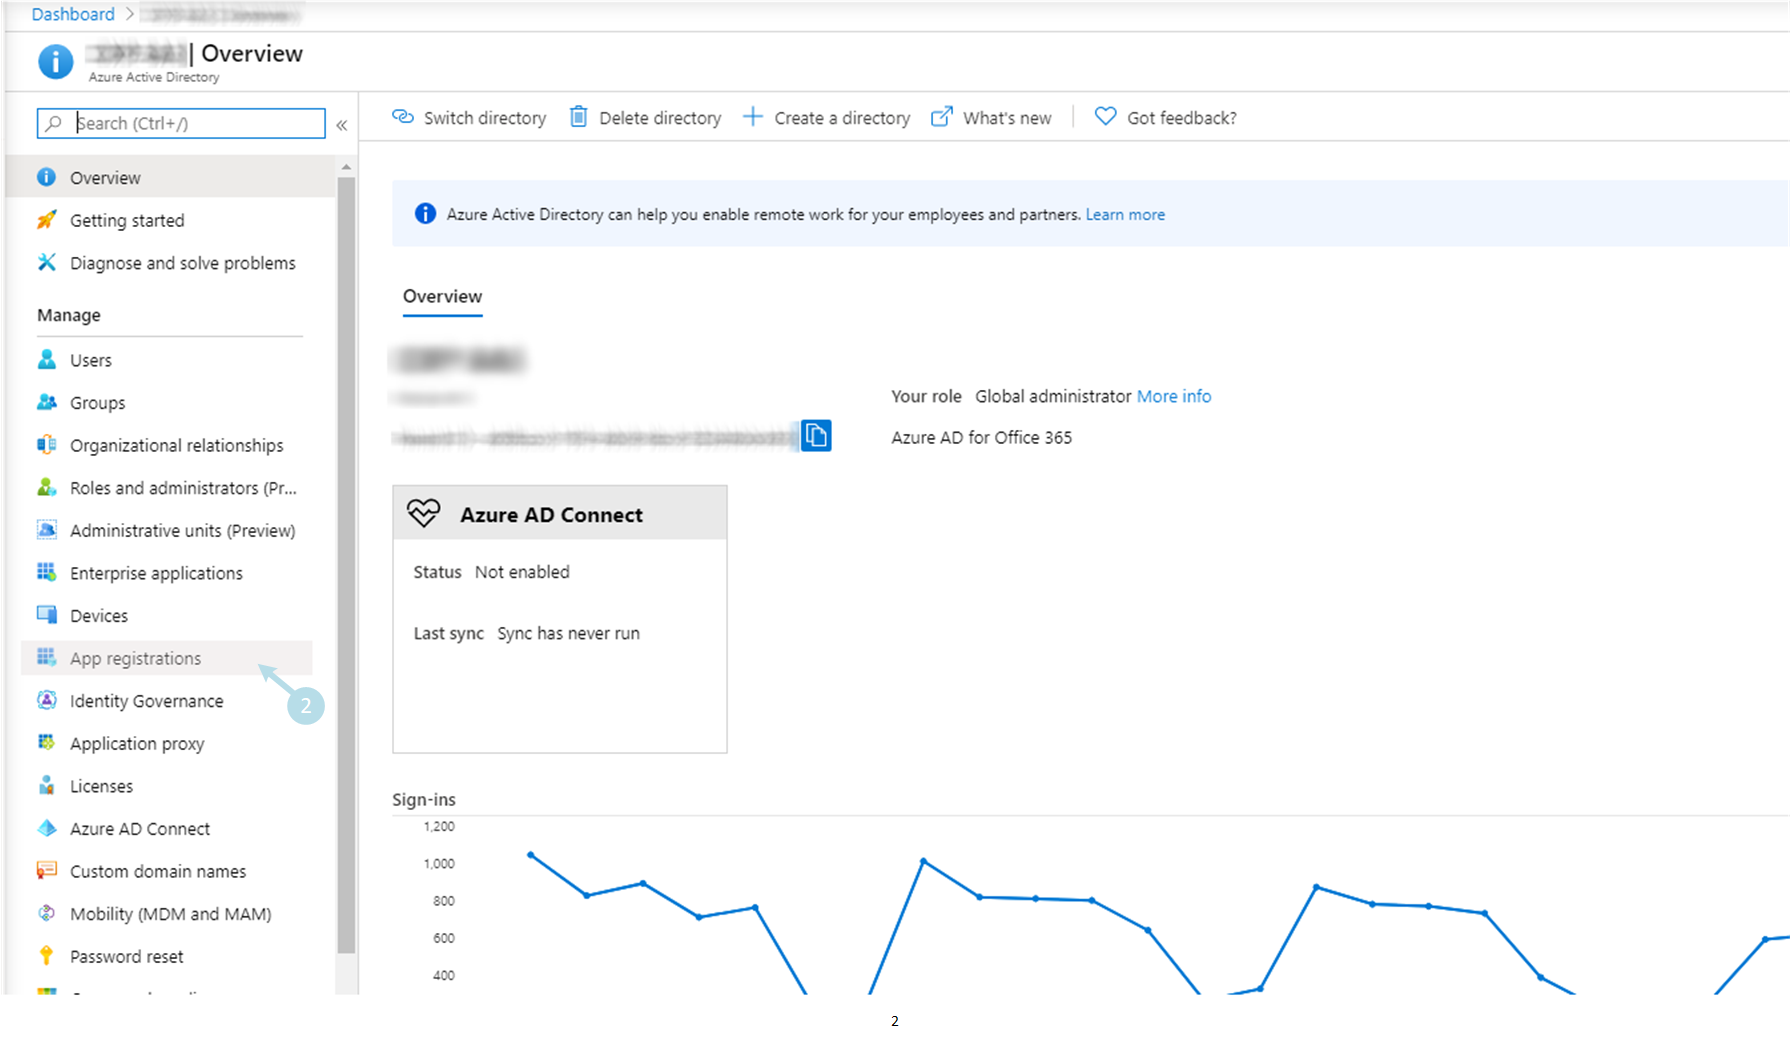
3) Add a new App by clicking on + New registration 3
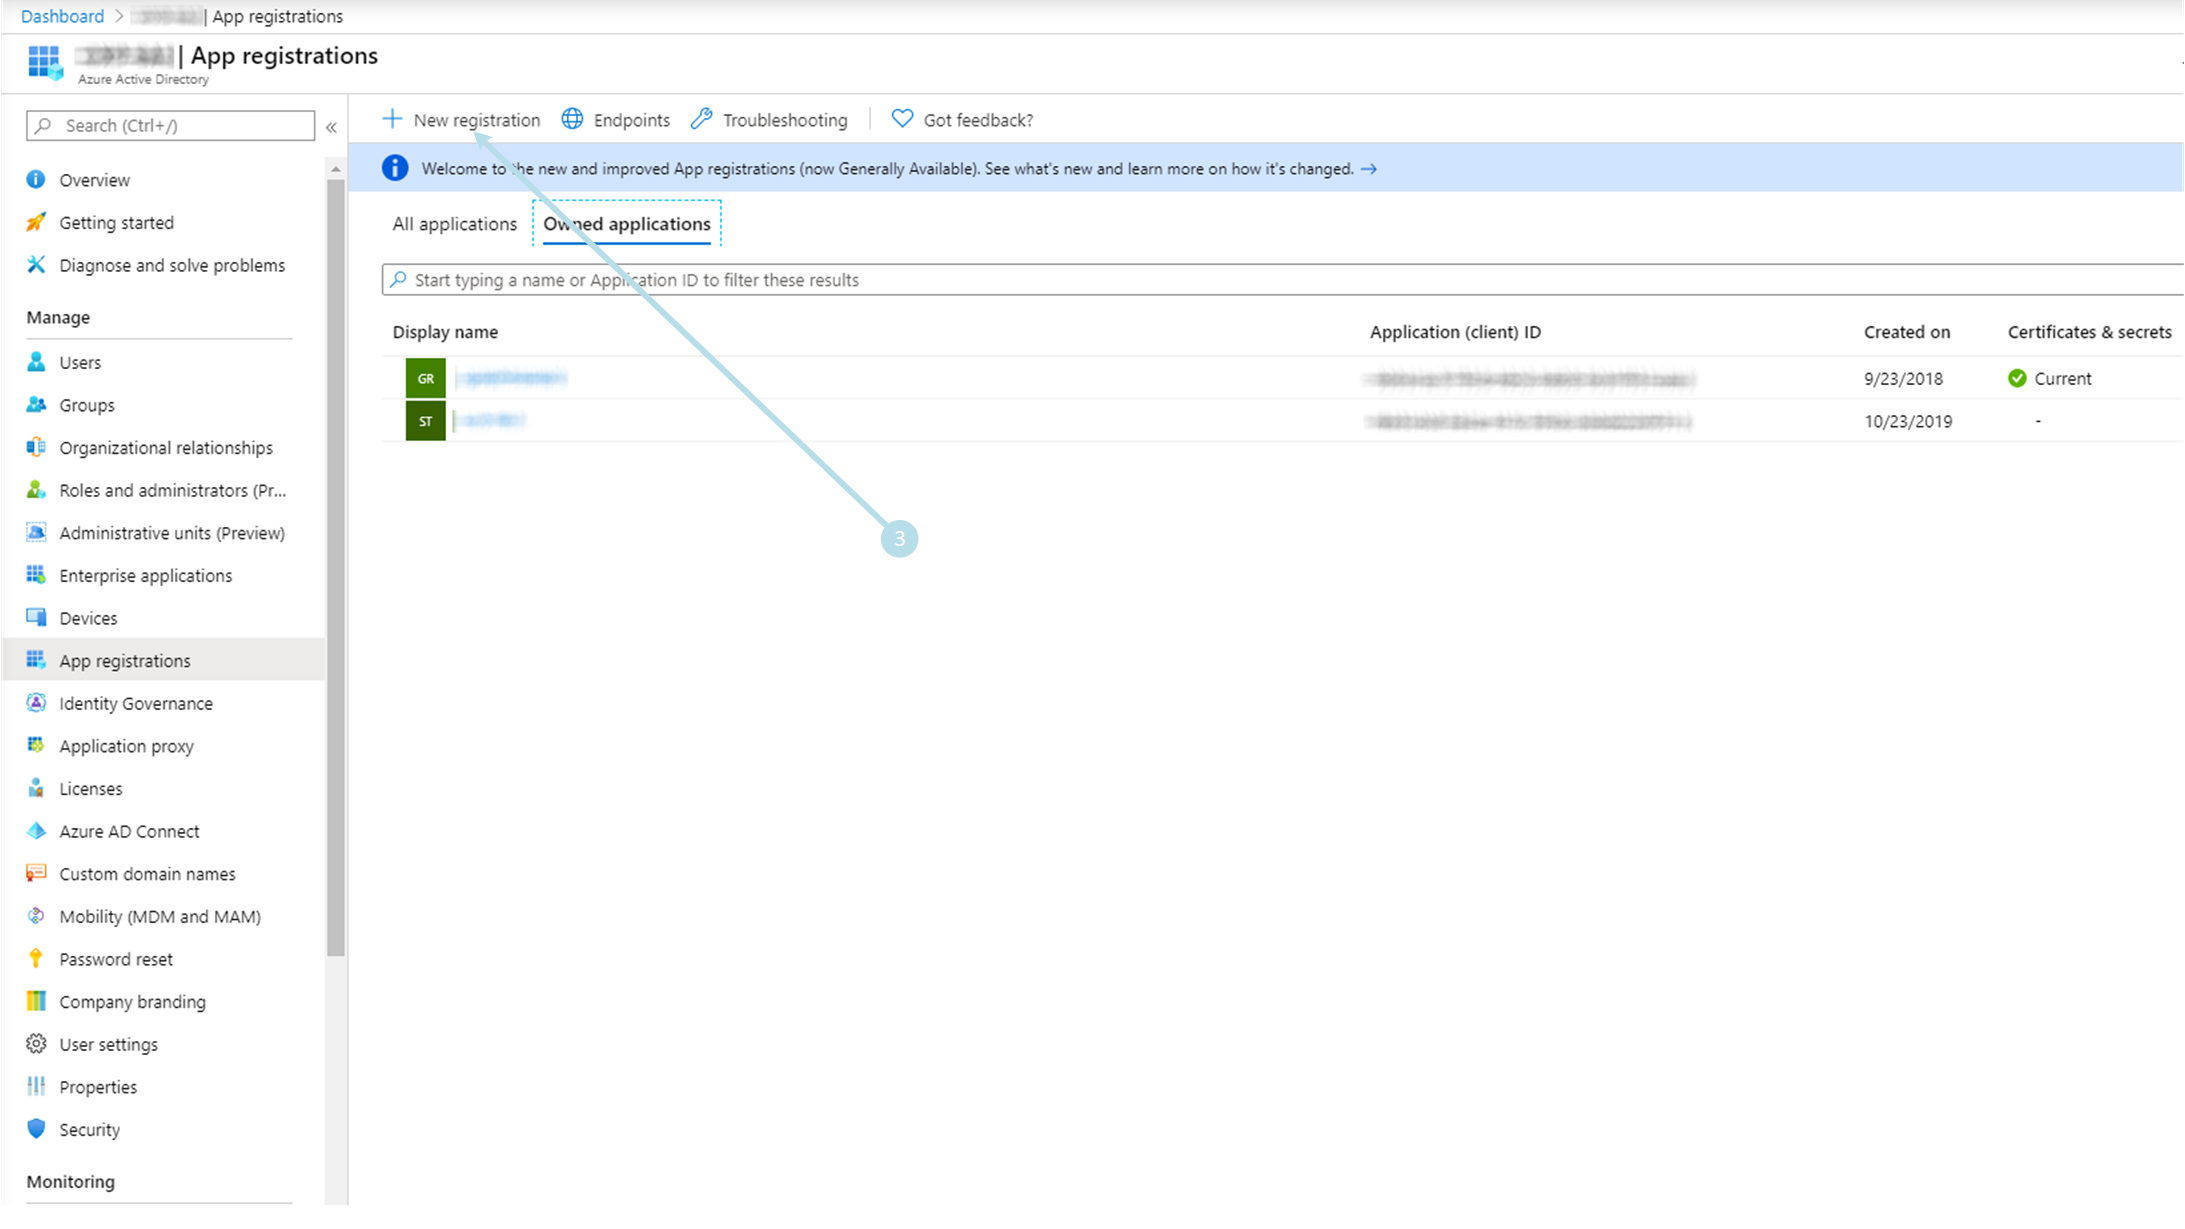
4) Fill *Name with the application name 4 and Select Accounts in any organizational directory (Any Azure AD directory – Multitenant) and personal Microsoft accounts (e.g. Skype, Xbox) as supported account type 5 Terminate by Register 6
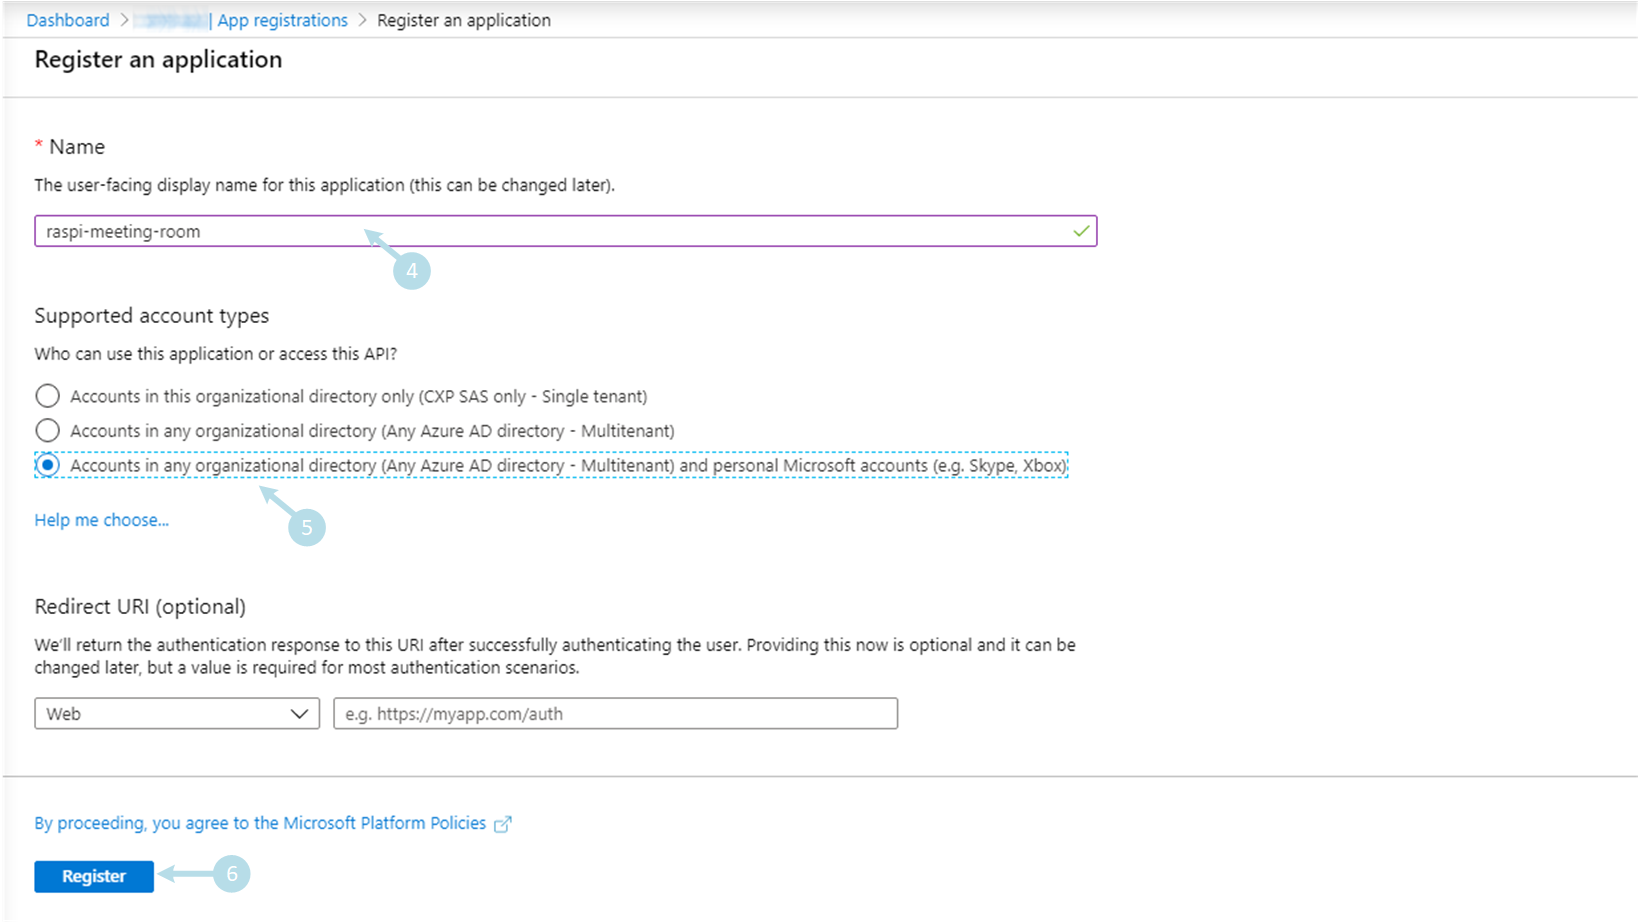
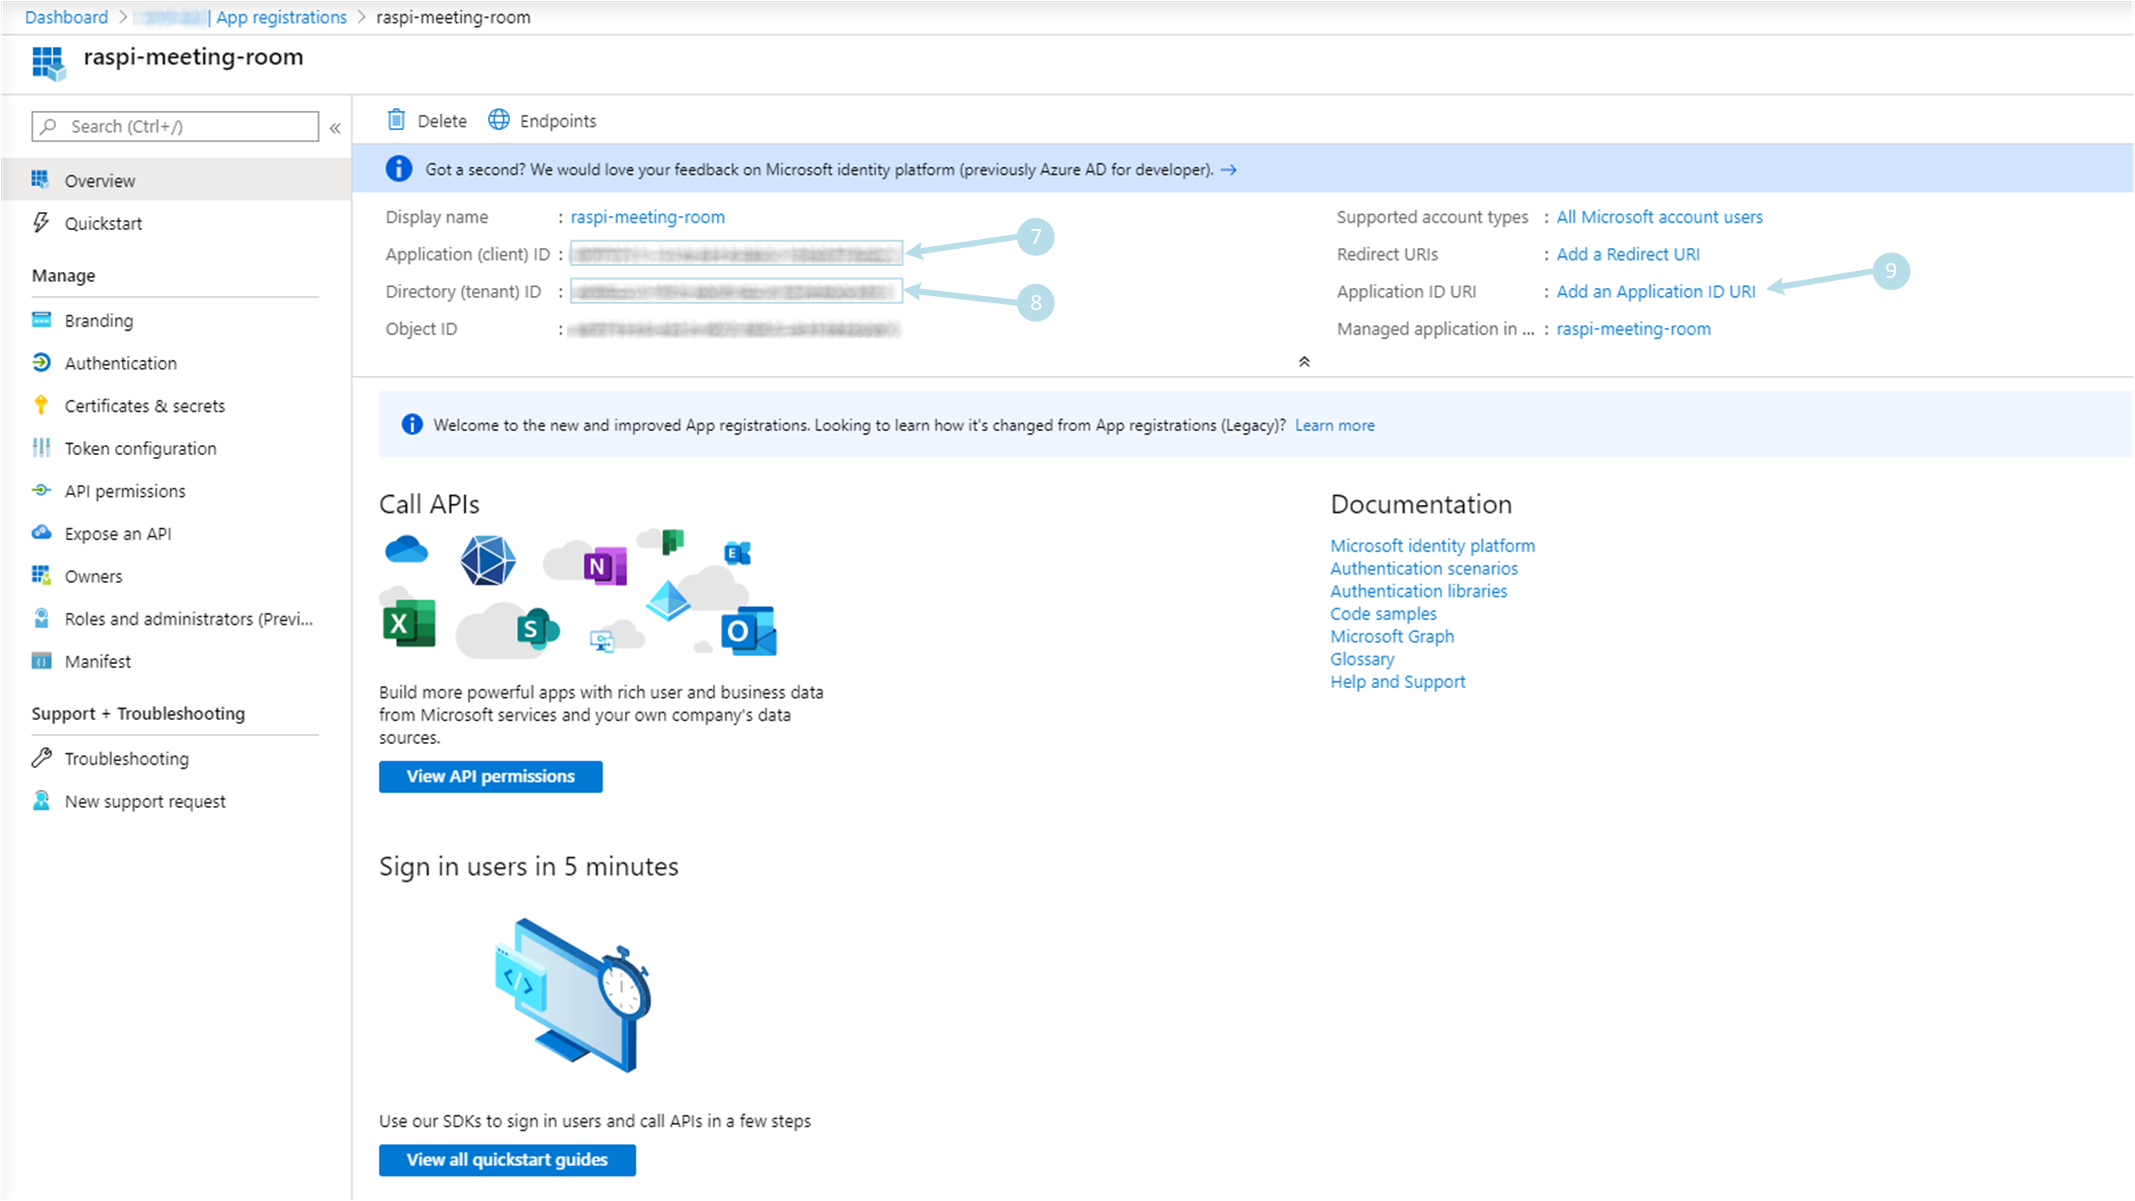
5) Copy the Application (client) ID with the application name 7, the Directory (tenant) ID 8, and click on Add an Application ID URI hyperlink 9
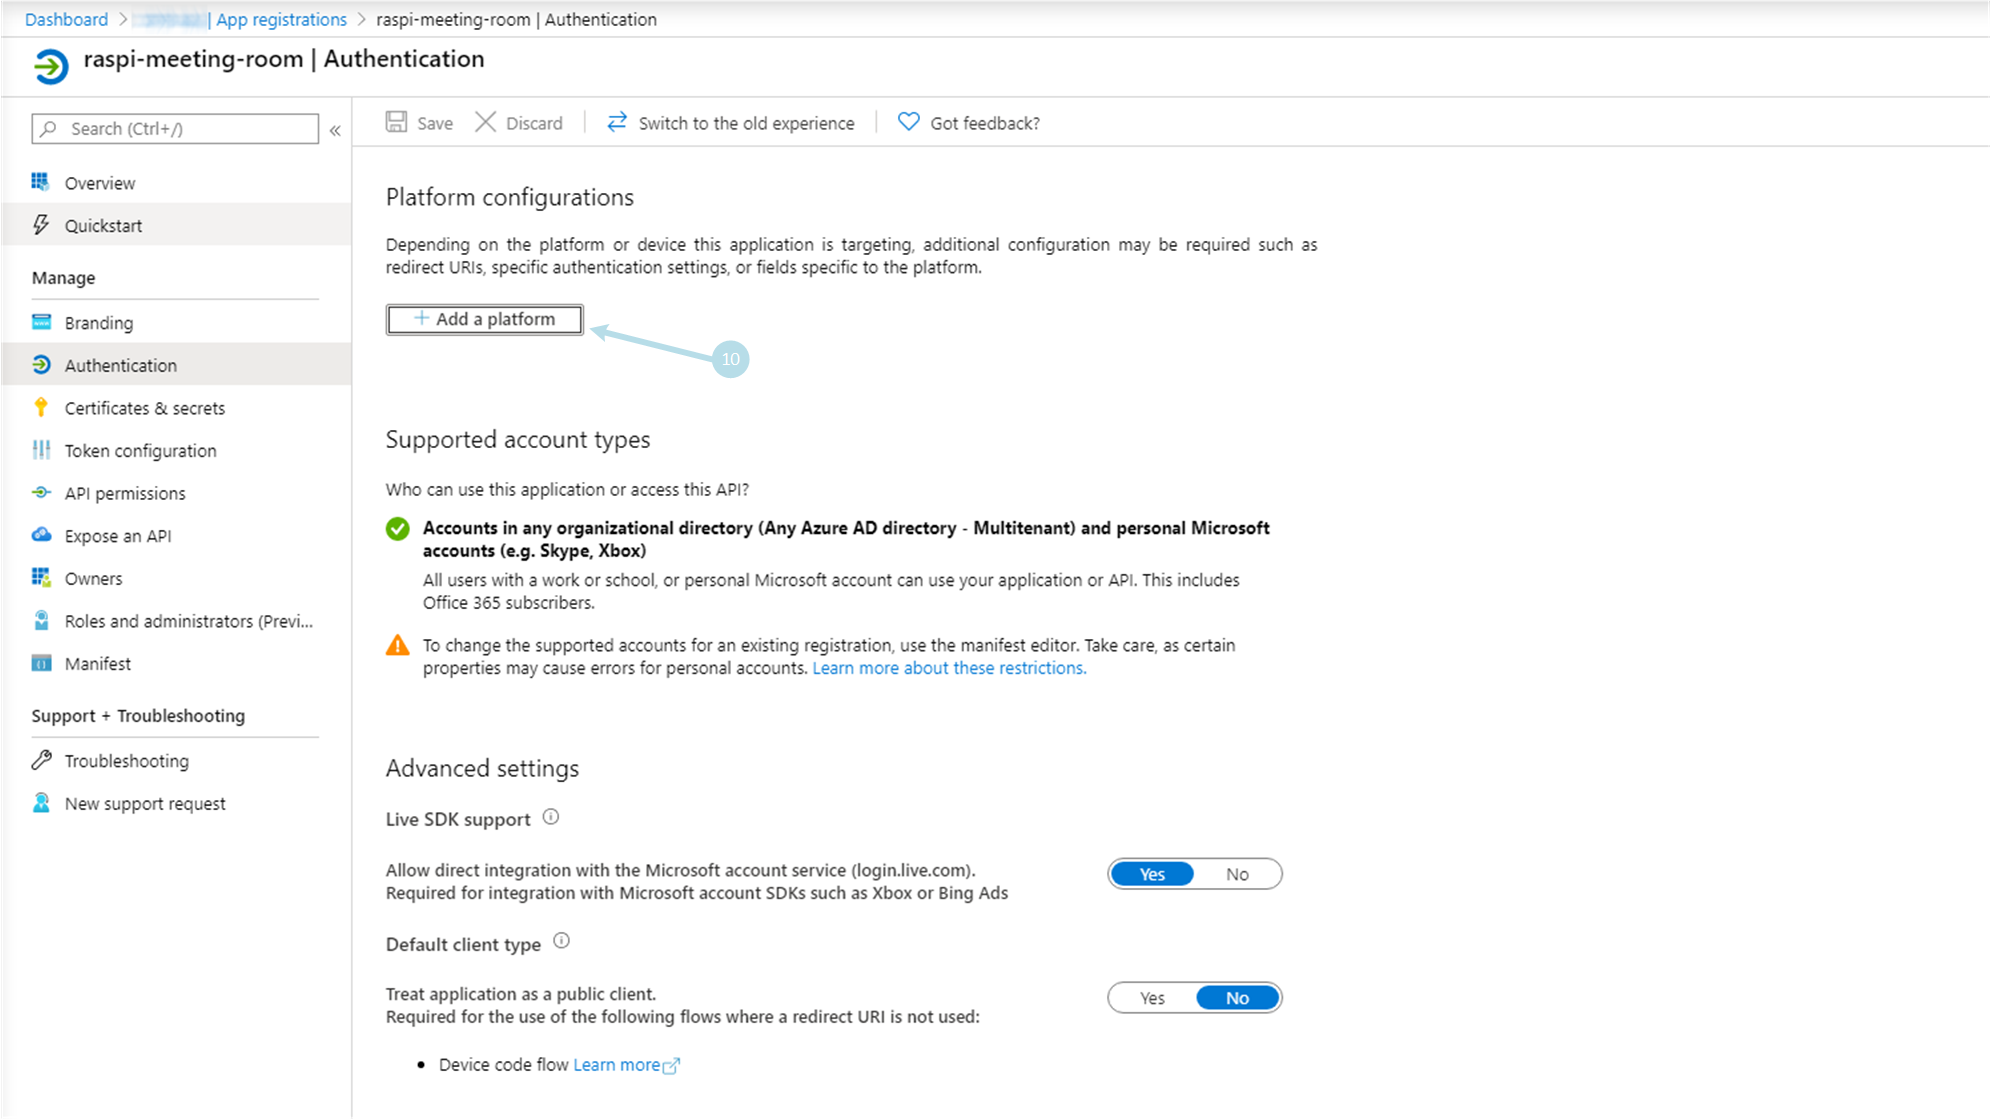
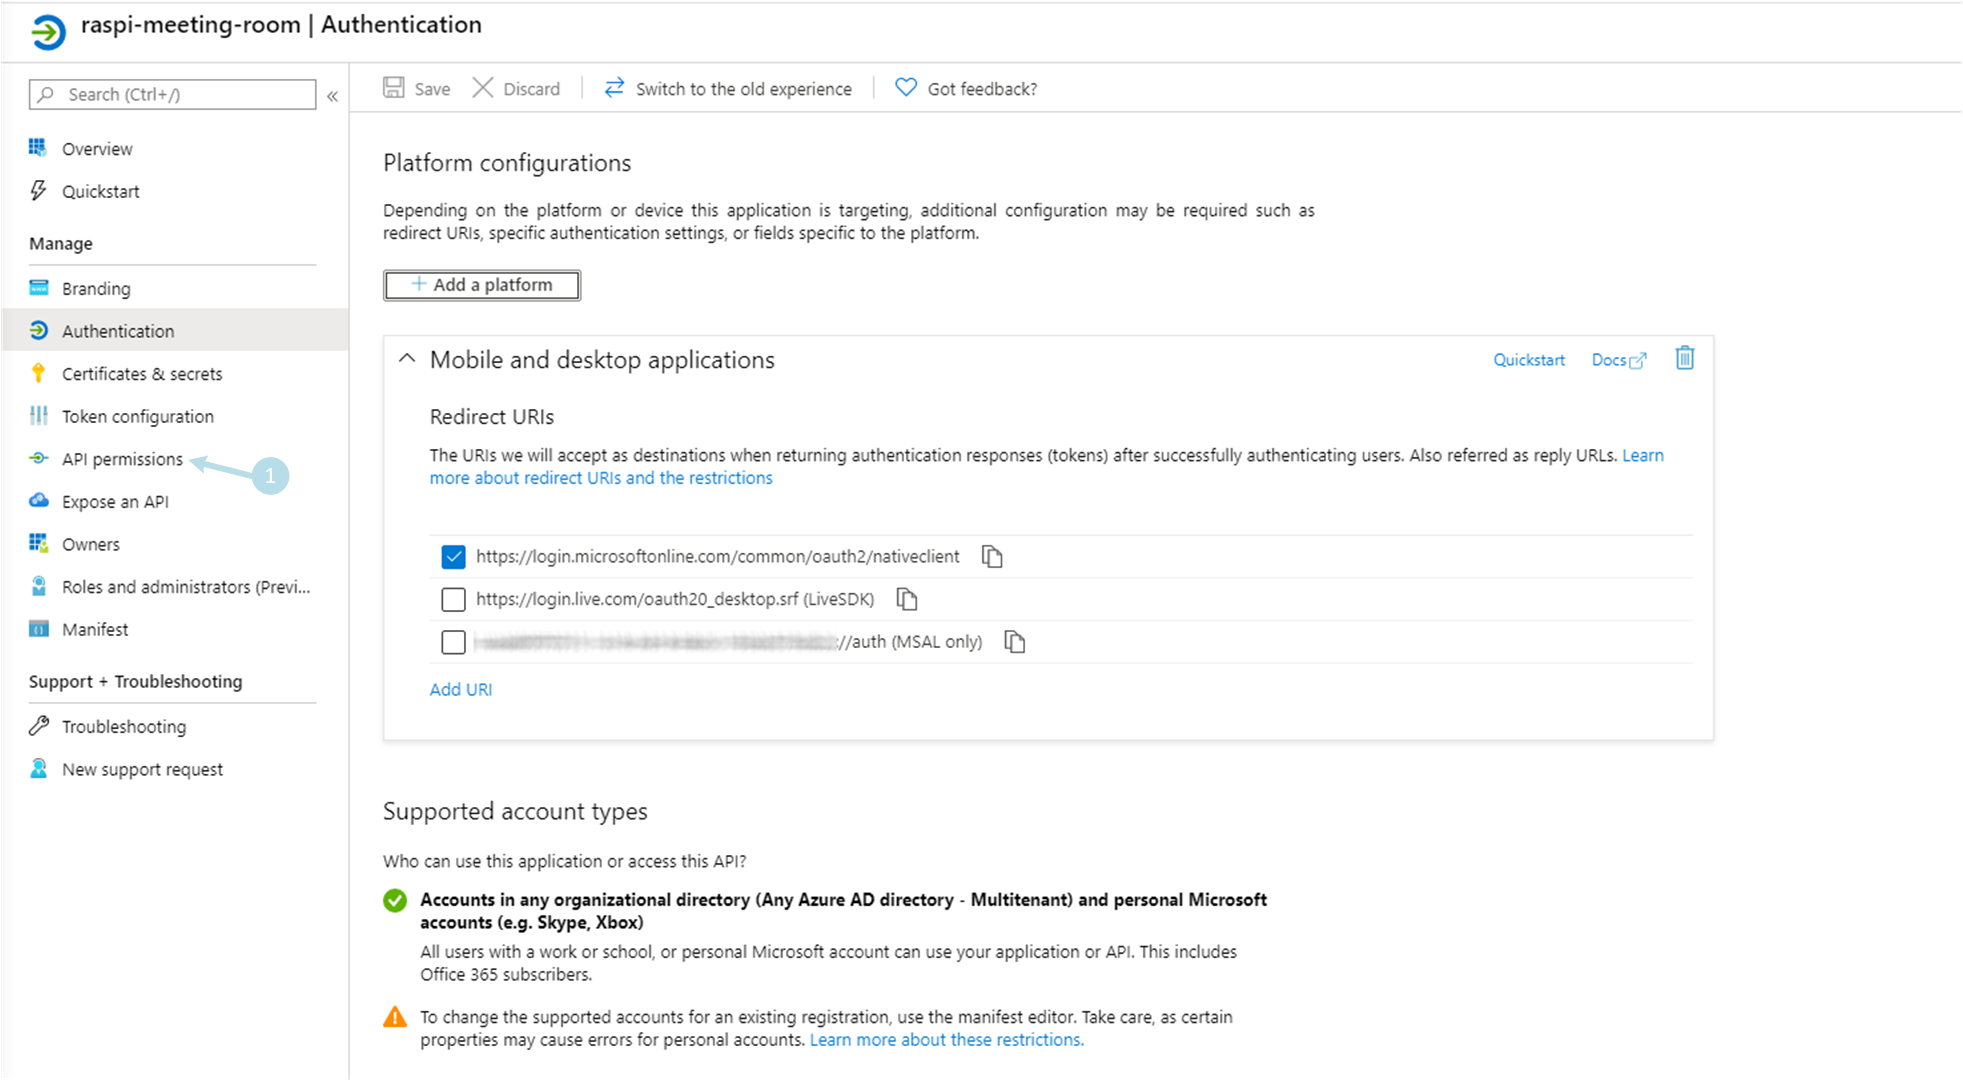
6) Click on + Add a platform 10
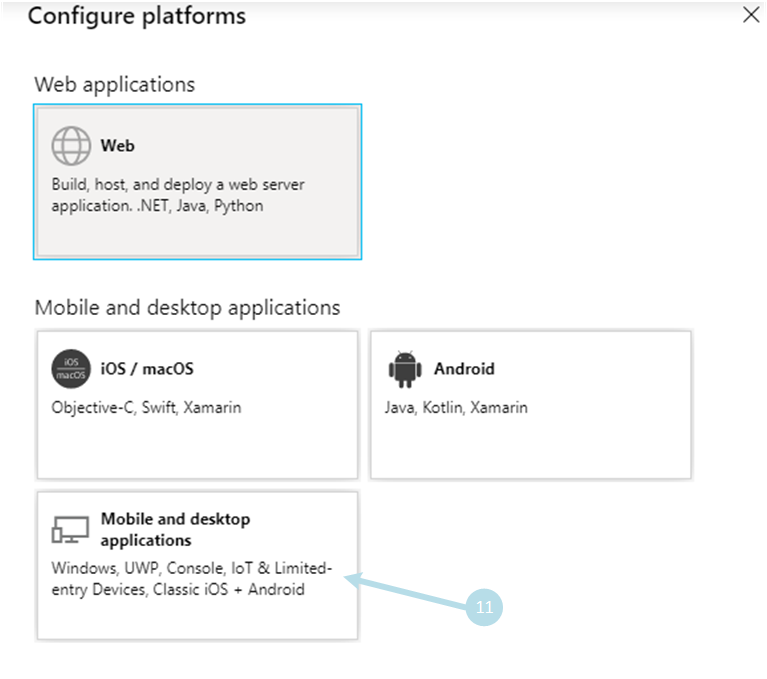
7) Click on Mobile and desktop applications 11
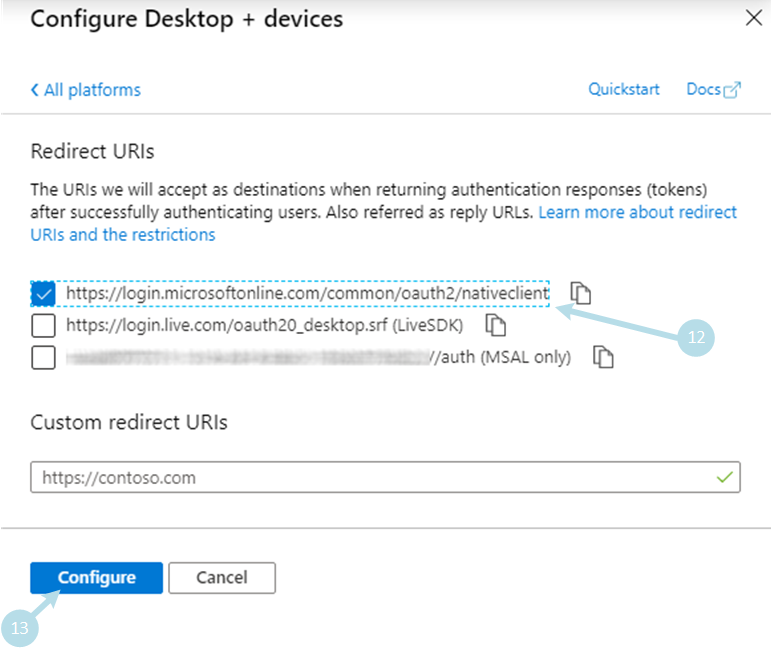
8) Under section Redirect URIs, only check https://login.microsoftonline.com/common/oauth2/nativeclient 12 and terminate by clicking on Configure 13
2nd step: set permissions
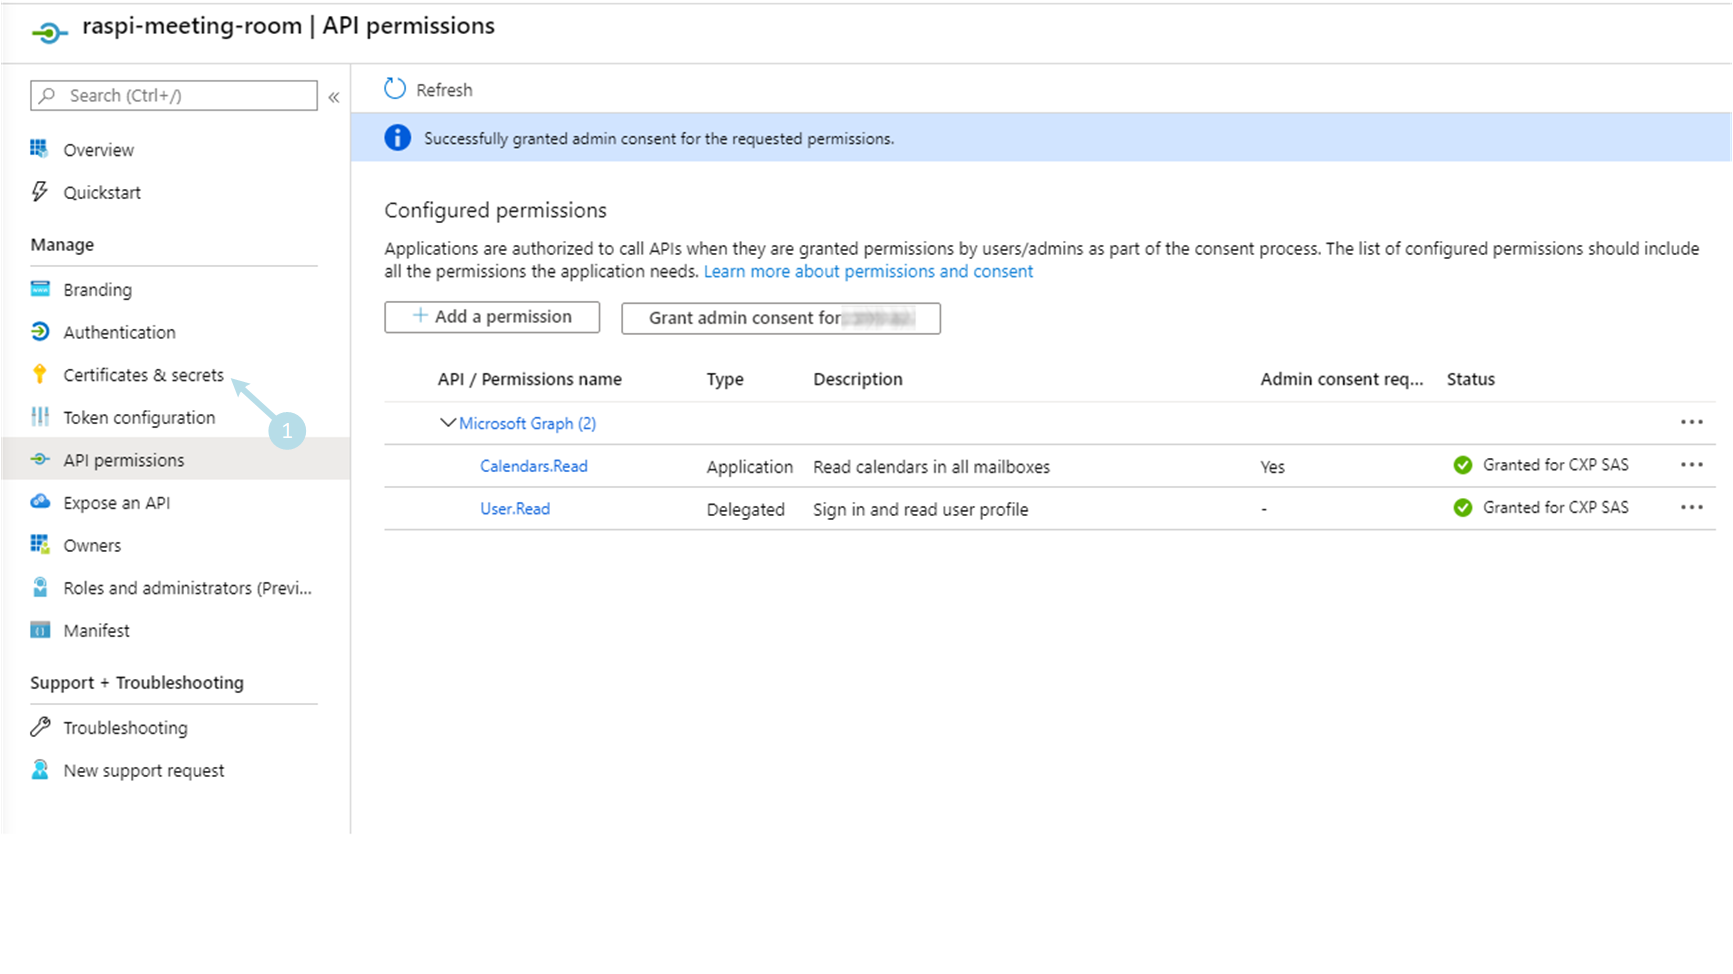
1) Click on API permissions menu 1
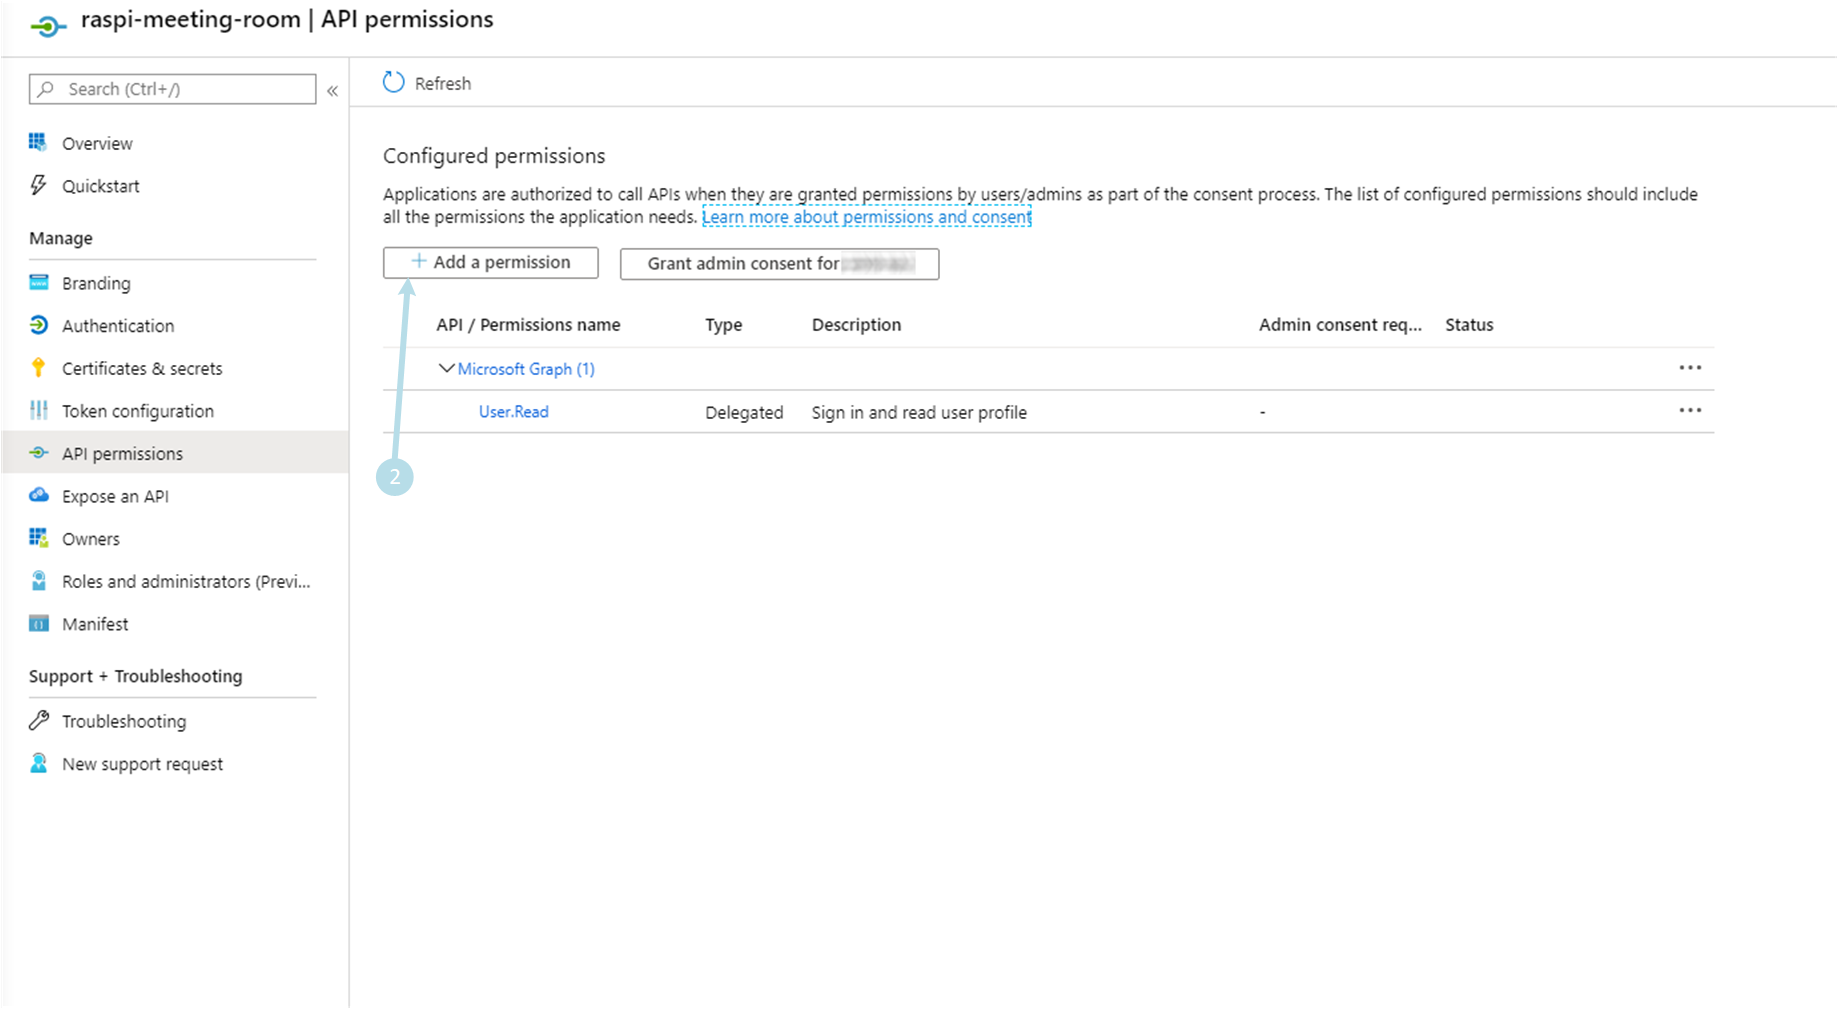
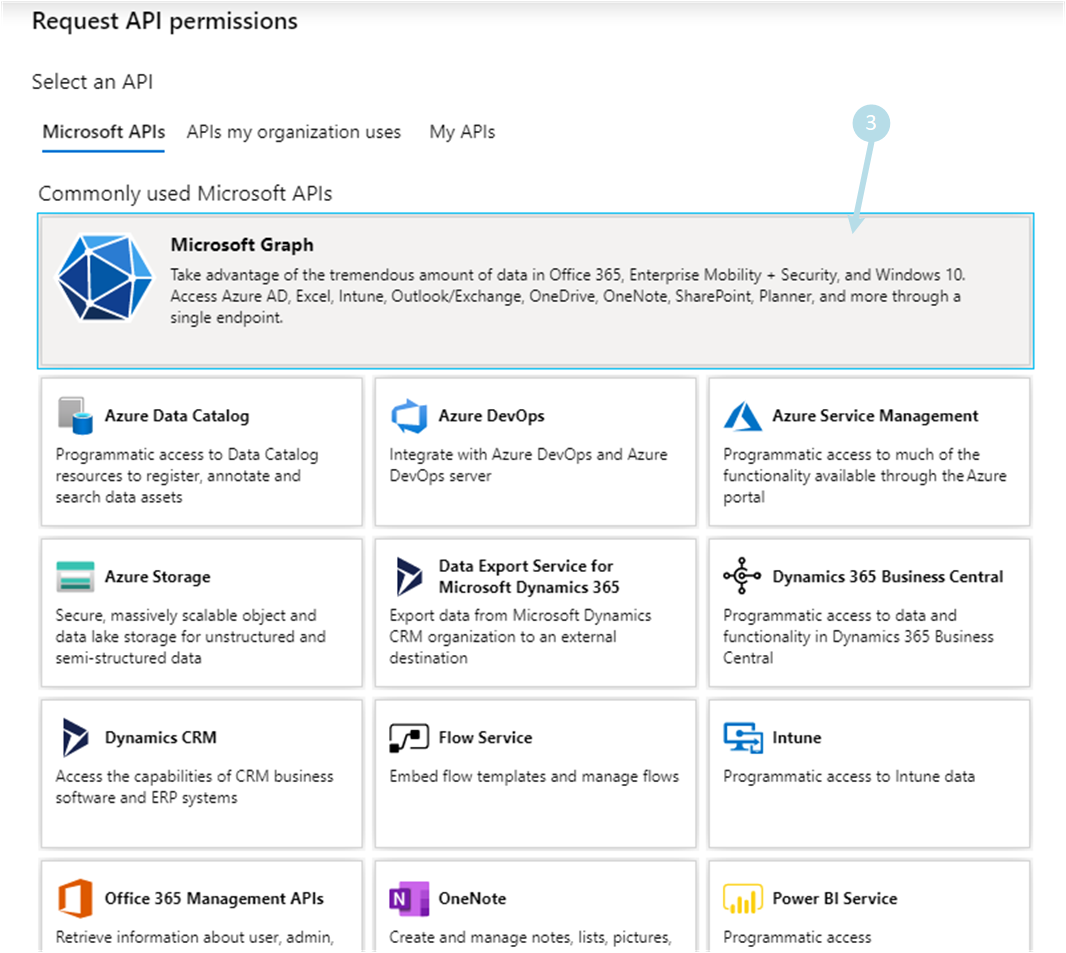
3) Clicking on Microsoft Graph 3
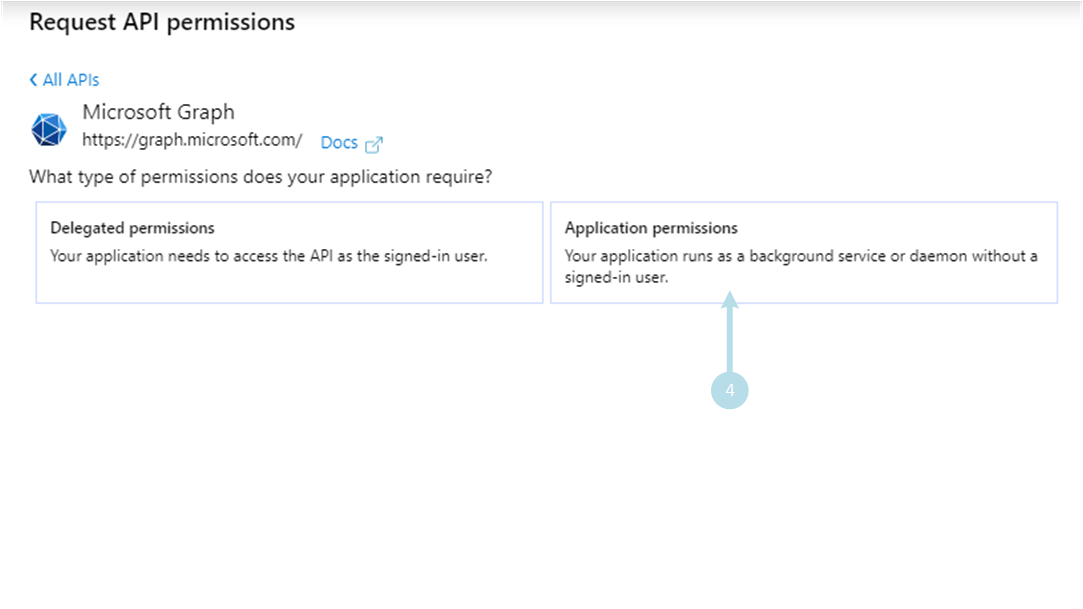
4) Click on Application permissions 4
3rd step: create secret key
1) Click on menu Certificates & secrets menu 1
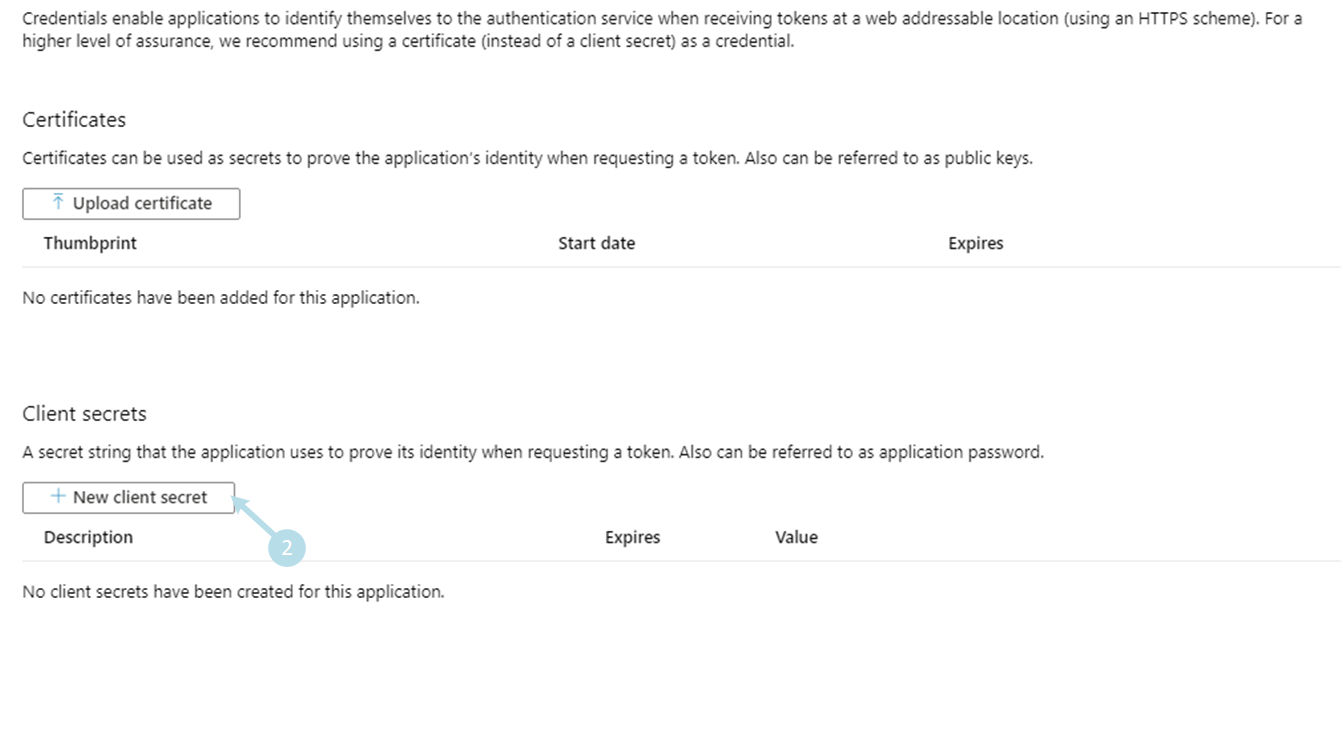
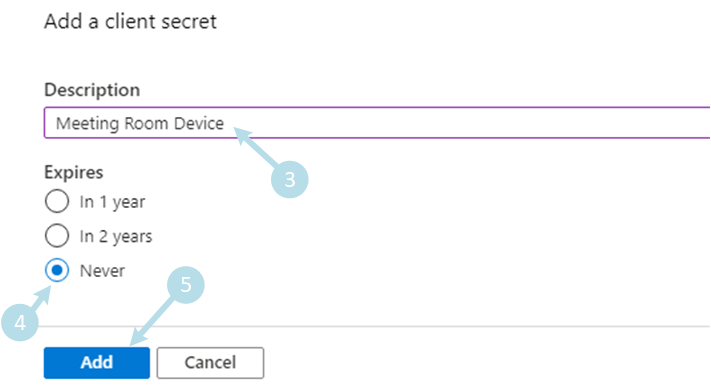
3) Fill a description 3, select expires as Never 4 and create the client secret by clicking on Add 5
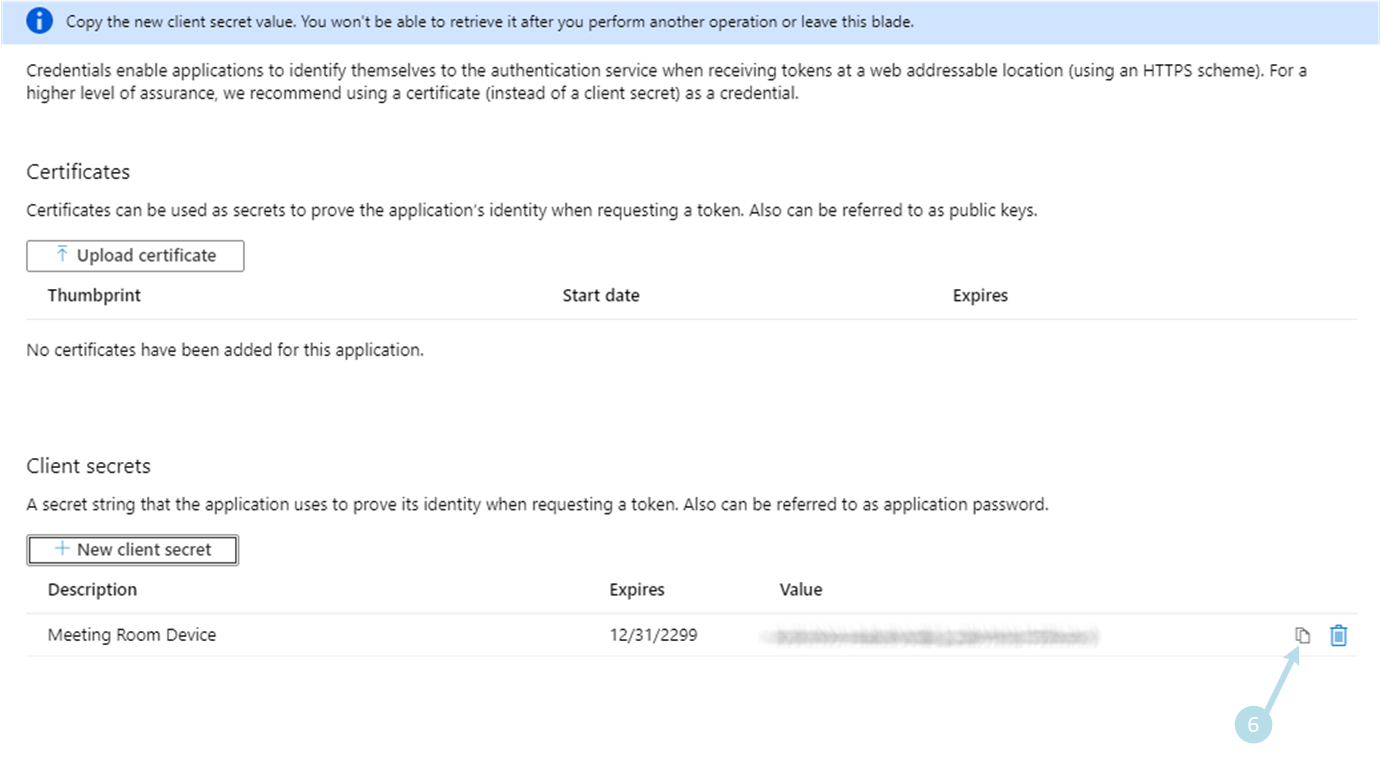
4) Copy Client secret ID 6
Great job !
You have got 3 importants stuff:
…keep them safe.