Fasten your seat belt !
Creating a Google API project and allowing APIs is a long and laborious job. This tutorial describes all the steps that lead to the desire result.
Prerequisites are as follows:
- Google Gsuite admin account
- Reserved URI to handle events’ push notifications, e.g. webhook.raspimeetingroom.fr
You will get 2 outputs:
1st step: create the project
Go to Google developer console and log-on: https://console.developers.google.com
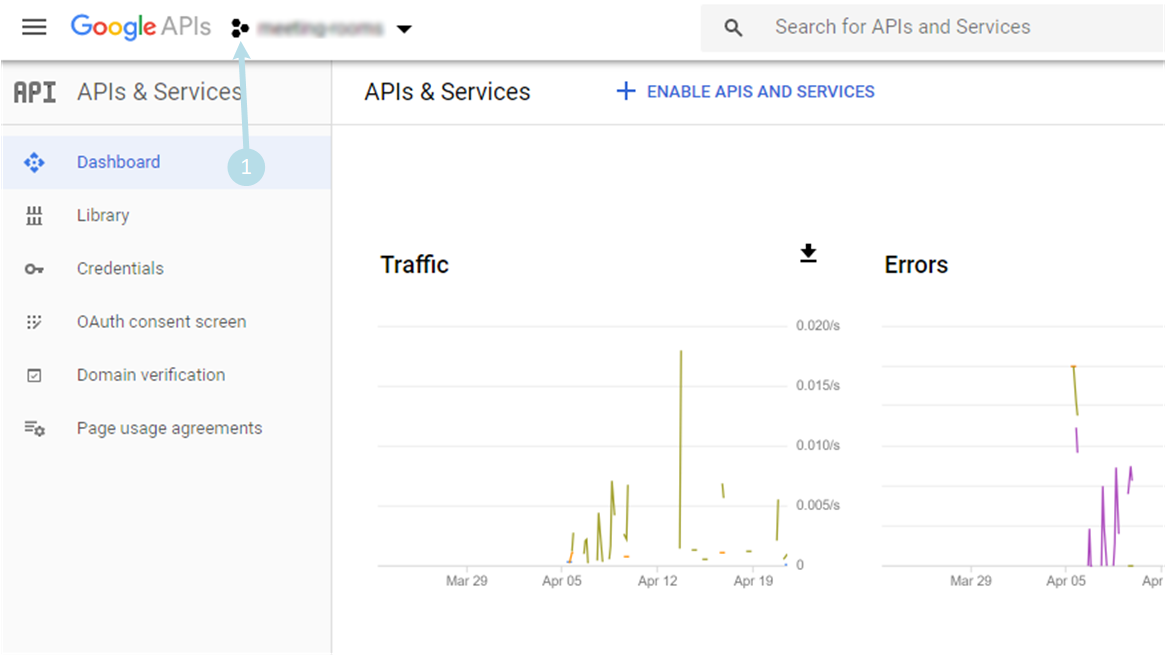
1) Move to projects management console 1
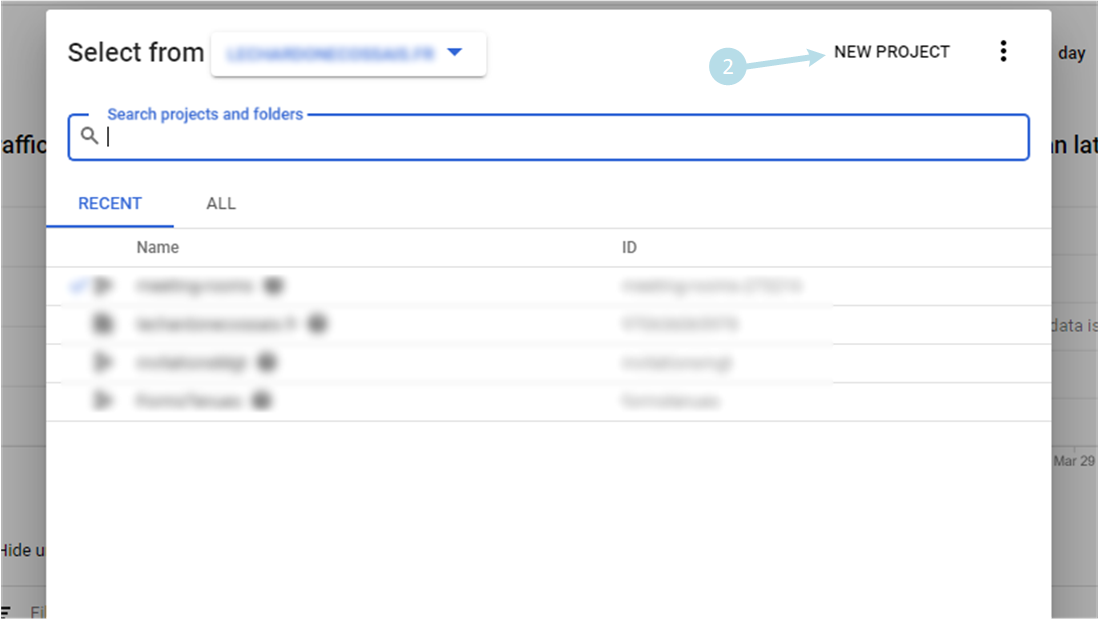
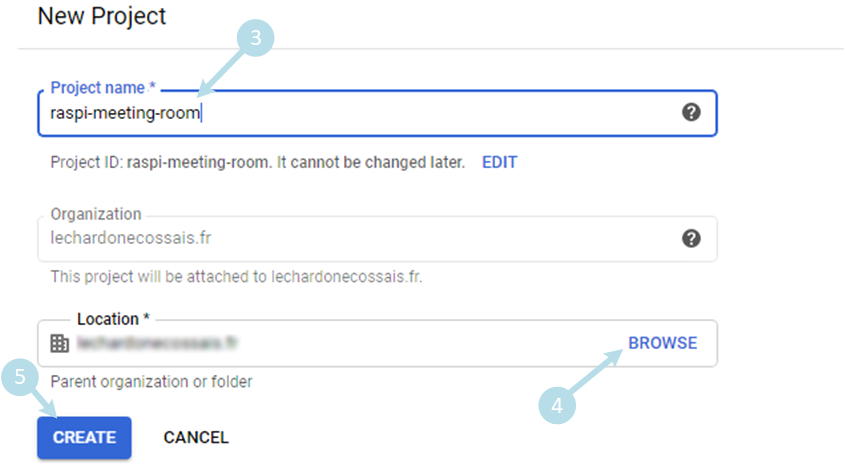
3) FIll project name 3 and browse to select the organiztion location the project will access to 4. Then click on CREATE 5
2nd step: add APIs
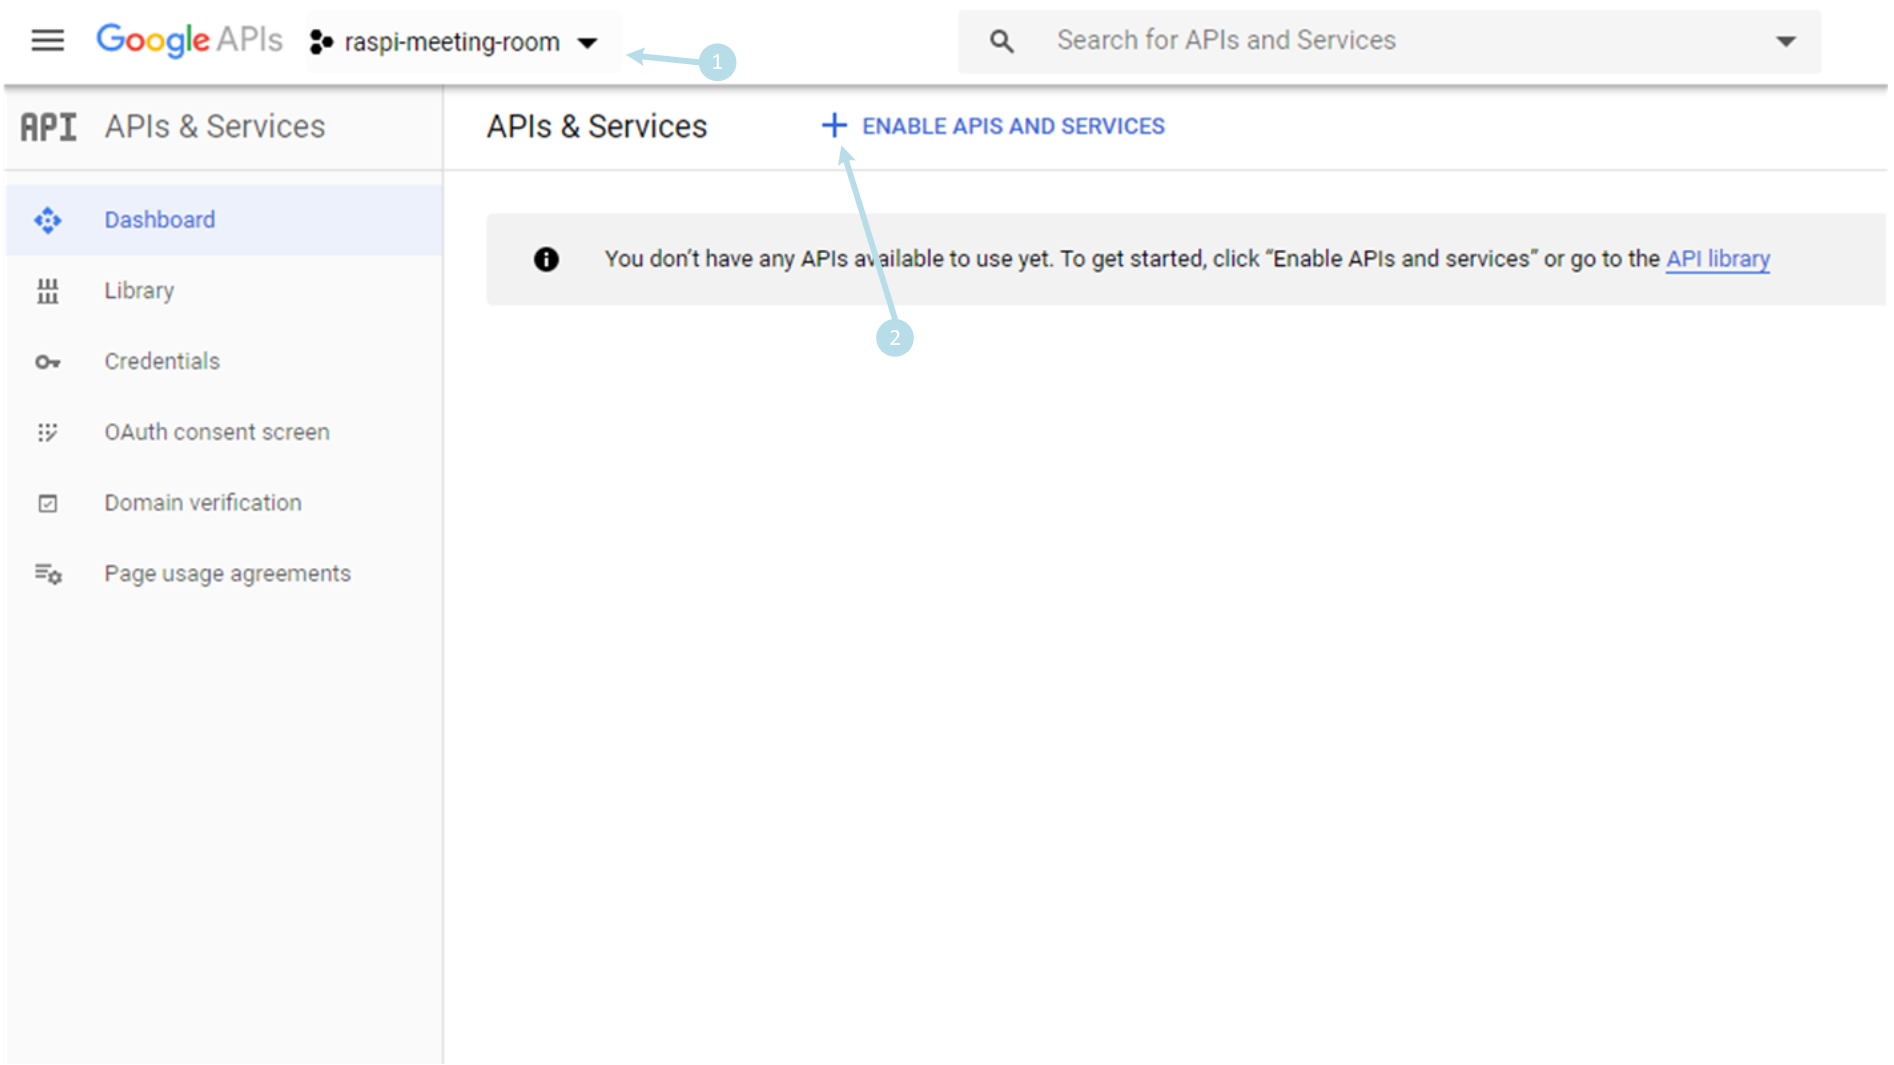
1) Eventually drop-down the projects list to select the new project 1 Click to + ENABLE APIS AND SERVICES 2
2) Use the search tool … 3
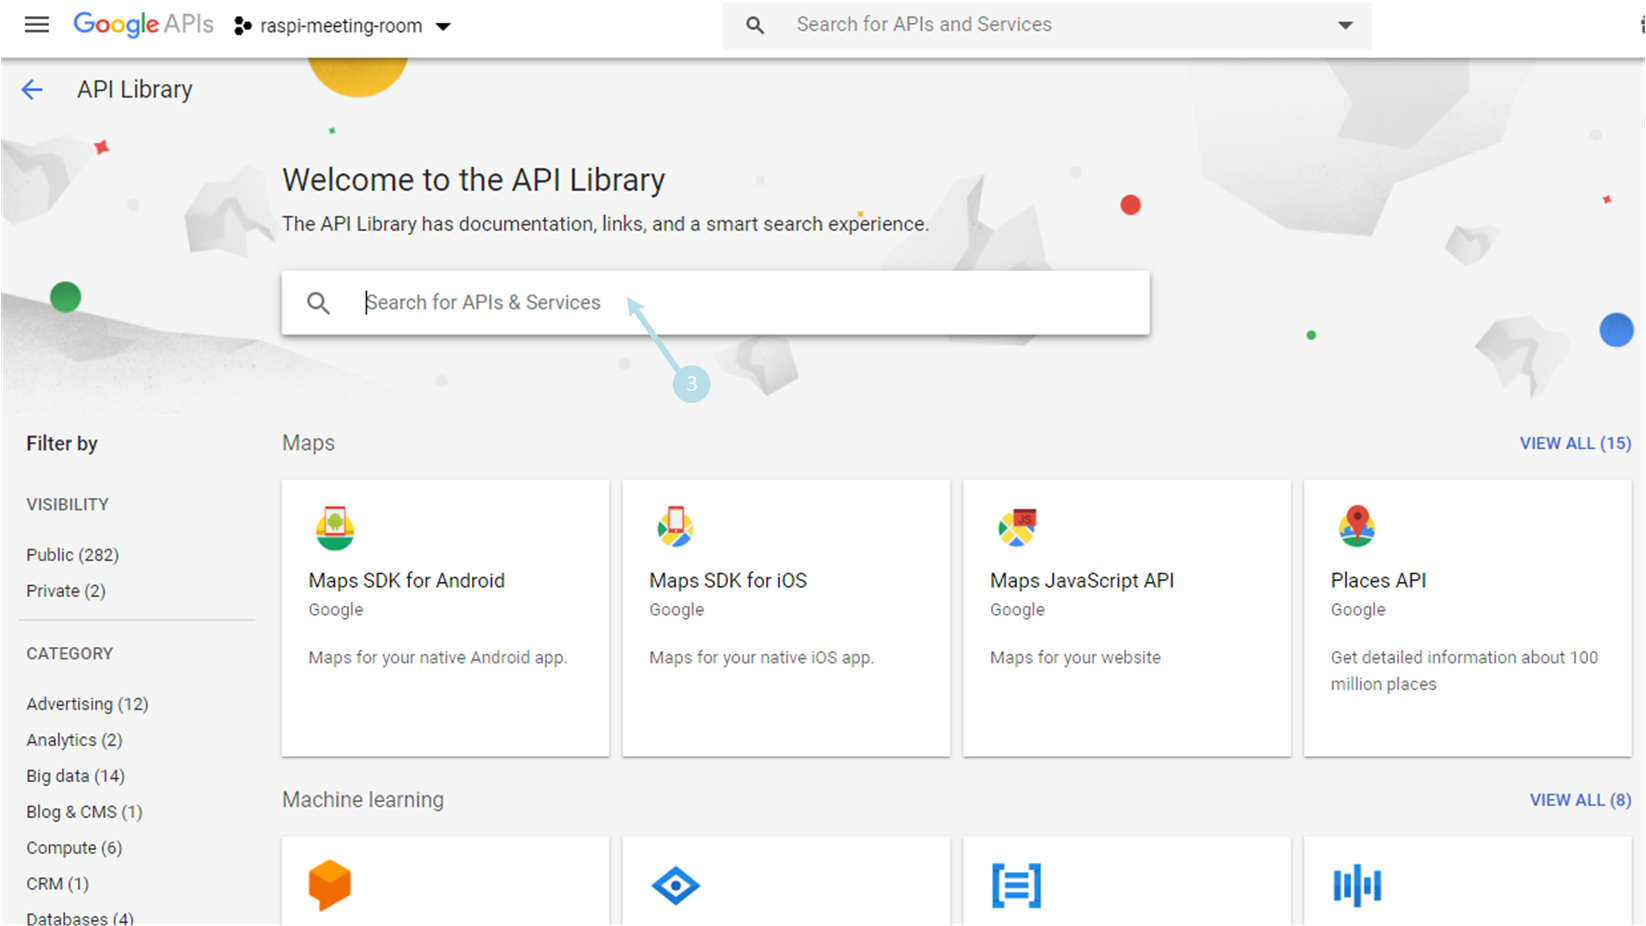
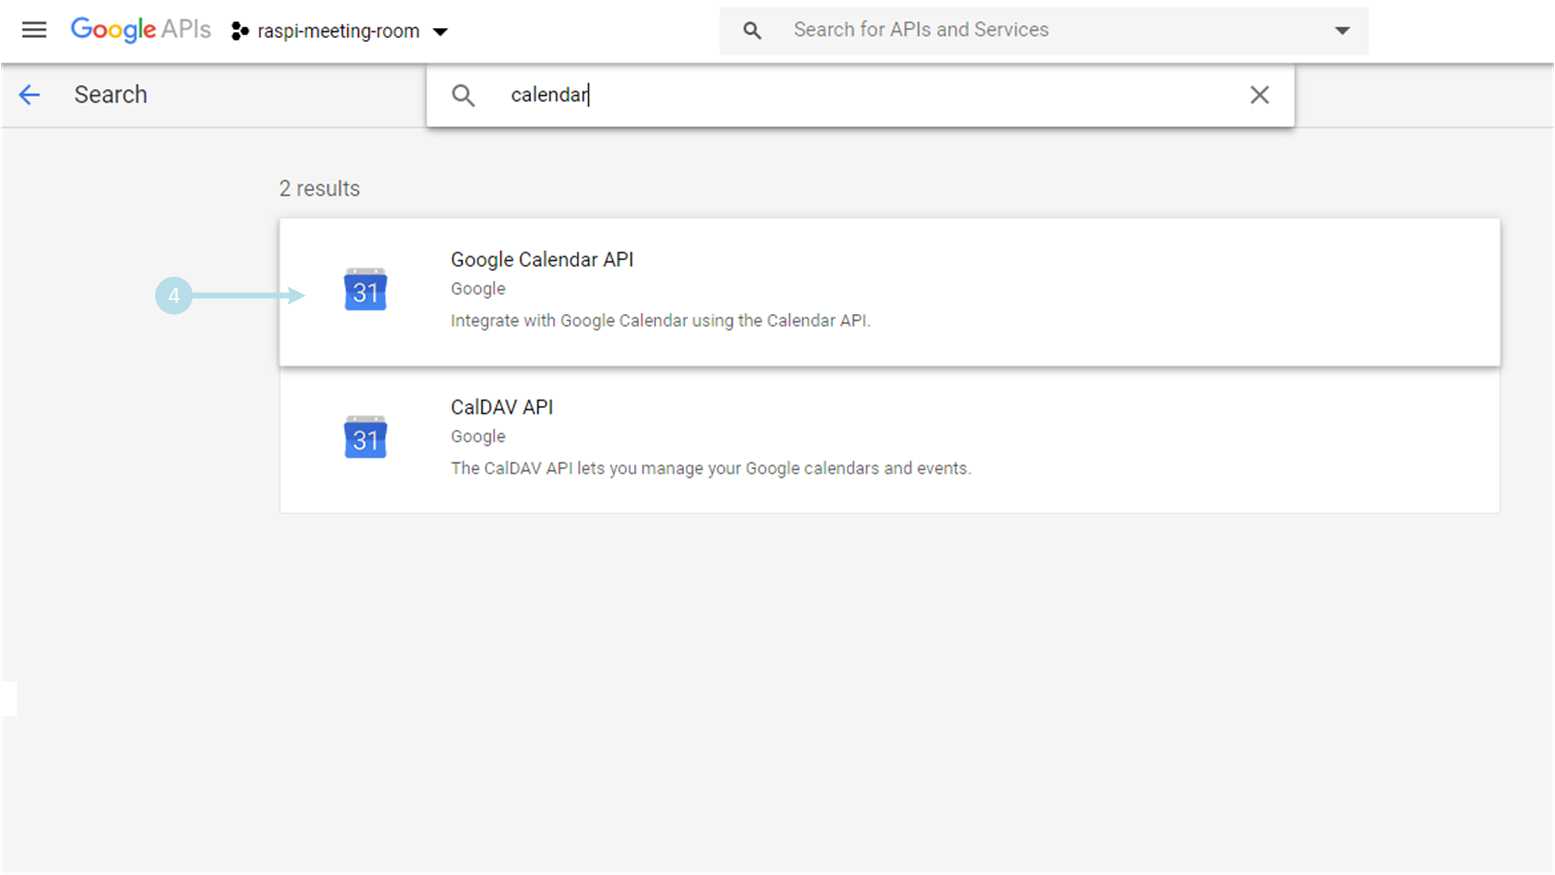
3) type calendar key word and click on Google Calendar API 4
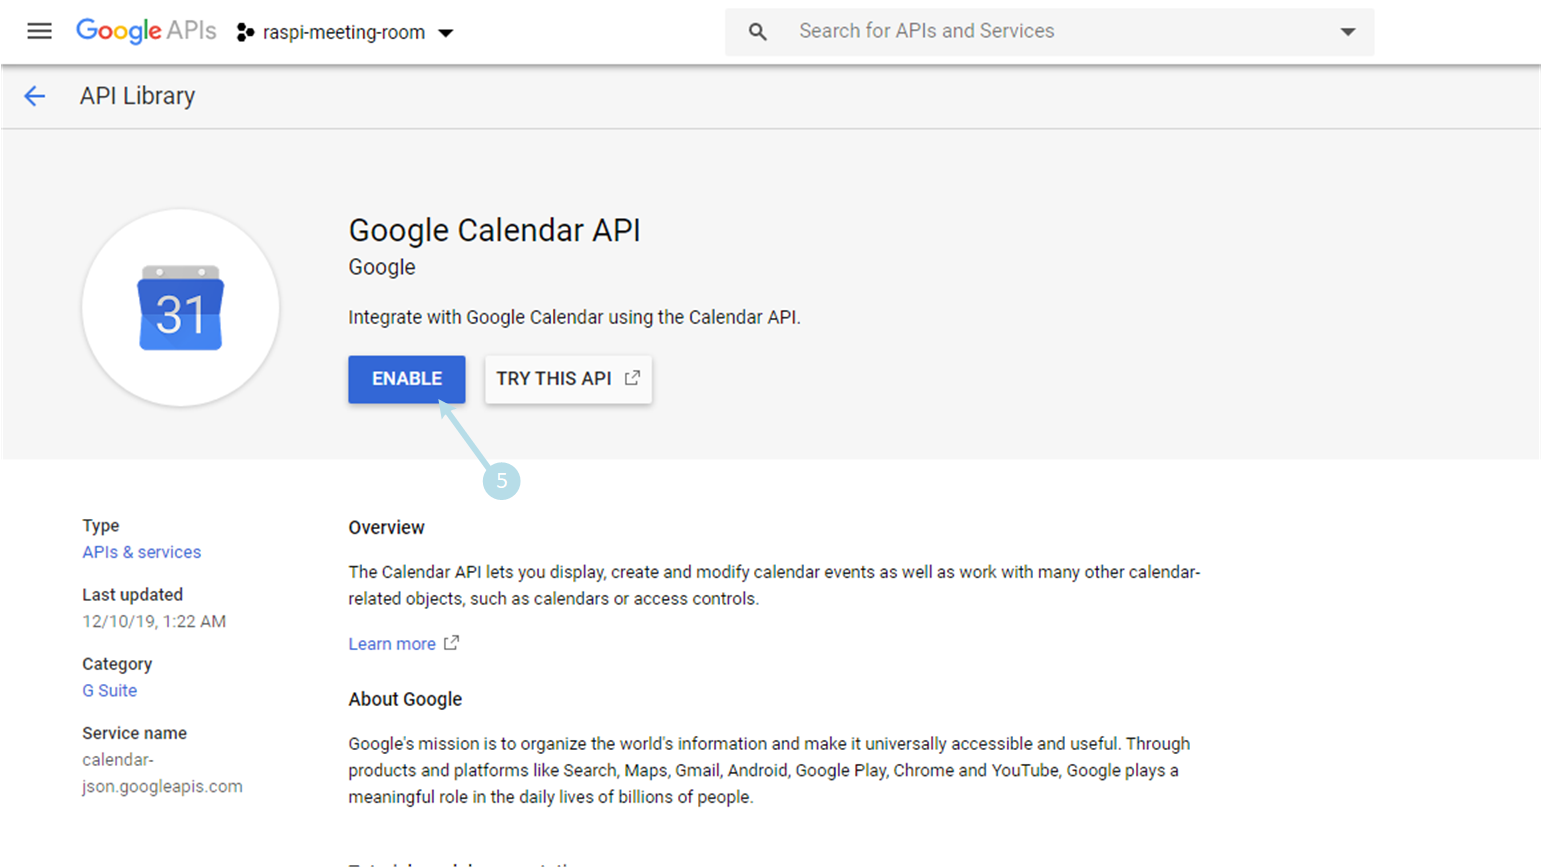
4) ENABLE Google Calendar API 5
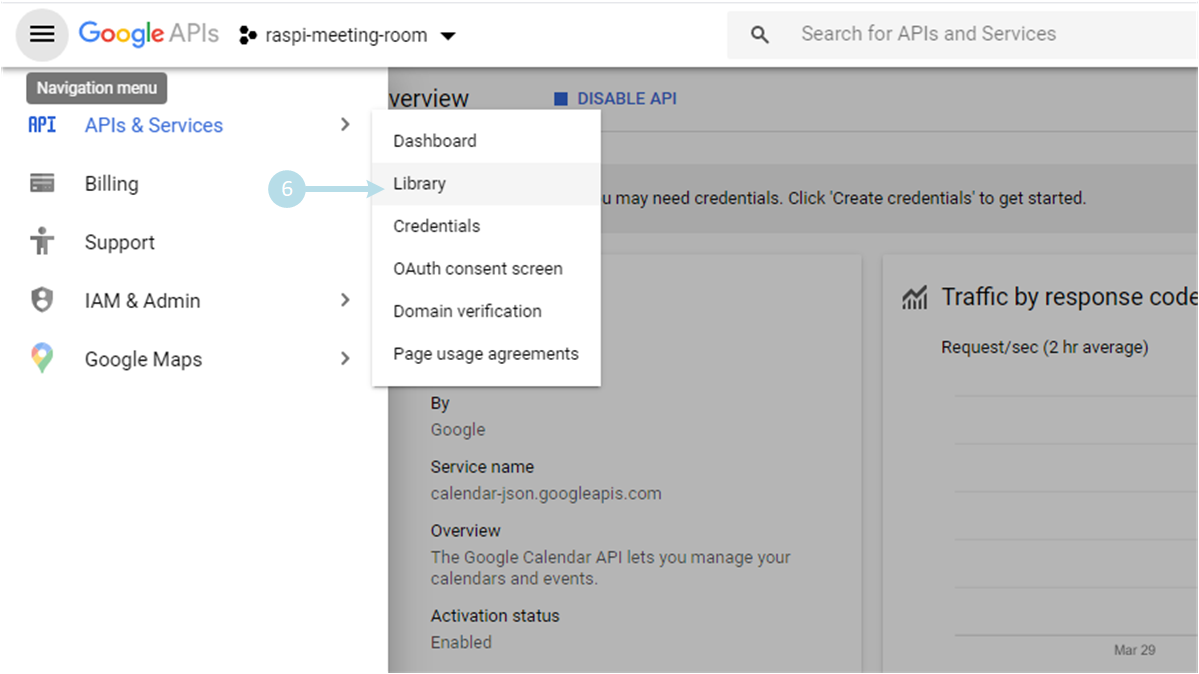
5) Go back to menu, APIs & Services and select Library 6
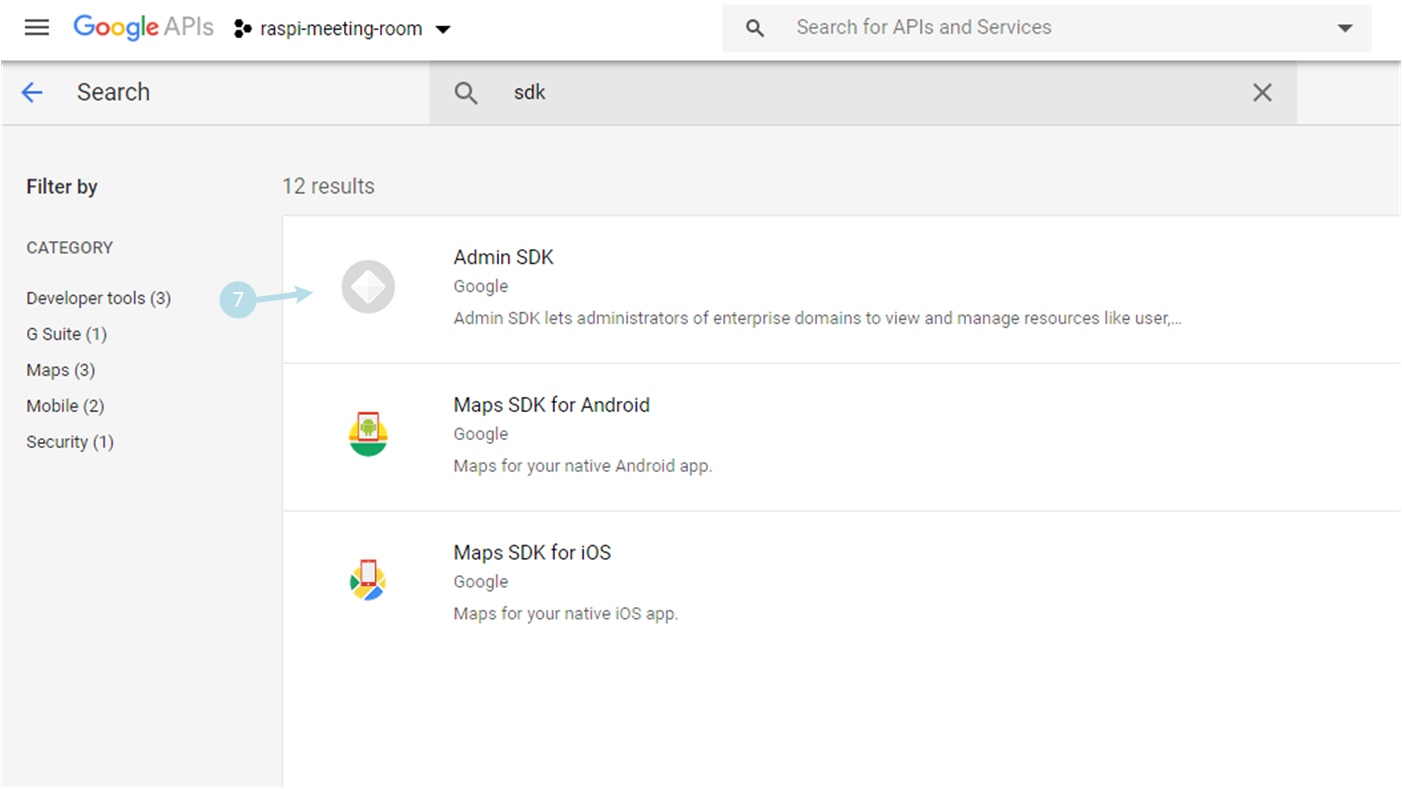
6) Type sdk and click on Admin SDK 7
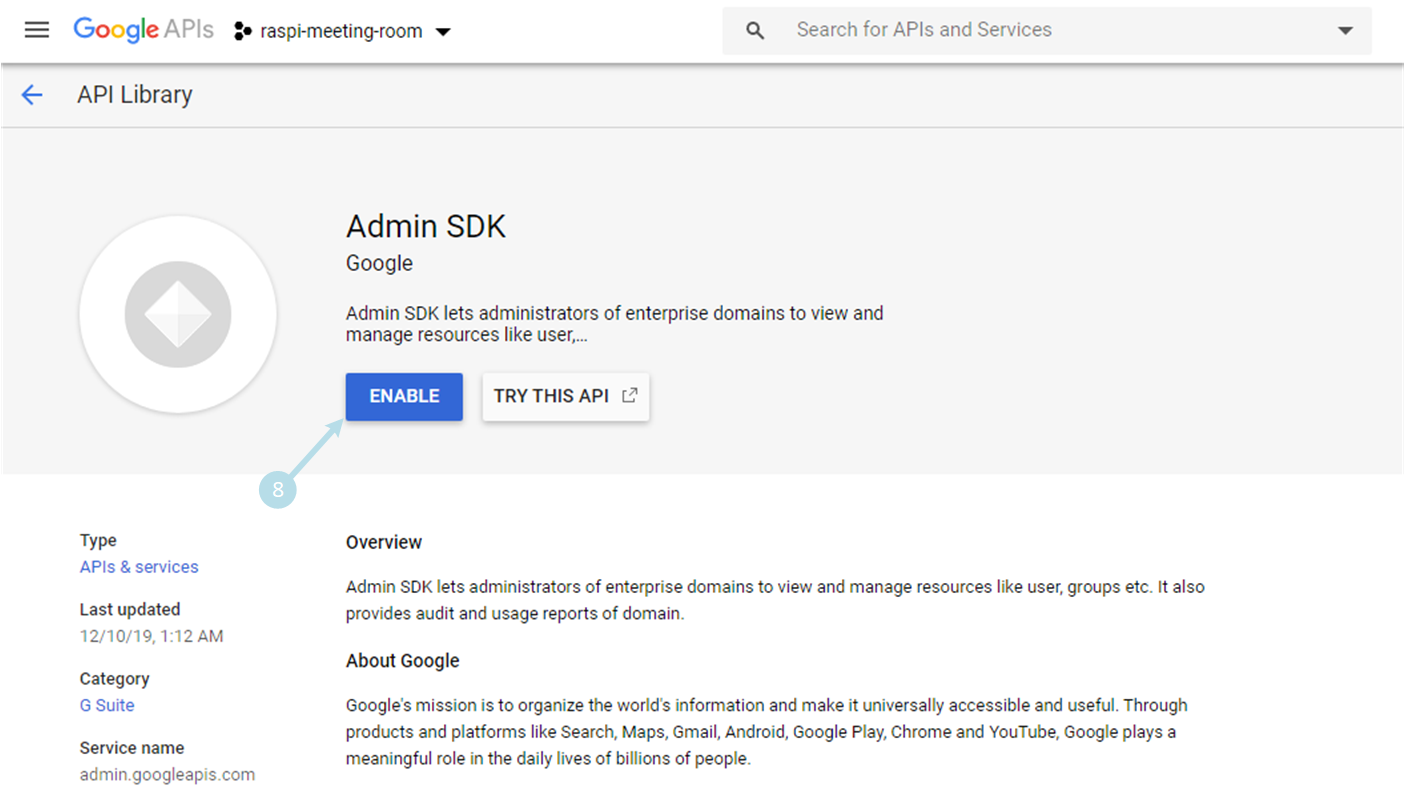
7) ENABLE Admin SDK 8
3rd step: create service account
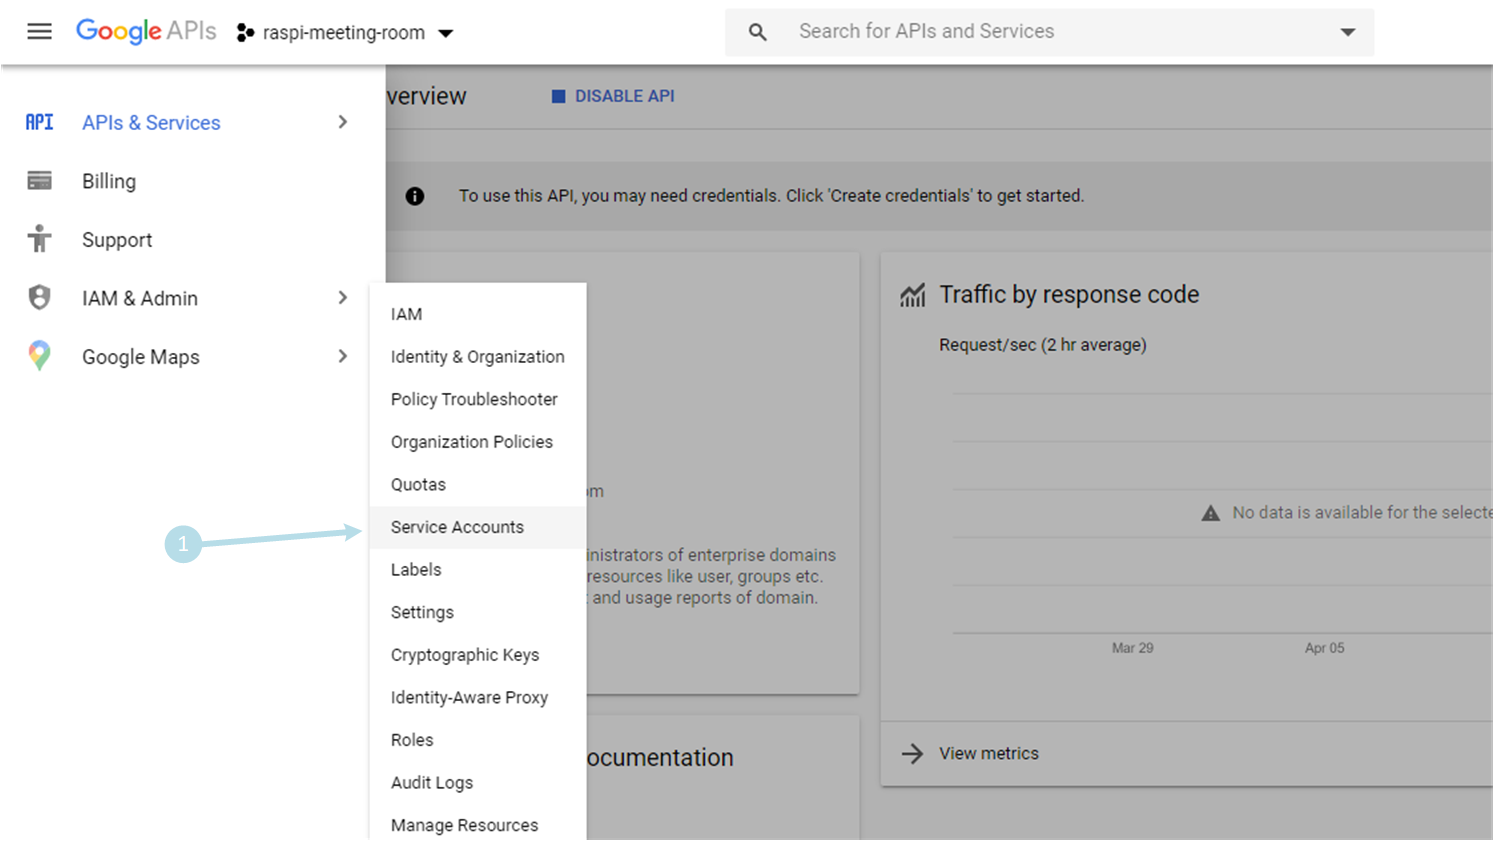
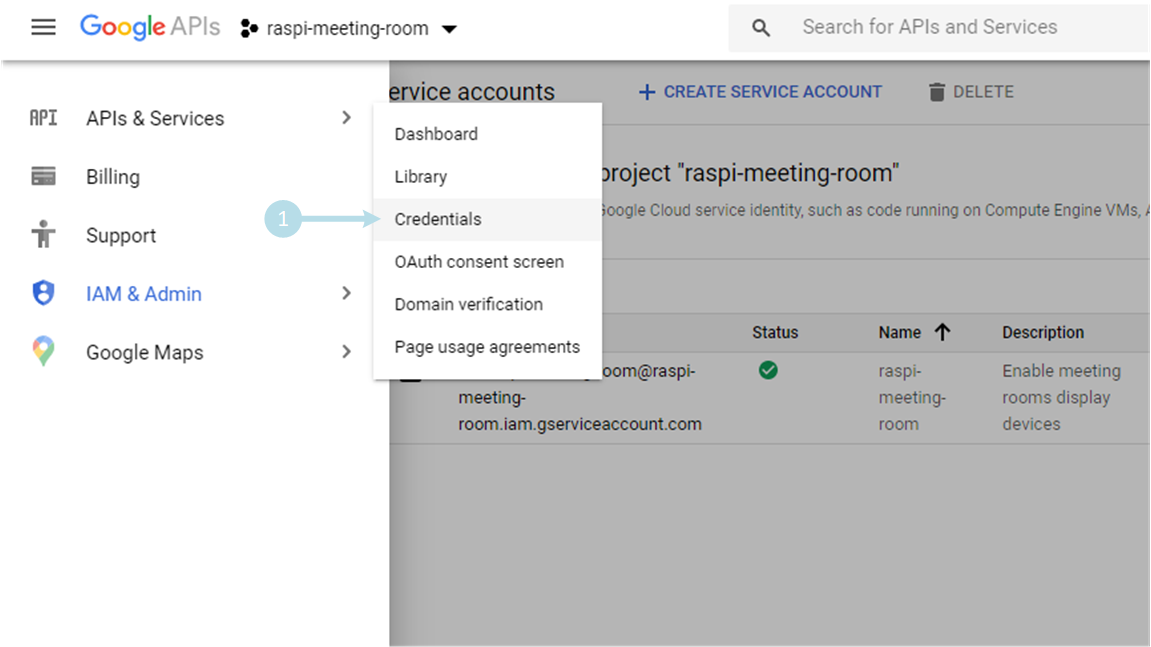
1) Go to menu, IAM & Admin and select Service Accounts 1
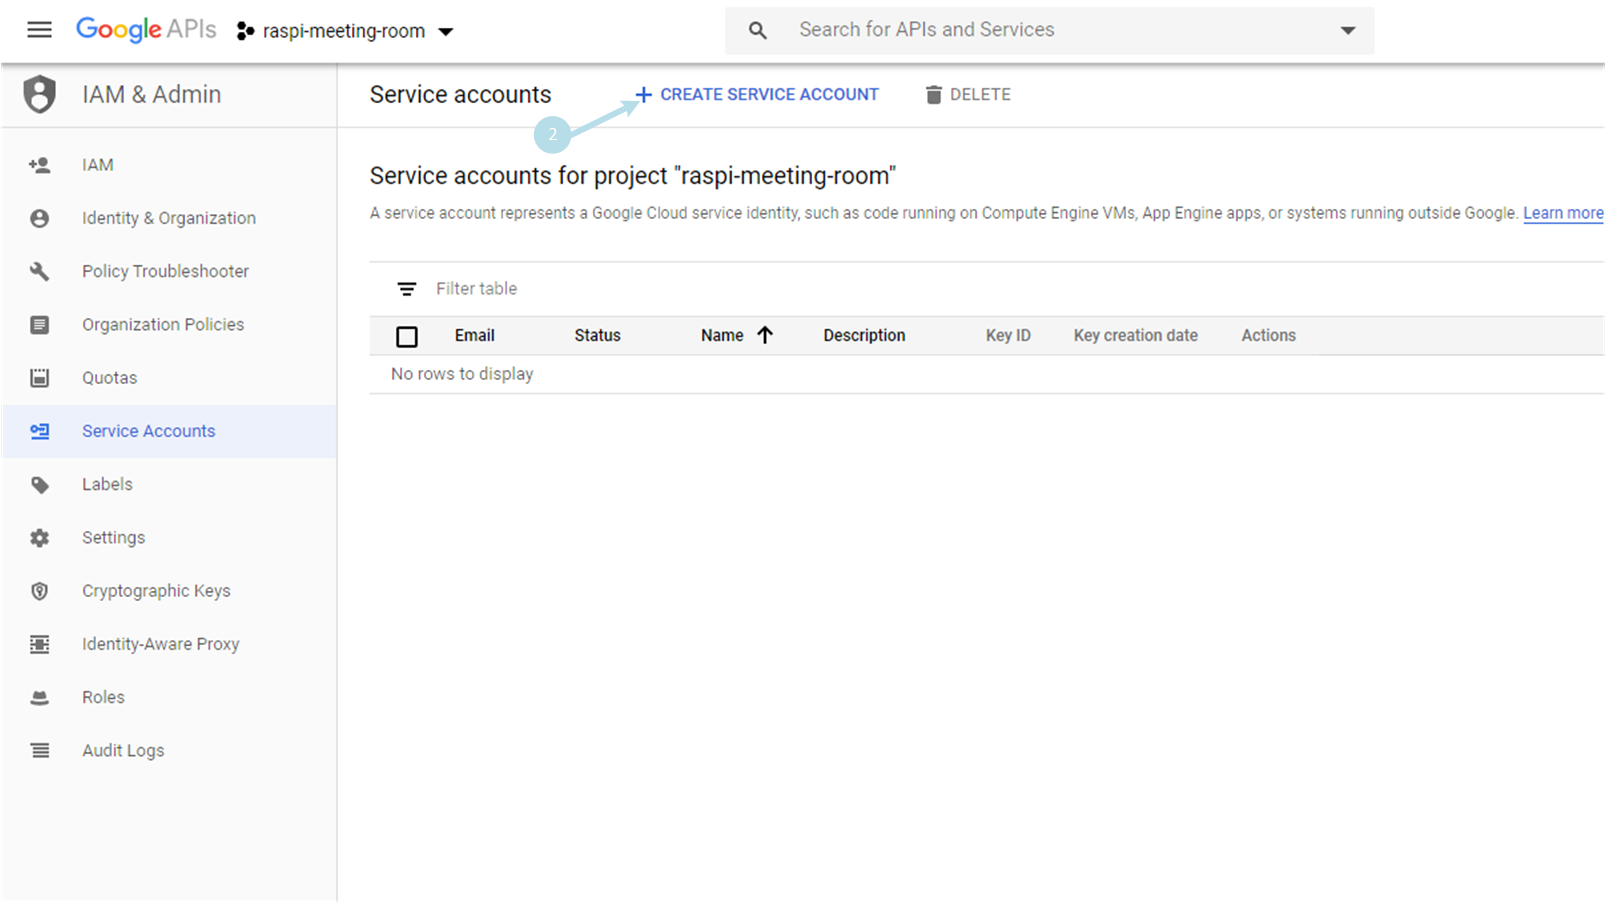
2) Click on + CREATE SERVICE ACCOUNT 2
3) type a service account name and optionally add a description 3. Terminate by clicking on CREATE 4
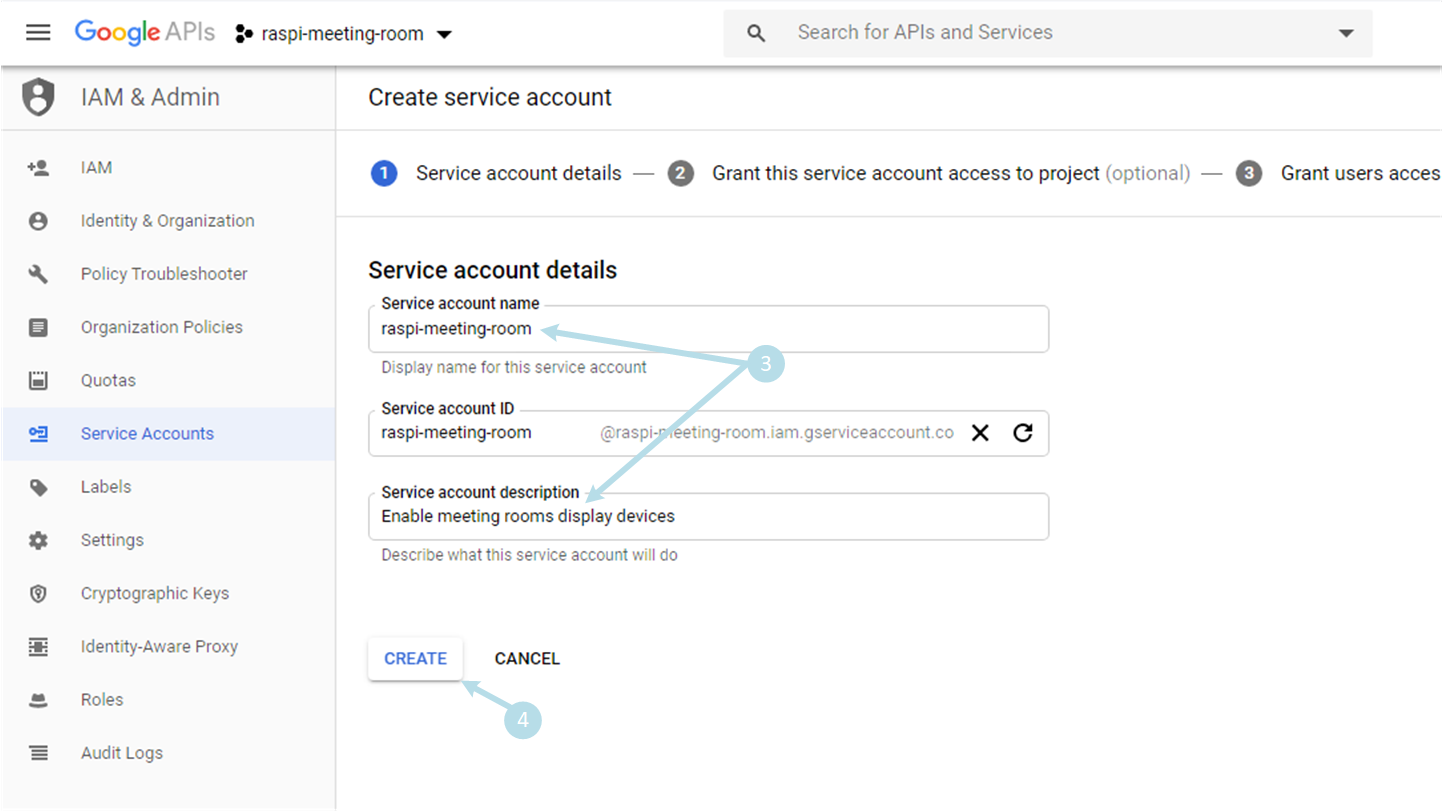
4) Drop-down the Select a role list 5
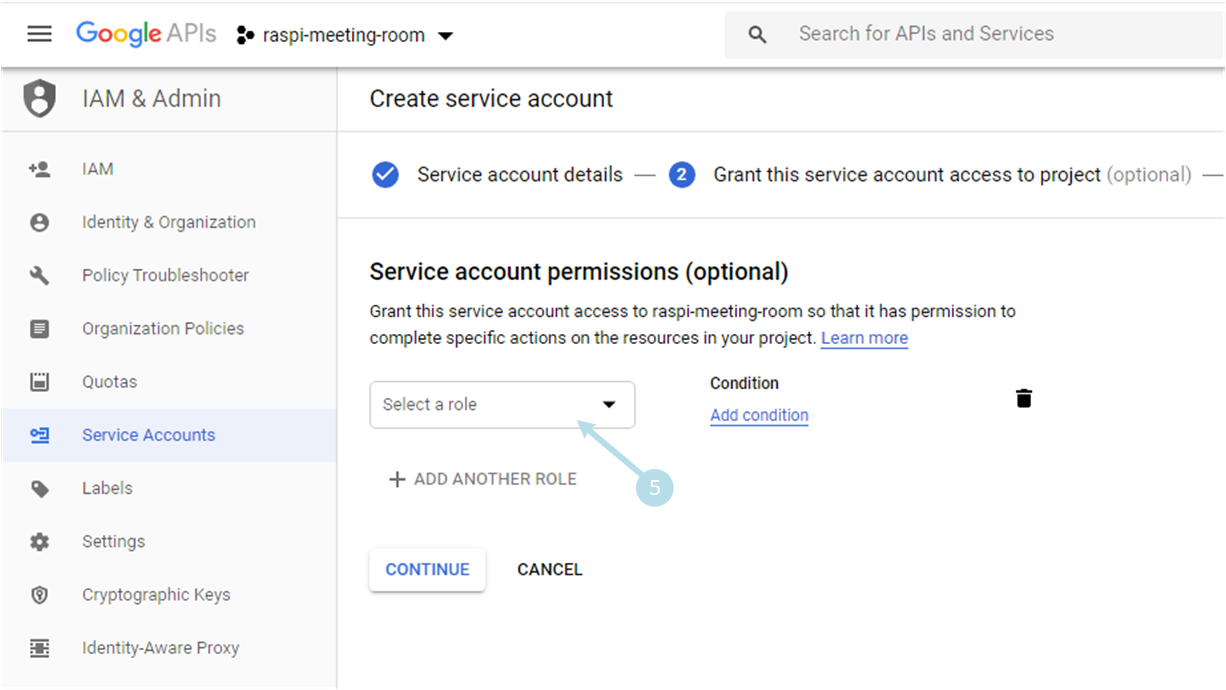
5) Select Project and Owner 6
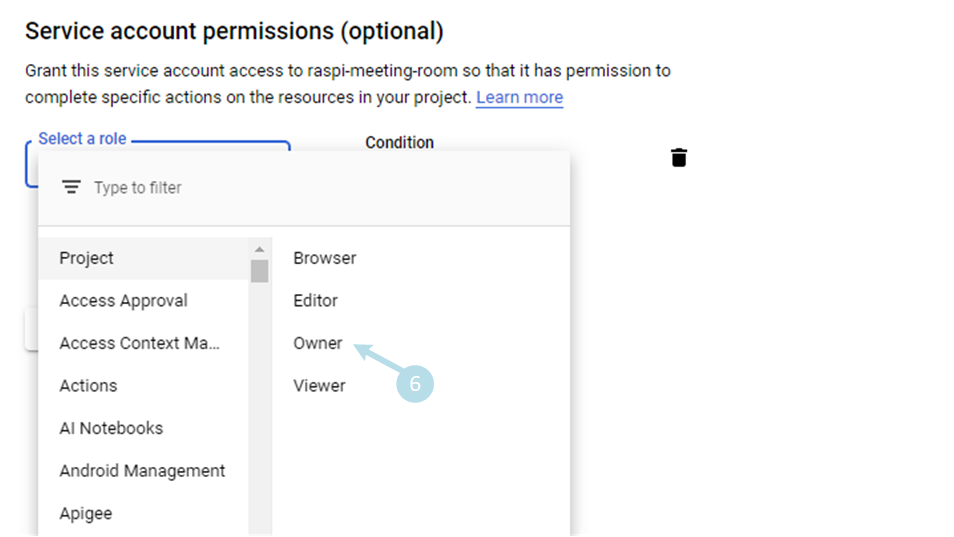
6) Click on + CREATE KEY 7
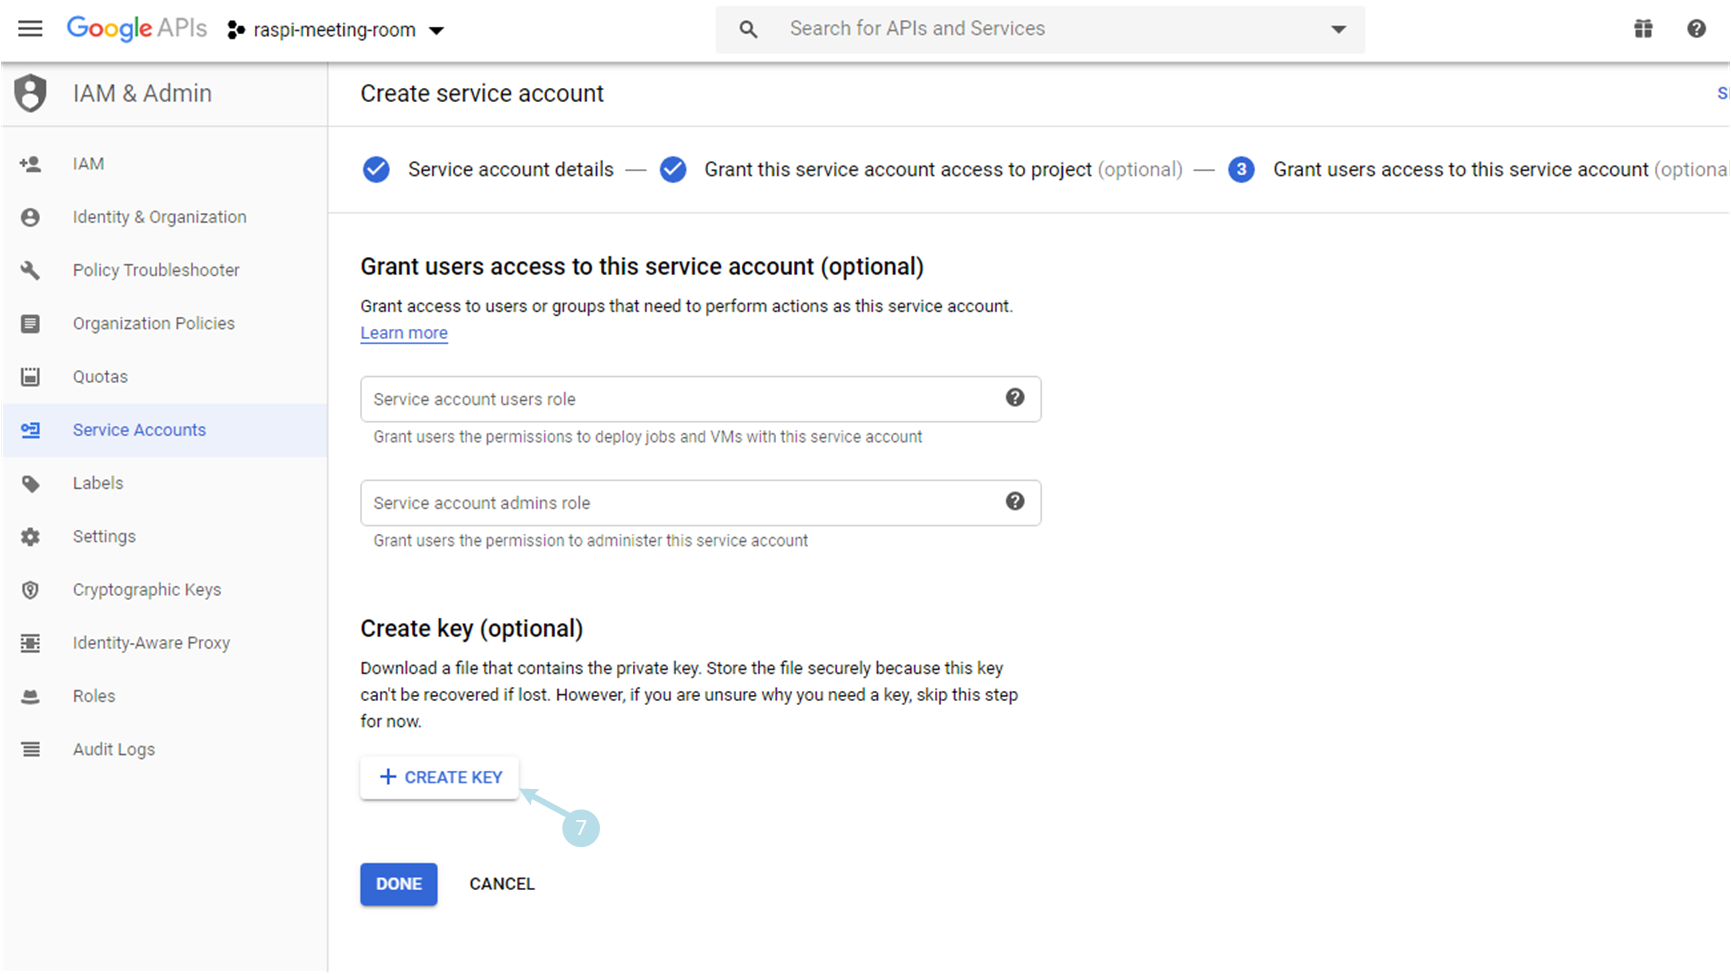
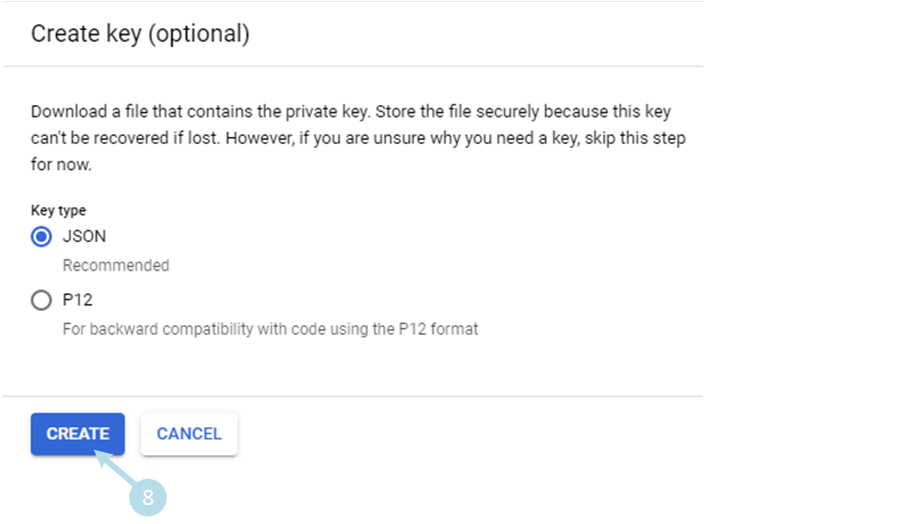
7) Select JSON format, then CREATE 8
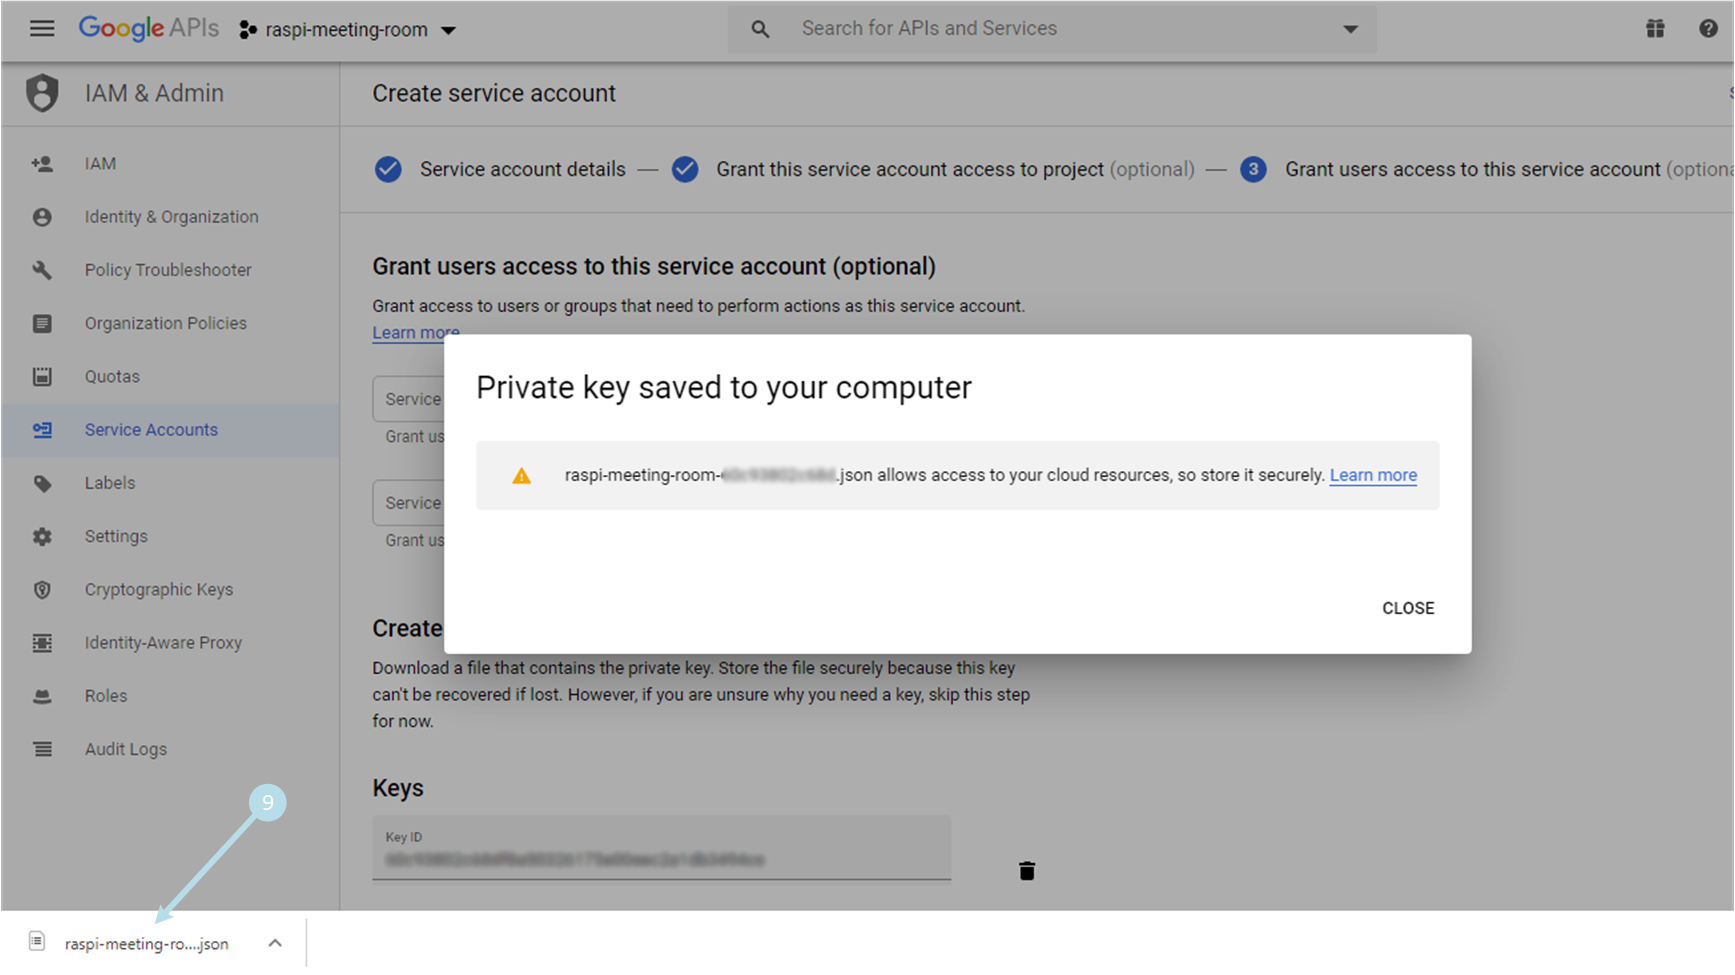
8) Save the JSON file key 9 which will be used by the Raspi-Server App
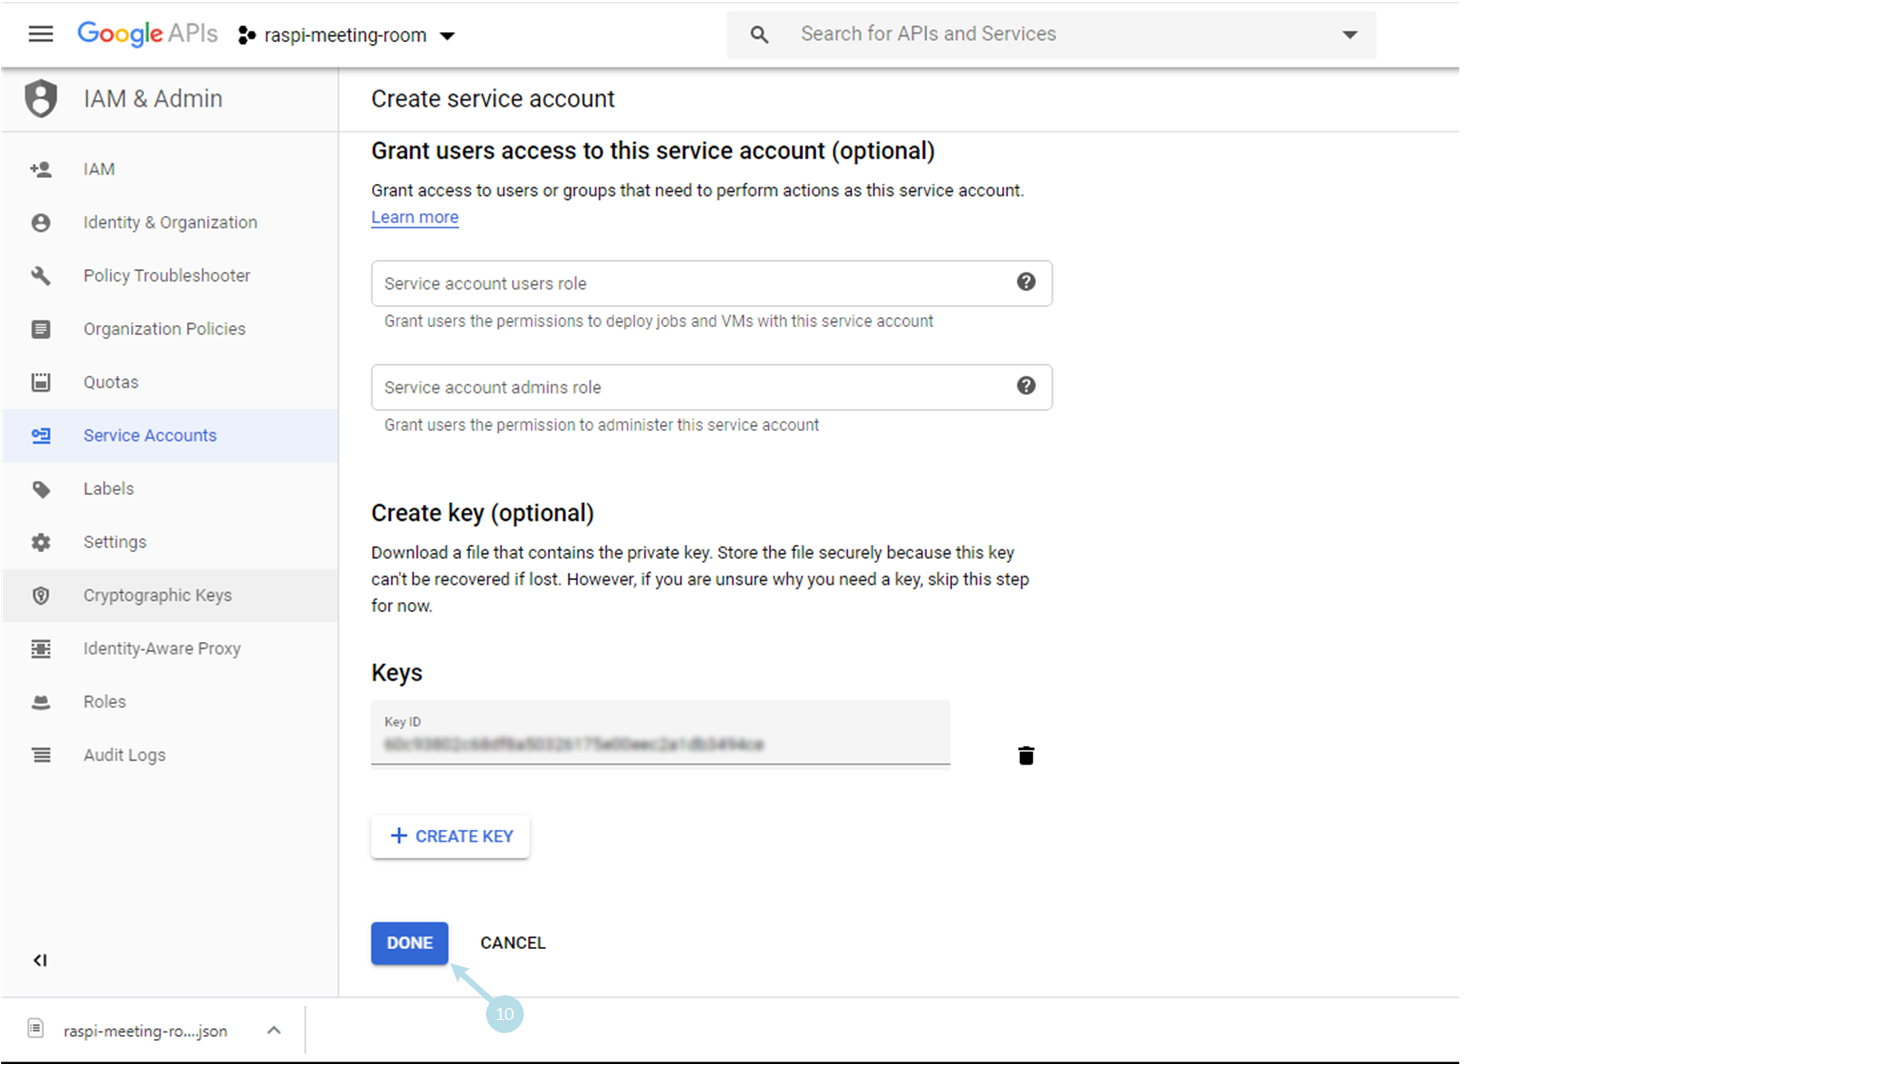
9) Terminate by clicking on DONE 10
4th step: Set credentials
1) Go to menu, IAM & Admin and select Service Accounts 1
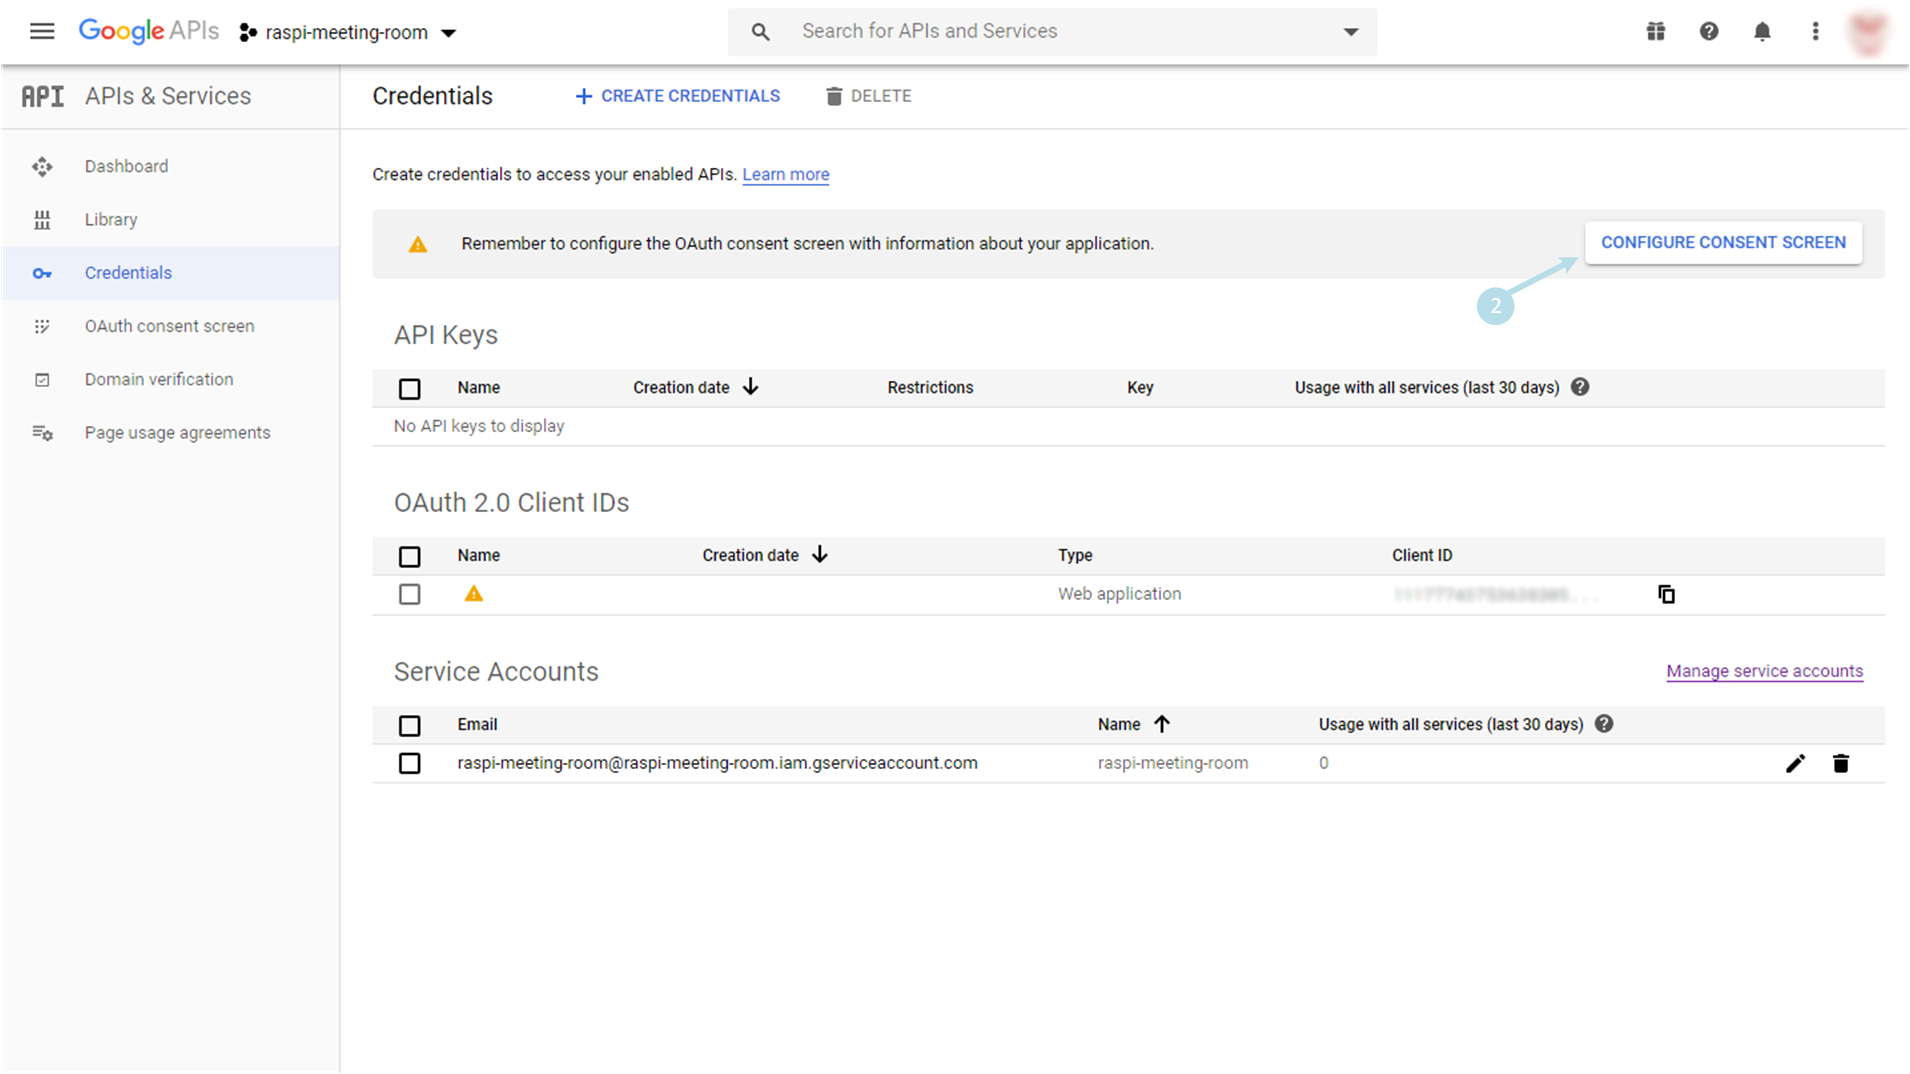
2) Click on CONFIGURE CONSENT SCREEN 2
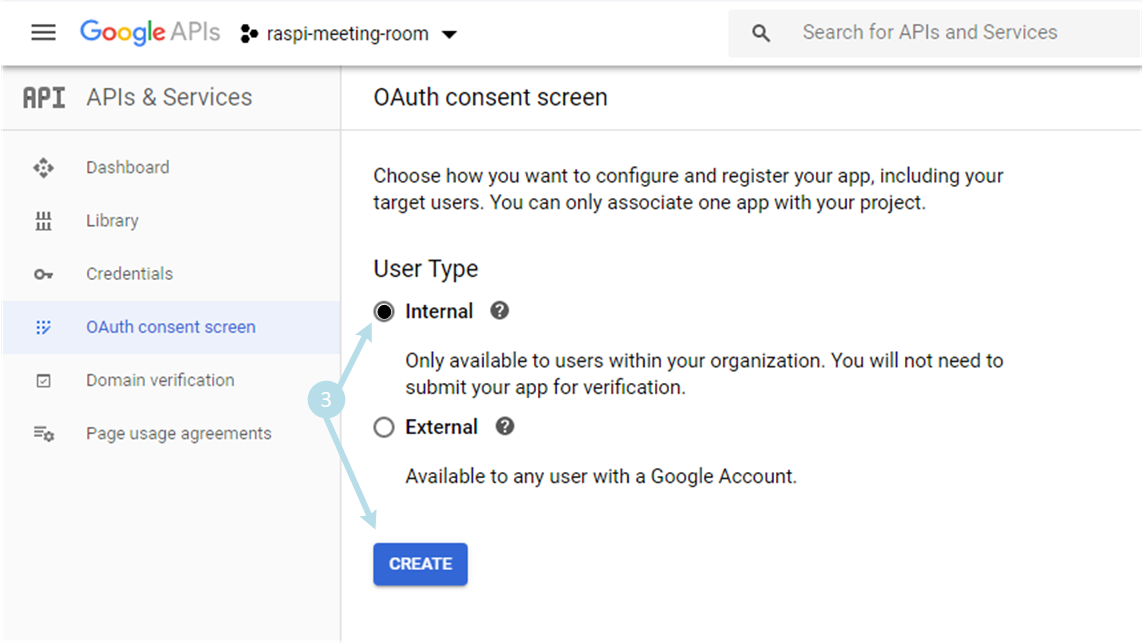
3) Select Internal as User Type 3 Terminate by clicking on CREATE
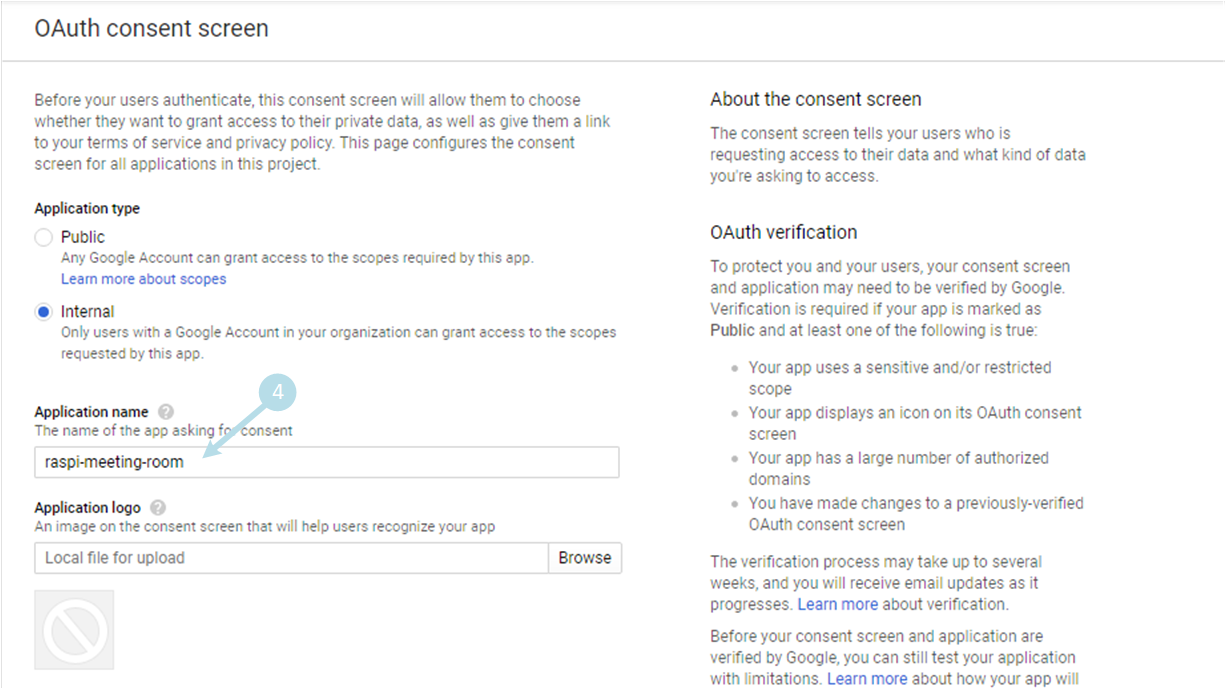
4) Fill the Application name 4
5) Scroll-down up-to Scopes for Google APIs section and click on Add SCOPE 5
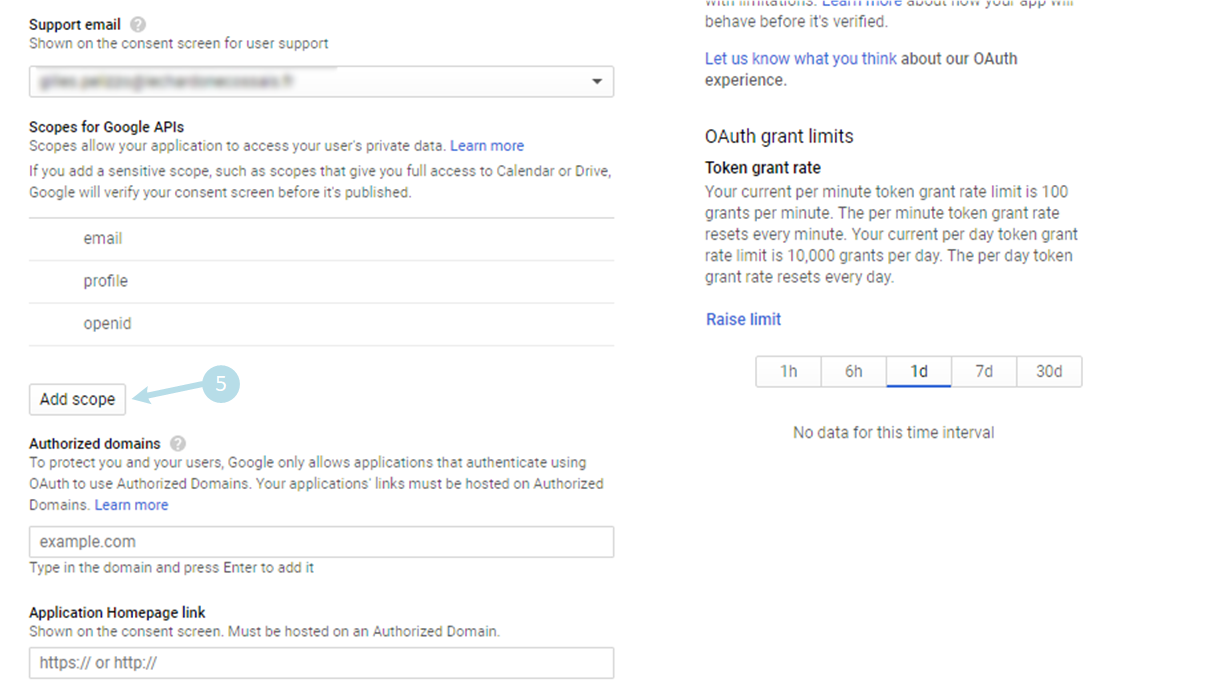
6) Check Google Calendar API, ..auth/calendar.readonly 6 and clicking on ADD 7
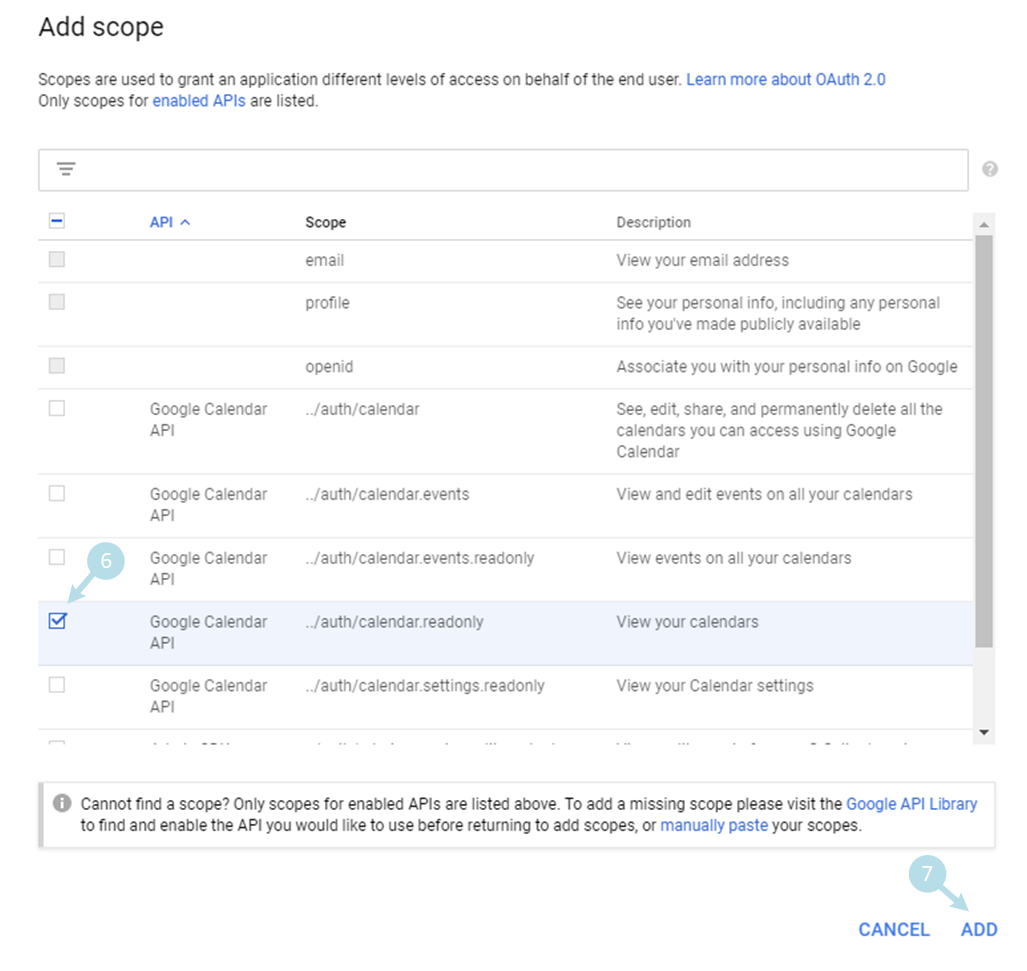
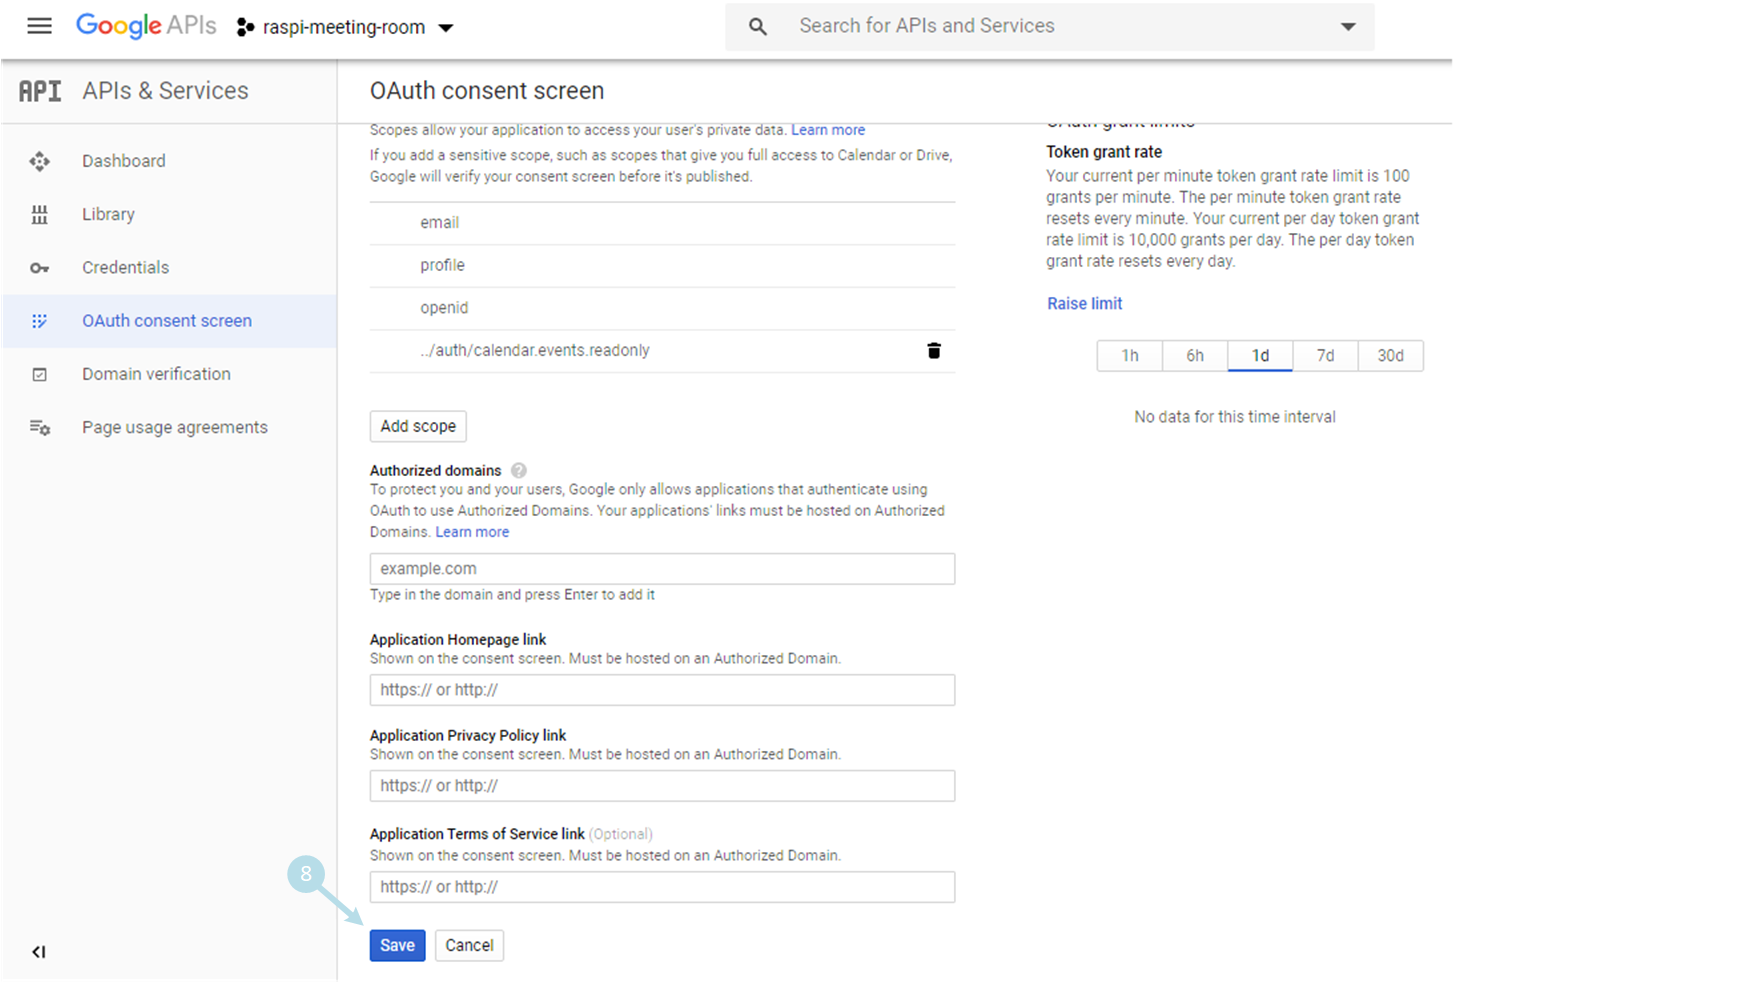
7) Terminate by clicking on SAVE 8
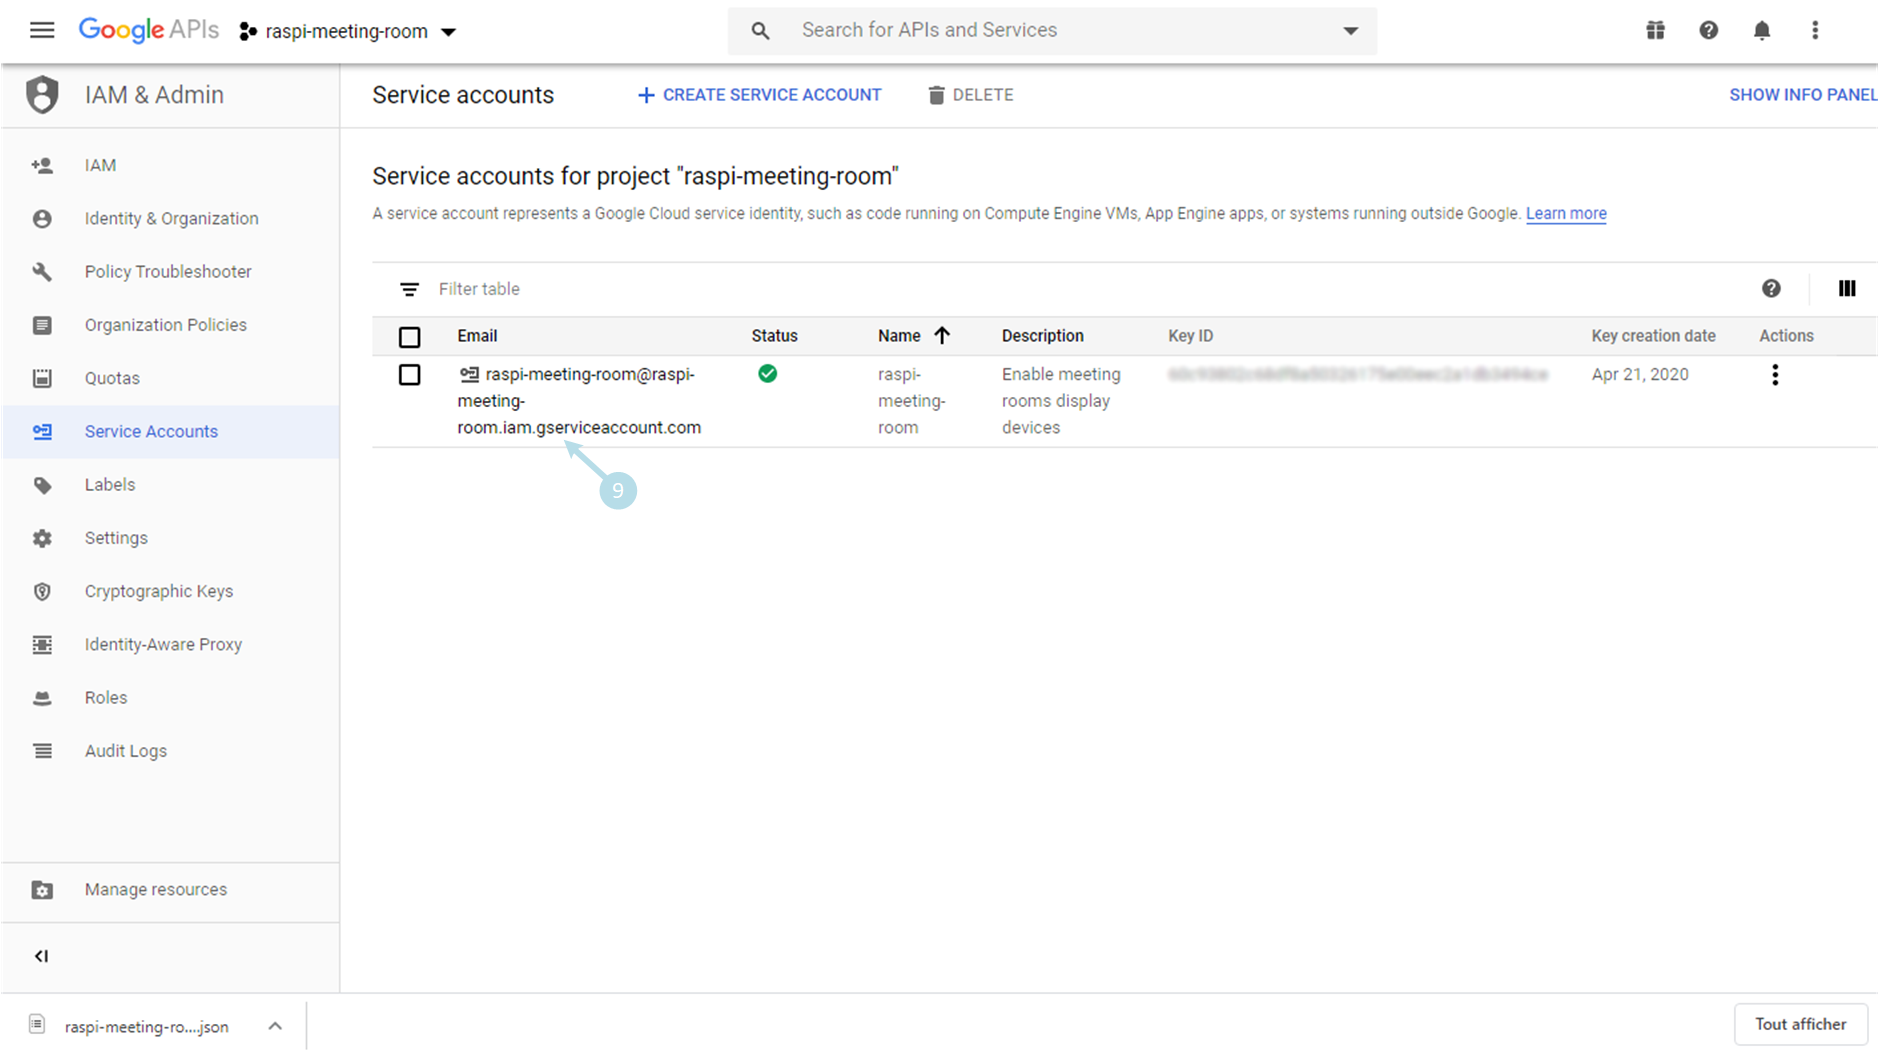
8) Go to menu, IAM & Admin, Service Accounts and click on the service account email address 9
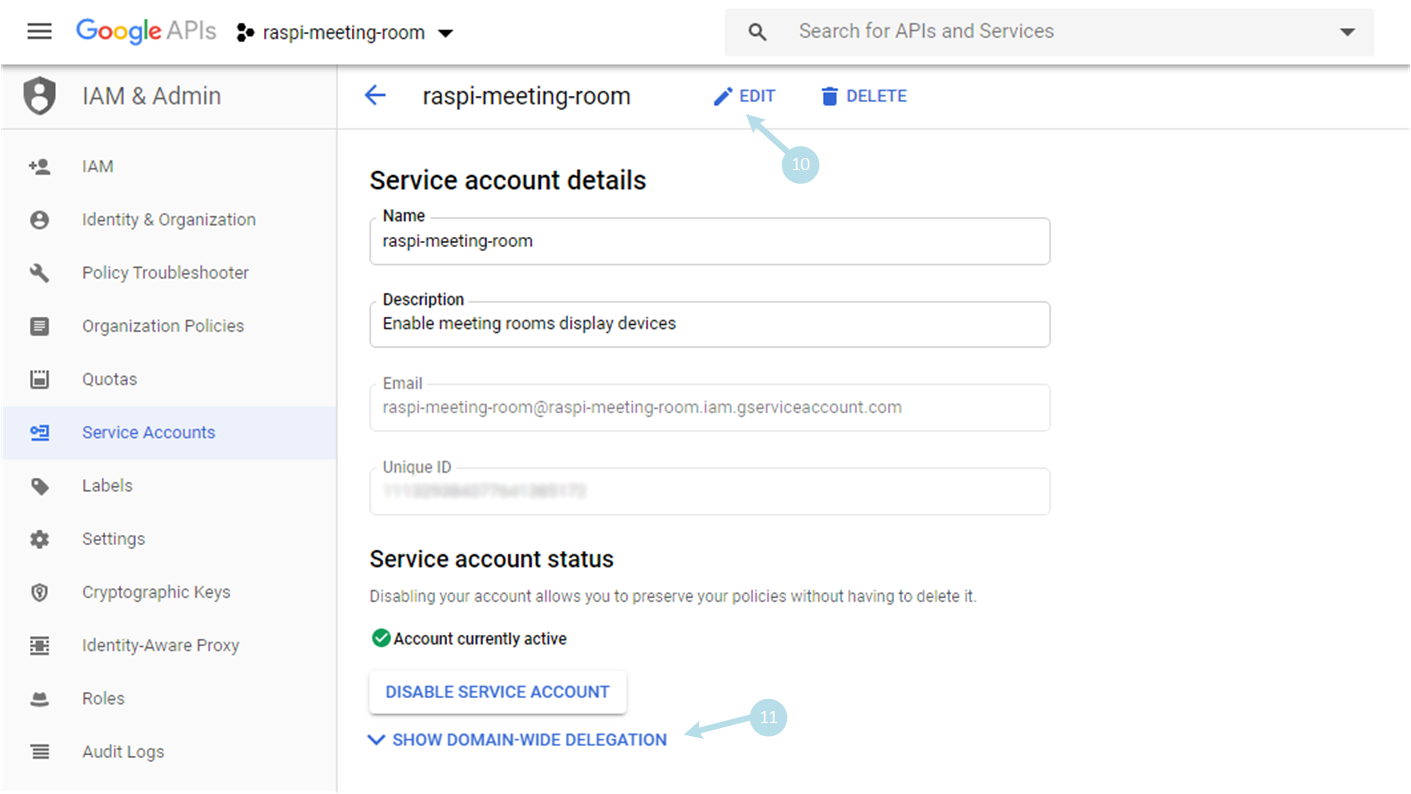
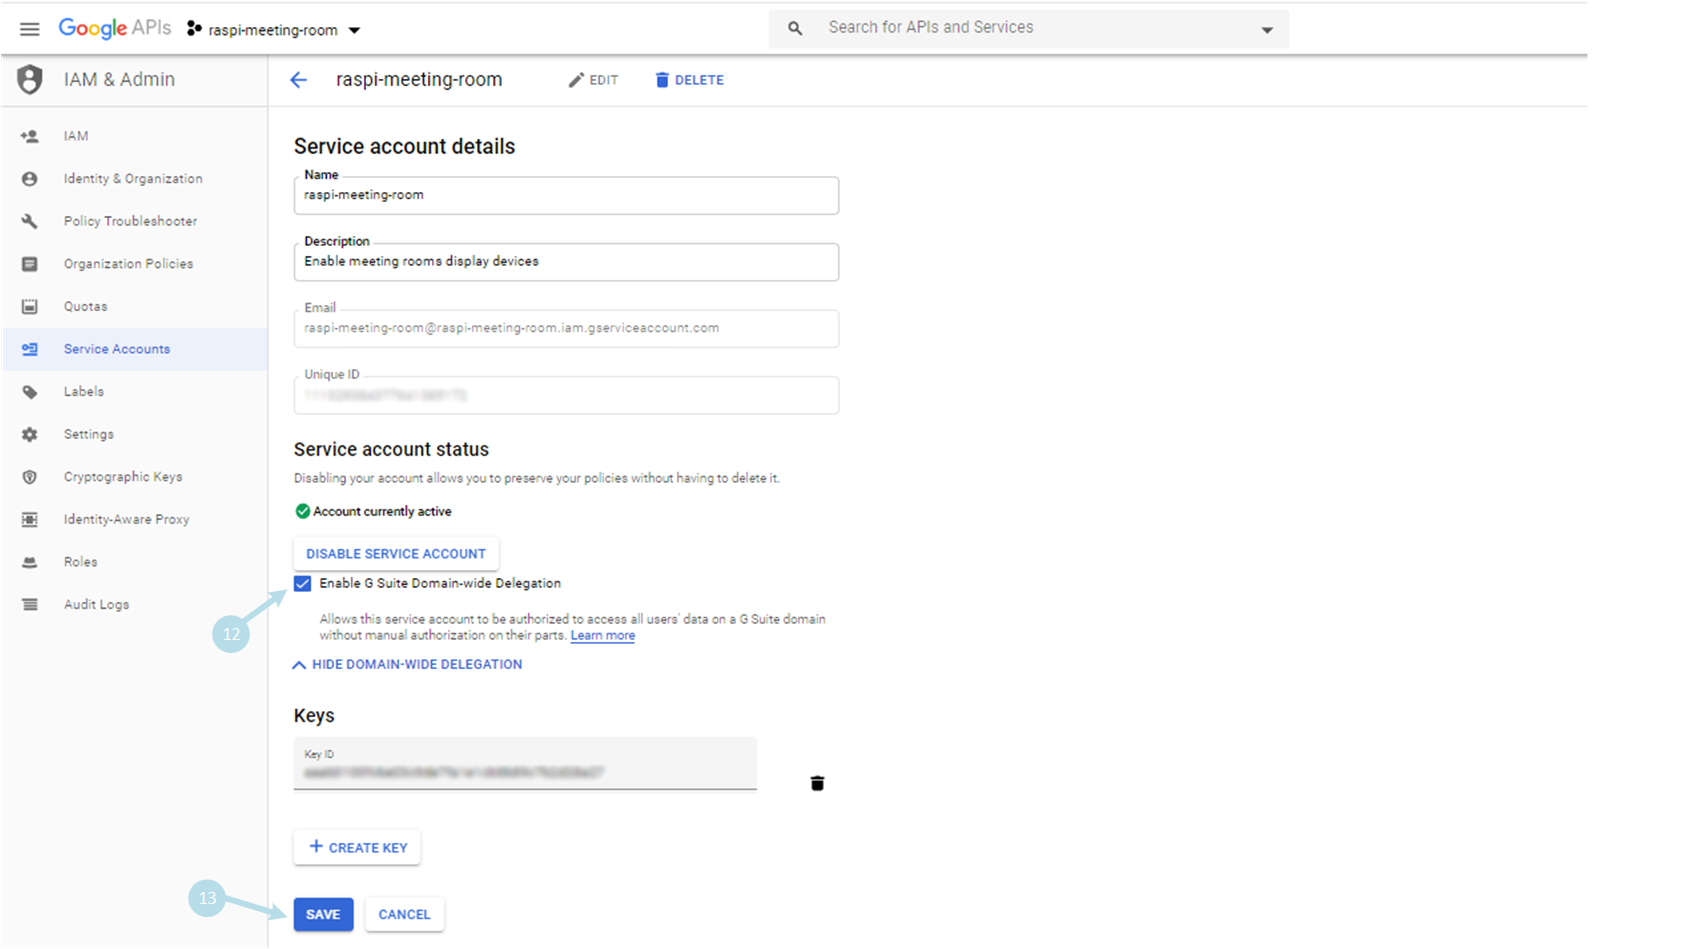
9) EDIT 10 and expand SHOW DOMAIN-WIDE DELEGATION 11
10) Check Enable G Suite Domain-wide Delegation 12 and click on SAVE 13
5th step: Set push notification URI
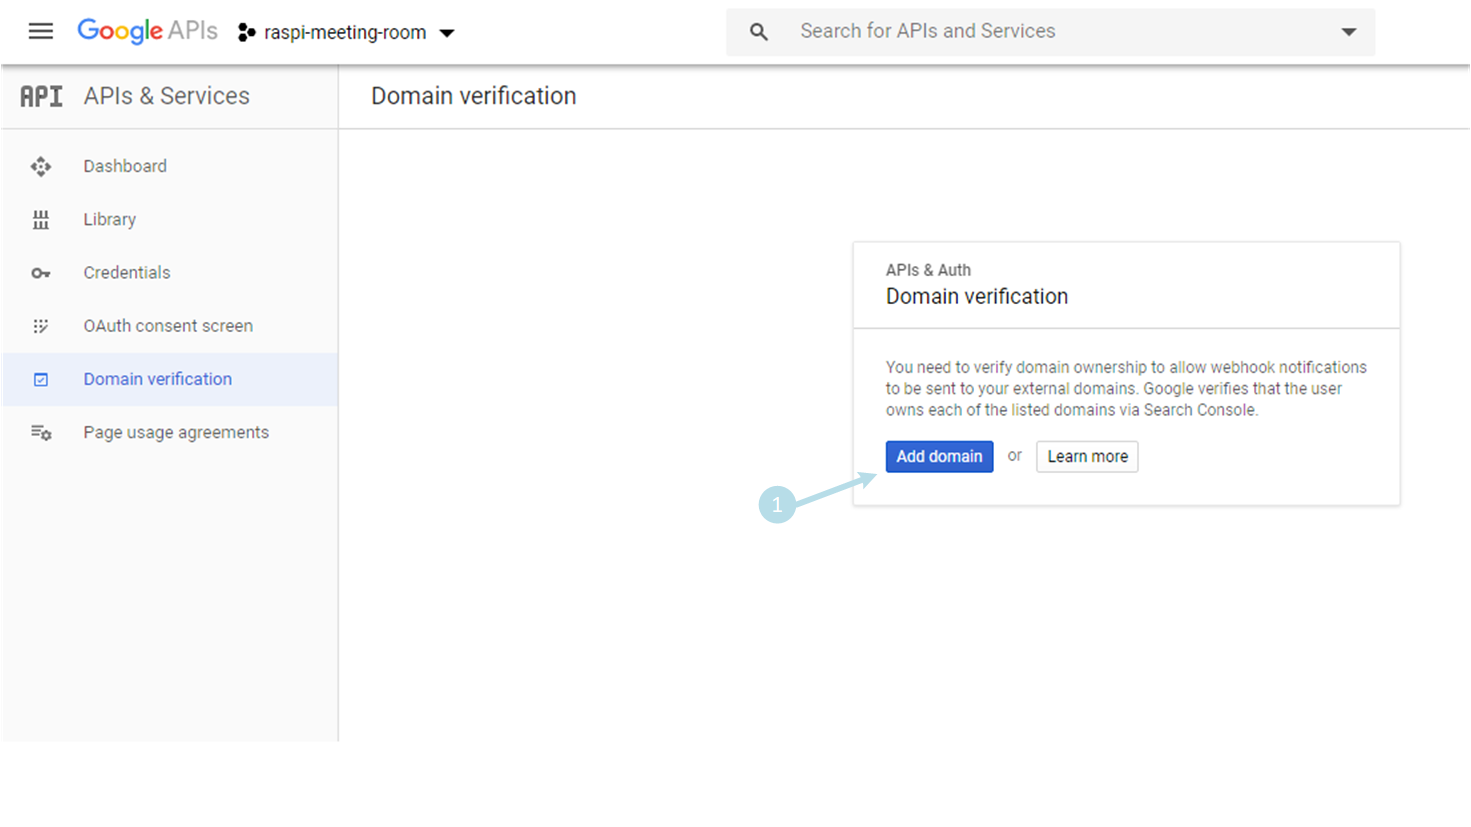
1) Go to menu, APIs & SERVICES, Domain verification and click on Add domain 1
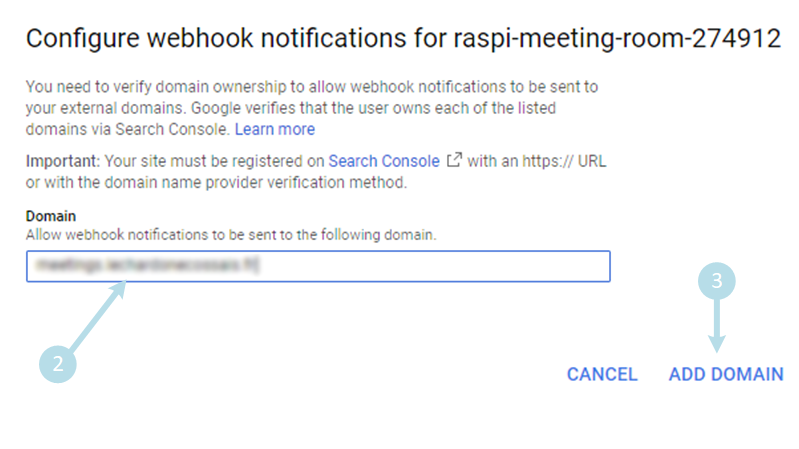
2) Fill Domain with the web hook push notification URI2 (without https), e.g. webhook.raspimeetingroom.fr. (eventually, more domain verification steps would follow if the domain name ownership has not been already verified). Terminate by clicking on ADD DOMAIN 3
6th…and final step: Enable APIs on Google GSuite account
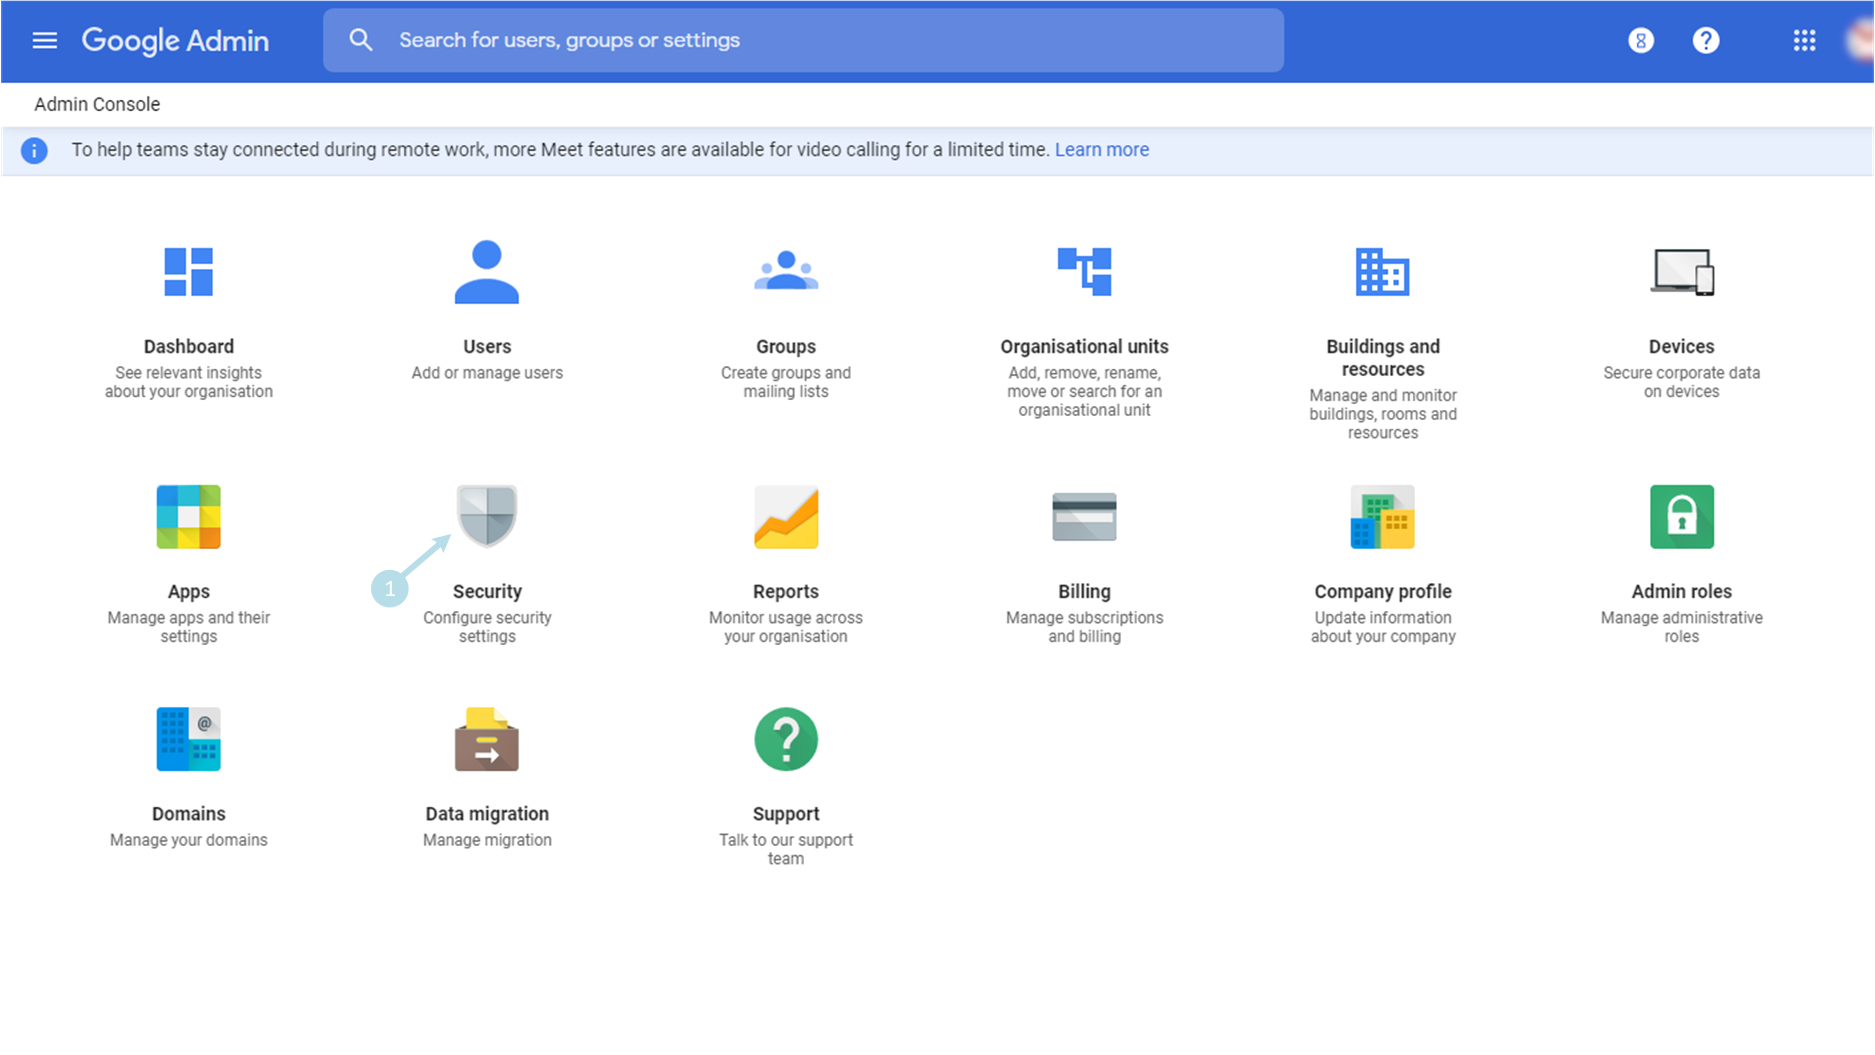
1) Go to Security panel 1
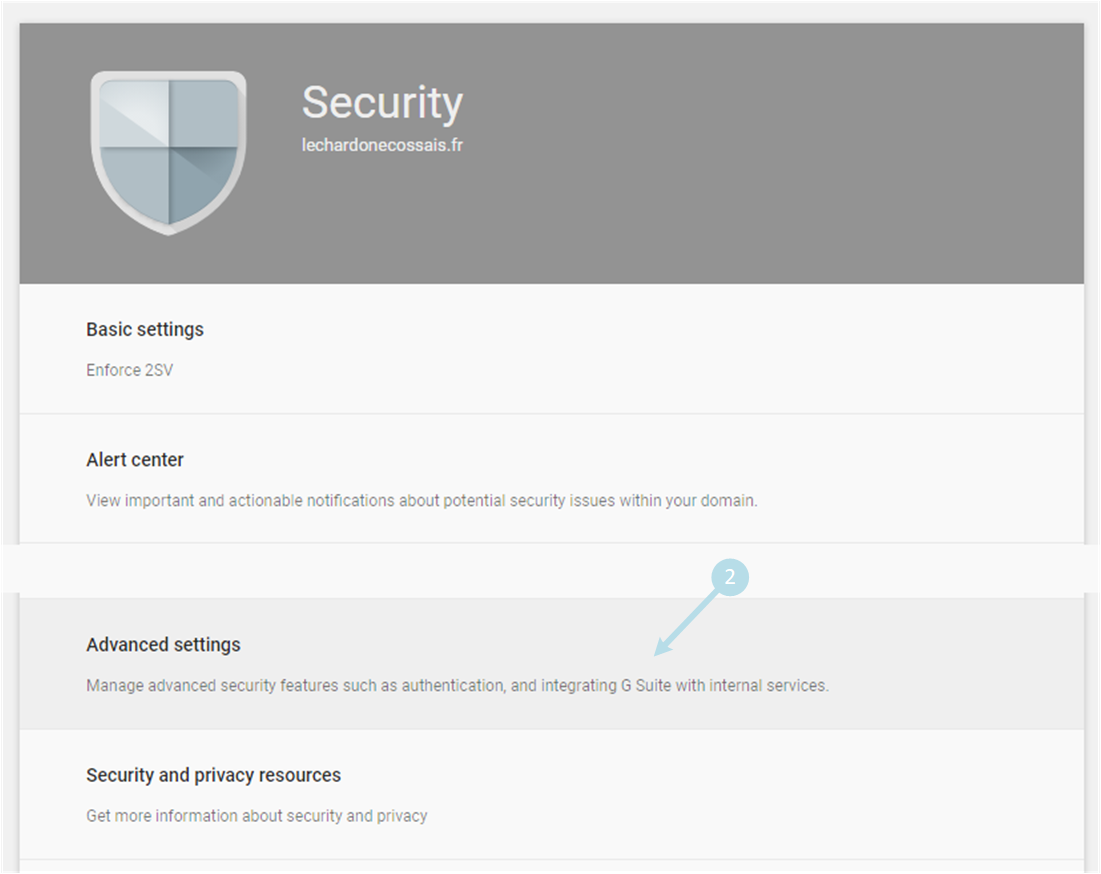
2) Scroll-down up-to Advanced settings 2
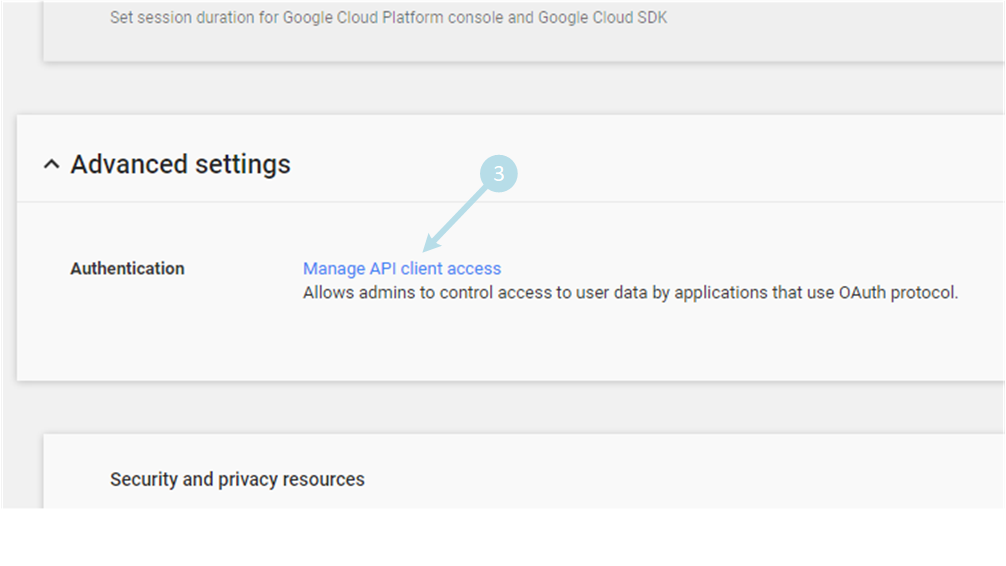
3) Click on Manage API client access 3
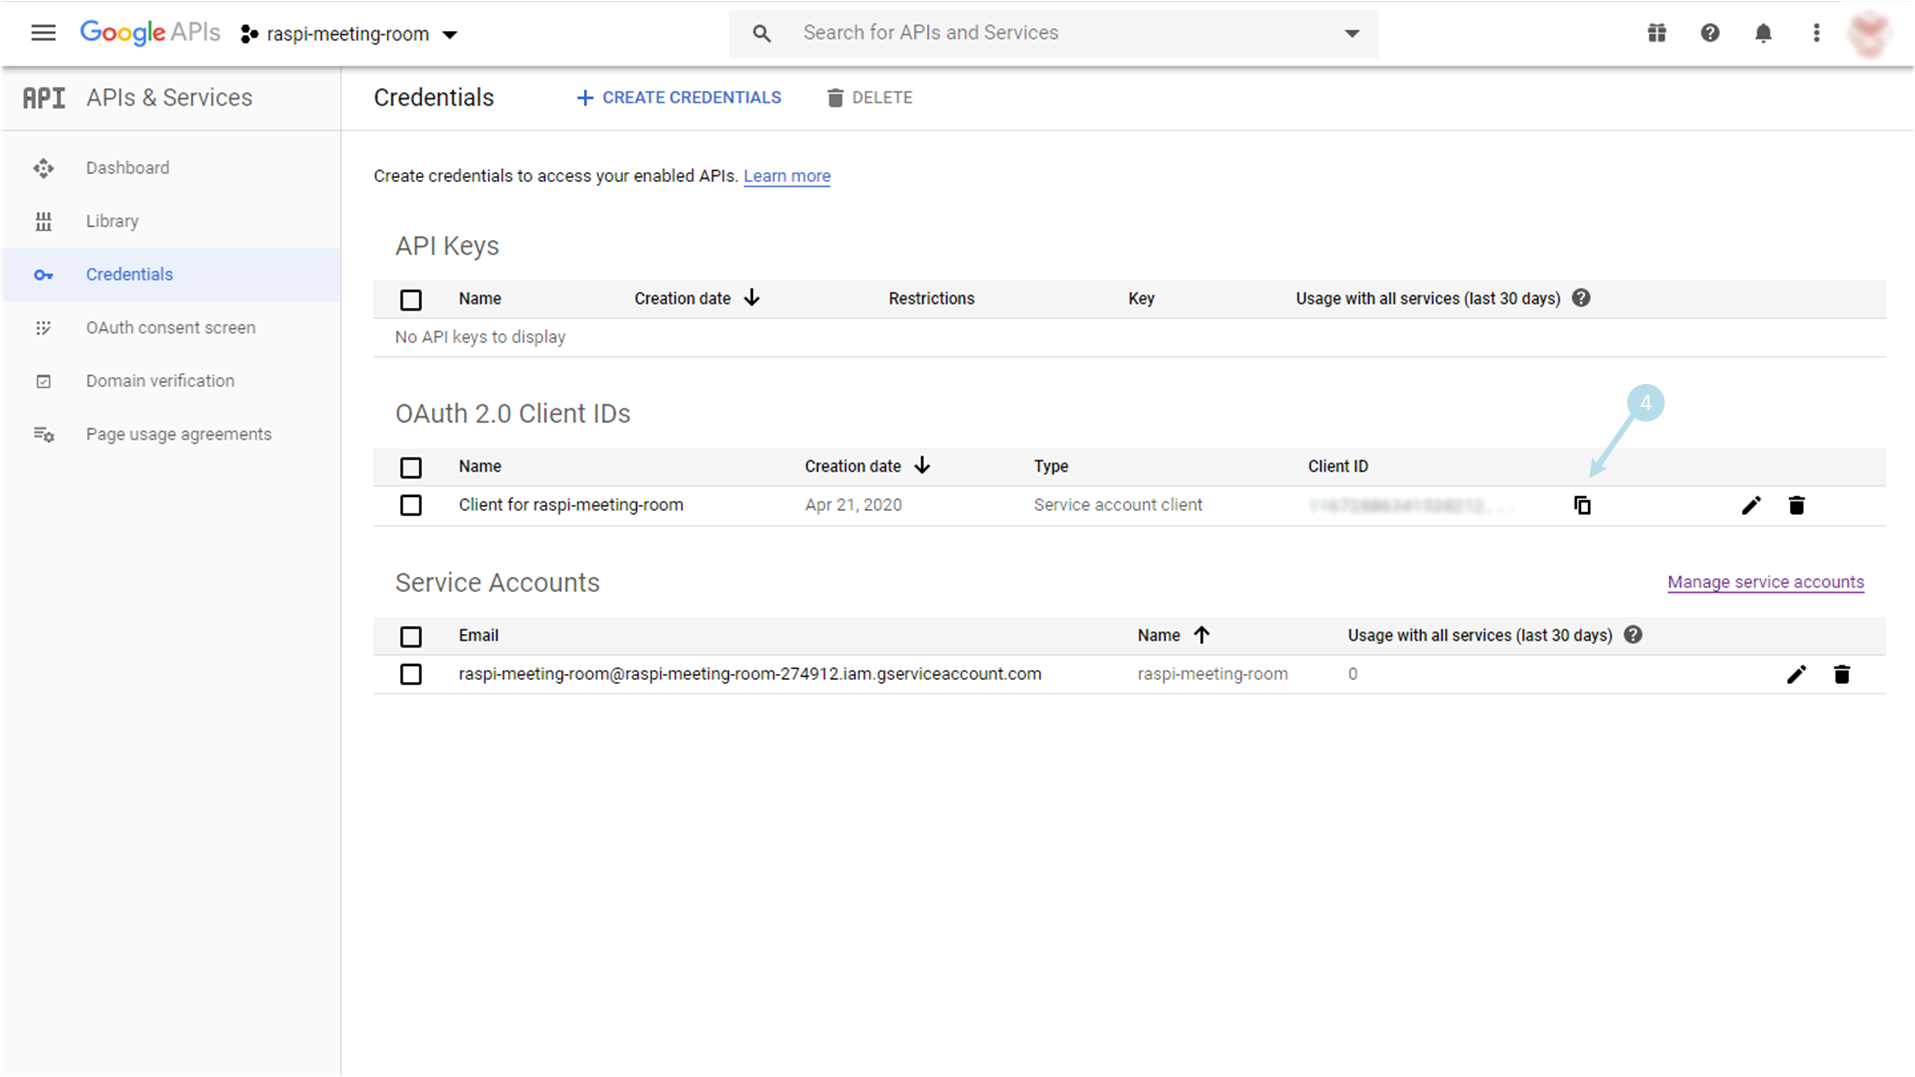
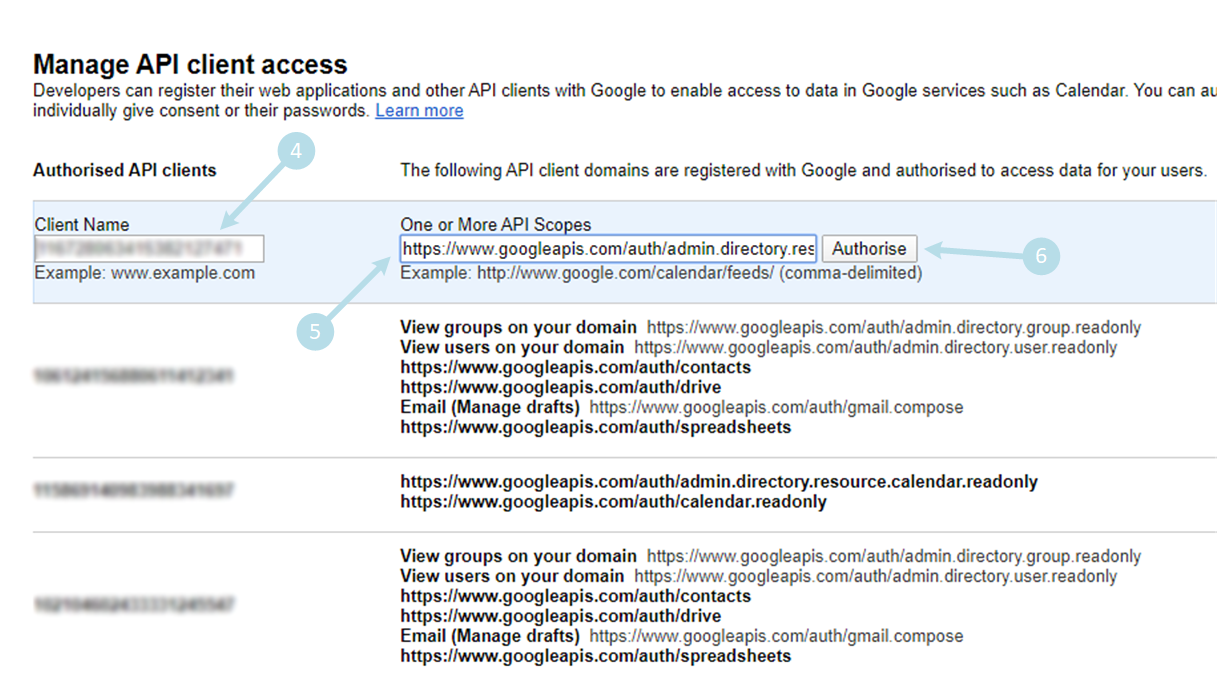
4) Copy the OAuth2 client ID into Client Name 4 and fill One or More API Scopes 5 with following content:
https://www.googleapis.com/auth/admin.directory.resource.calendar.readonly, https://www.googleapis.com/auth/calendar.readonly
Then termine by clicking on Authorise 6
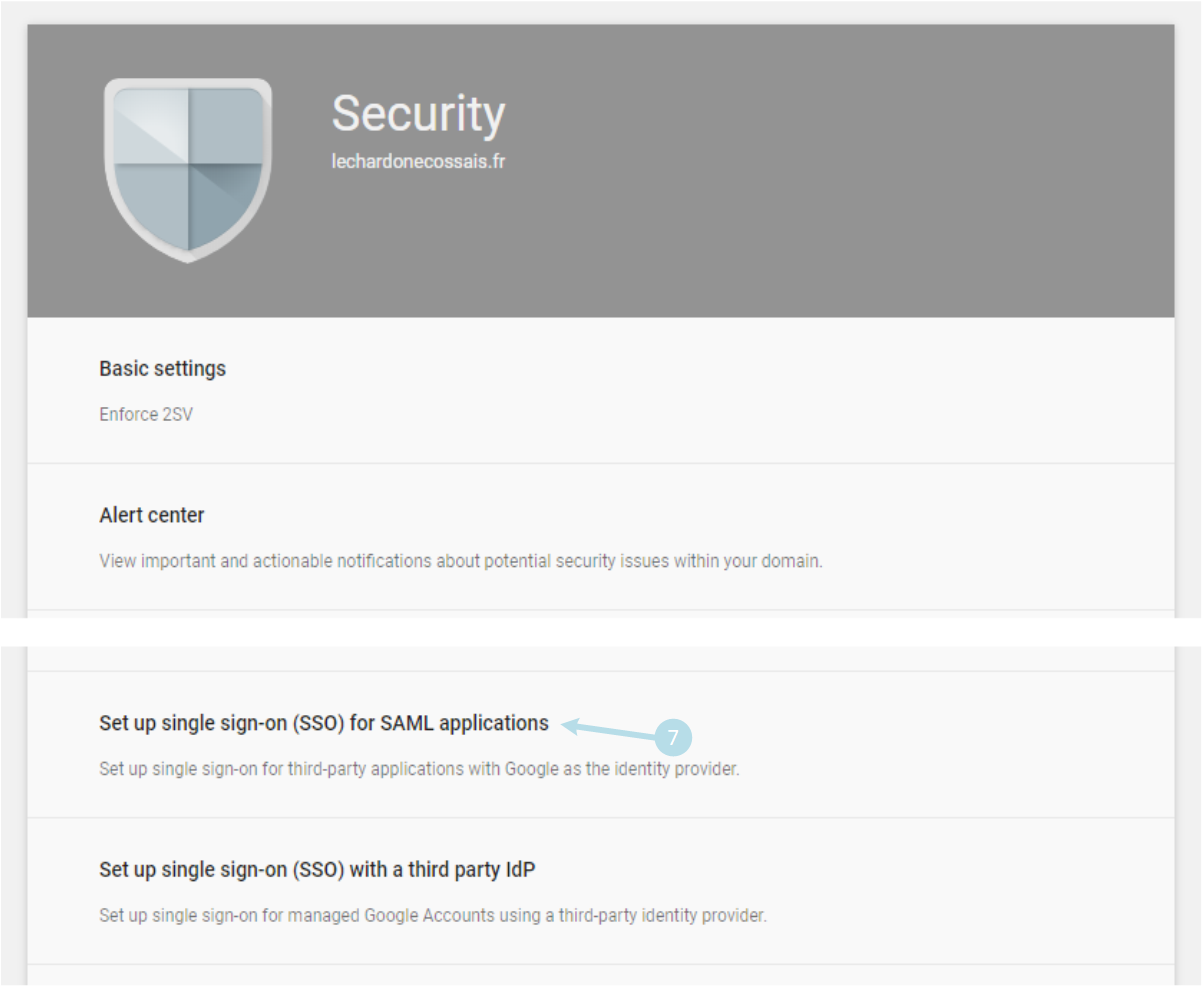
5) Scroll to Set up single sign-on (SSO) for SAML application and click 7 to expand
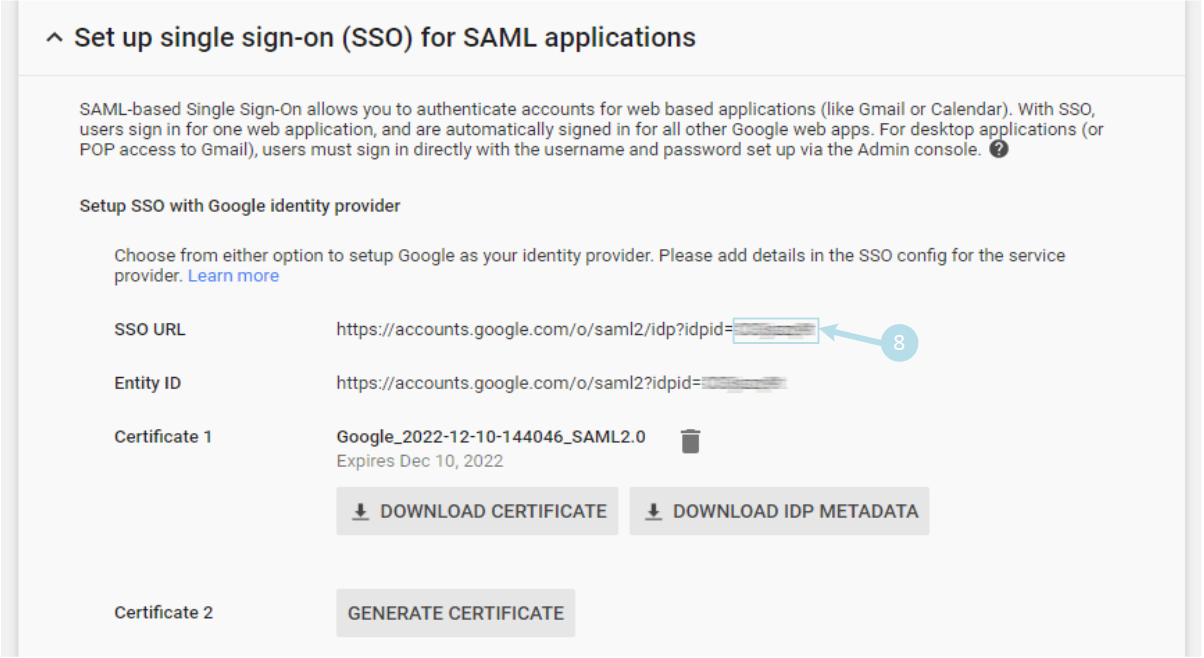
5) Copy the Customer ID value placed after …?idpid= 8
Bravo !