EPS32| ESPRESSIF Tool Chain | AT commands | UART | WiFi&Bluetooth modules | Debian
ESP32 AT commands firmware: UART host interface
While developing the Brother-in-Law wine cella project, I faced a critical issue with the ESP-01 wifi module based on an ESP8266 processor from Espressif. The AT commands firmware hides a 5 year old bug named ‘busy..P’ enjoining to reset the module. It was too late to go back, but for possible future development, it’s logical to choose an alternative.
The benefit of such a module is to provide access to an IP stack and utilities via AT commands on the serial port. This avoiding to code a lot of lines to connect to an access point and access the Internet. There is not a plethora of modules of this kind. I investigated a lot on the Microchip ATWINC1500 and 3400 (+ Bluetooth) 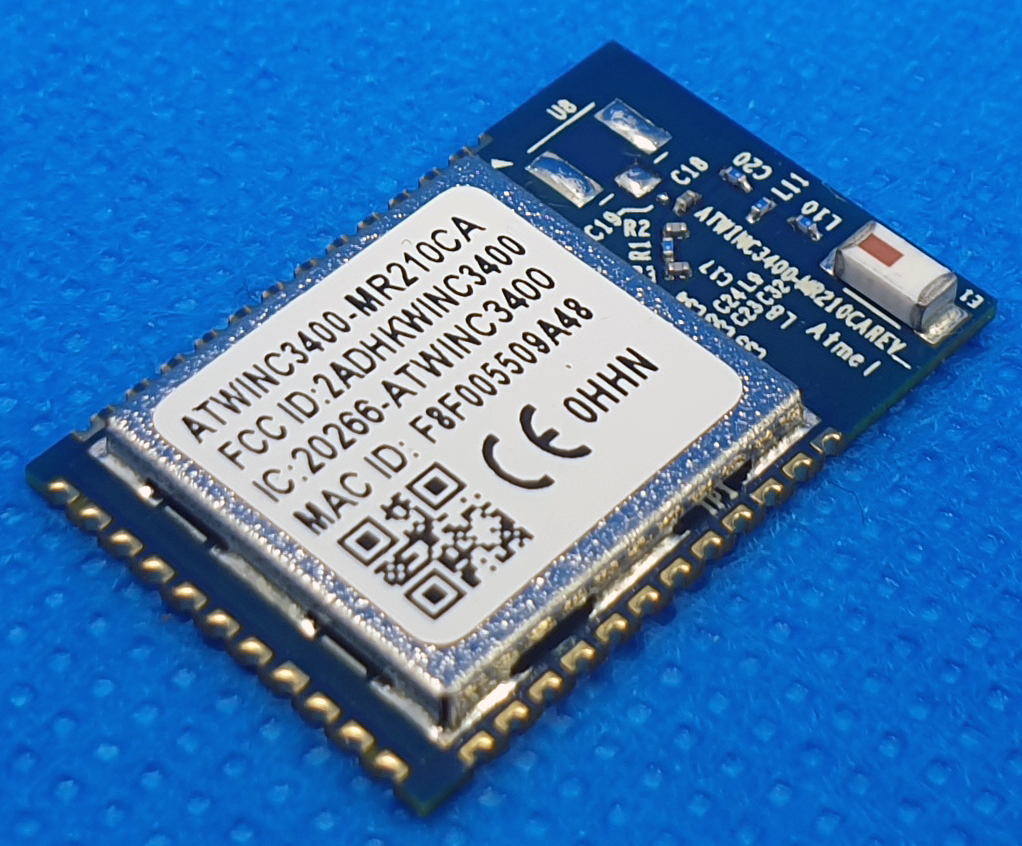 but the coding documentation looks not visible for public; the only option is to perform reverse-engineering from de C-libraries. By the way, I don’t know if protocol is base on AT commands. Mystery !
Other rare modules are based on Espressif (again) ESP32 supporting both wifi and bluetooth, e.g. U-BLOX NINA-W102 WiFi chip, 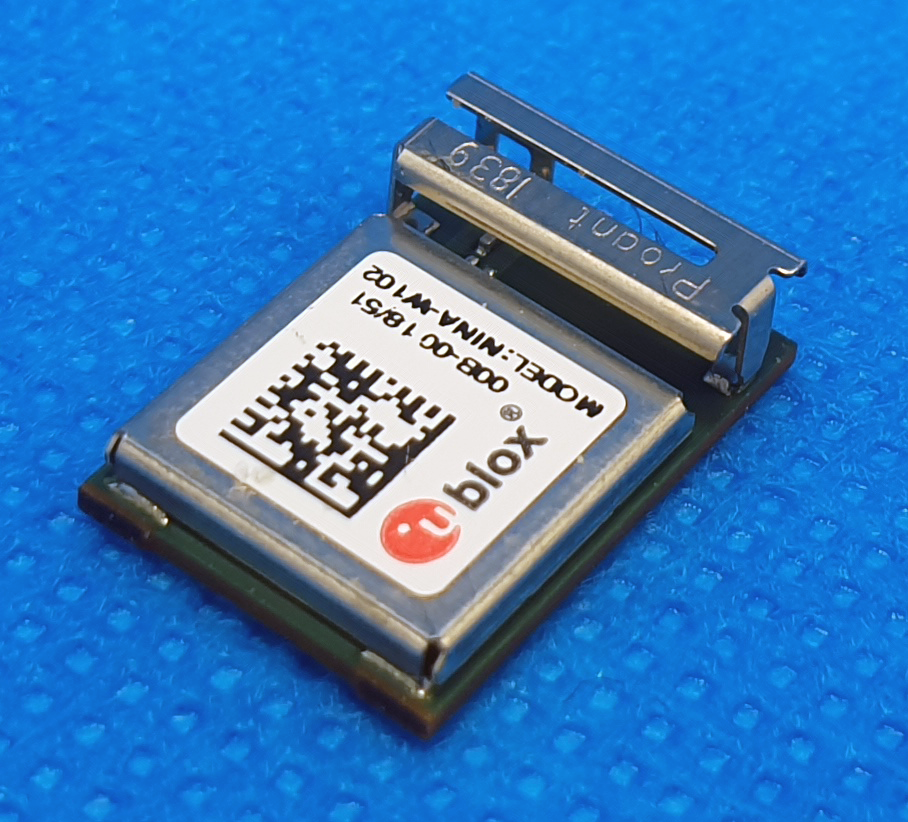 the one used by Arduino 33 IOT and BLE
As I am curious, I ordered a pack of 3 modules. I noticed:
- the modules are delivered raw, without firmware for the ESP32.
- UBLOX does not provide any compiled binaries that supports AT commands.
- The UBLOX documentation is enough to make you cry ! no application notes (I guess you need to buy some support).
- NINA W102 is not a module but a chip – no surprise because the dimensions are available into the datasheet. I though I could use it on a 2.54 mm board, but this is very tricky.
I found out another module with a form factor closed to the ESP-01, but the 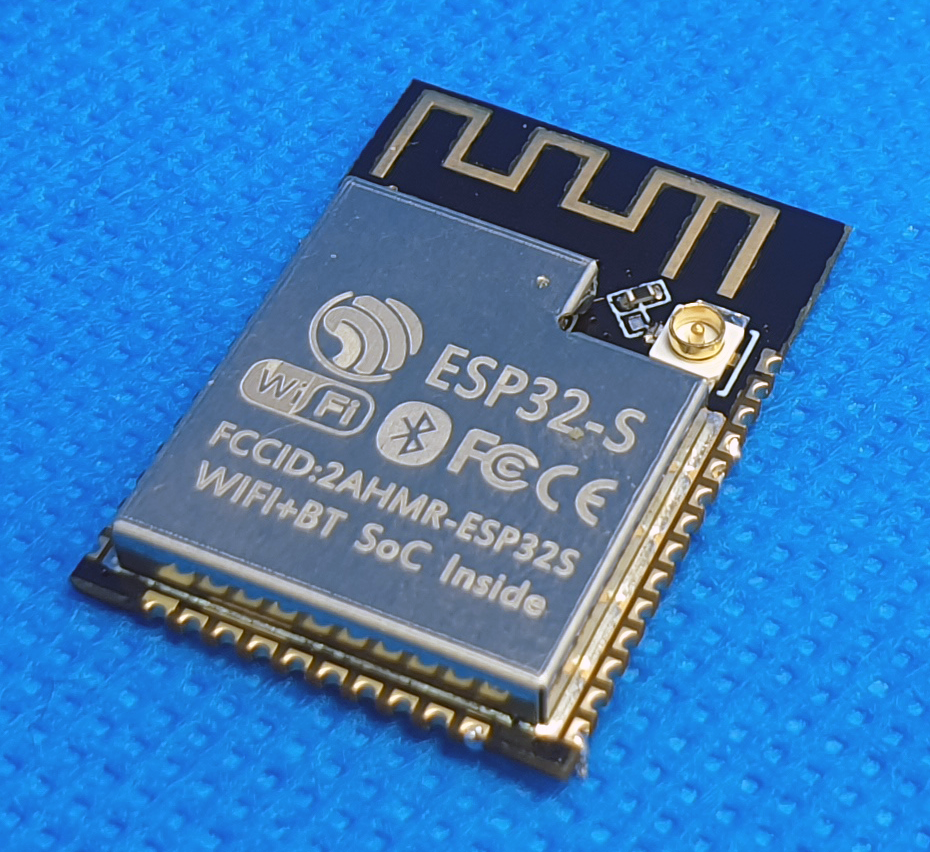 firmware supporting AT commands is the one developed by ESPRESSIF. It requires host and module to be interfaced via SPI. This is not suitable to replace a ESP-01 module connected via a serial port.
Eventually, the only option then to use my ESP32 modules/chips is to recompile the firmware after changing the interface from SPI to UART – note that in all cases (including the NINA chip), the firmware is uploaded via USART.
This article is going to describe all the steps to change SPI to UART interface and compile the ESPRESSIF firmware, and this as much as for a NINA W102 chip as for any other module based on an ESP32.
1) Environment
The tool-chain provided by ESPRESSIF requires a linux distribution. But if you are a Windows10 user – as I am – you can use the Legacy GNU Make Build System and MSYS2. However, I strongly recommand to install WSL (Windows Subsystem for Linux), and the Debian distribution. Once installed and activated, you have a full Linux OS running into your Windows10. Mac users cans also install the toolchain.
The next few lines will consider a Debian distribution running on WSL. Please refer to the ESPRESSIF official page for others distributions and OS.
Install prerequisites:
Set PYTHON3 as default:
check current version
If version is still under 3, or Python command is not recognized, update the symbolic link:
Install XLRD and PYYAML python modules:
Create ESP folder
and move to the new folder
2) Settings
Create a folder for each ESP32 modules/chips, first start with e.g. NINA-W102
and move to the folder
Clone ESPRESSIF ESP-AT repository:
and move to esp-at folder:
Launch MenuConfig:
Now select the platform. Enter 1 to select ESP32:

Select the module. For NINA-W102, enter 6 to select ESP32-D2WD:

Enable silent mode:

install depedencies:
Re-launch MenuConfig:
After a while, a new menu is opened. Go to Component Config

Go to Common ESP-related

and to UART for console output

disable consol output by setting None

Optional: this is mandatory if if module continuously reset after boot because of a brownout detection. It occurs on some ESP32 module.
Return back and move to menu ESP32-specific

disable Hardware brownout detect & restart.

Quit and Save
Open file factory_param located into components/customized_partition_raw_data in order to change UART RX and TX ports:
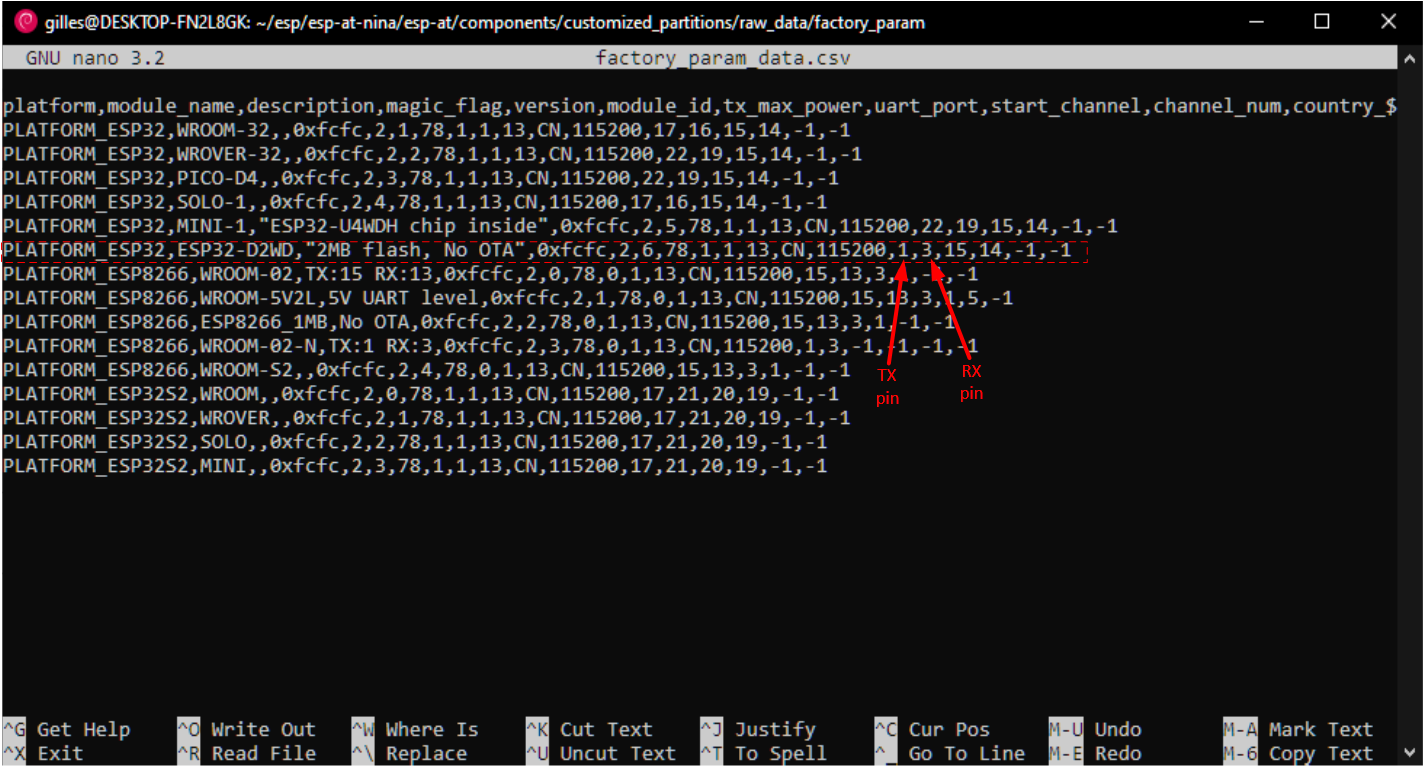
Replace RX and TX pin port values: TX=1 and RX=3. Save
2) Building
Start building:
After a while, the build process luckily finish with no error. check into build/factory: factory_ESP32-D2WD.bin file
3) Flashing
Because I’m a WSL user on Windows10, and also because there is no USB pas-through access, ESPTool for flashing must be used from a Windows command line or Powershell.
Let’s manage from Powershell (otherwise, take a look on ESPRESSIF web site). First, install Python 3 (cf Python website )
Copy factory_ESP32-D2WD.bin file to location accessible by Windows10, e.g.:
Leave WSL and open a Powershell window. Install ESPTool:
Right now, 2 options:
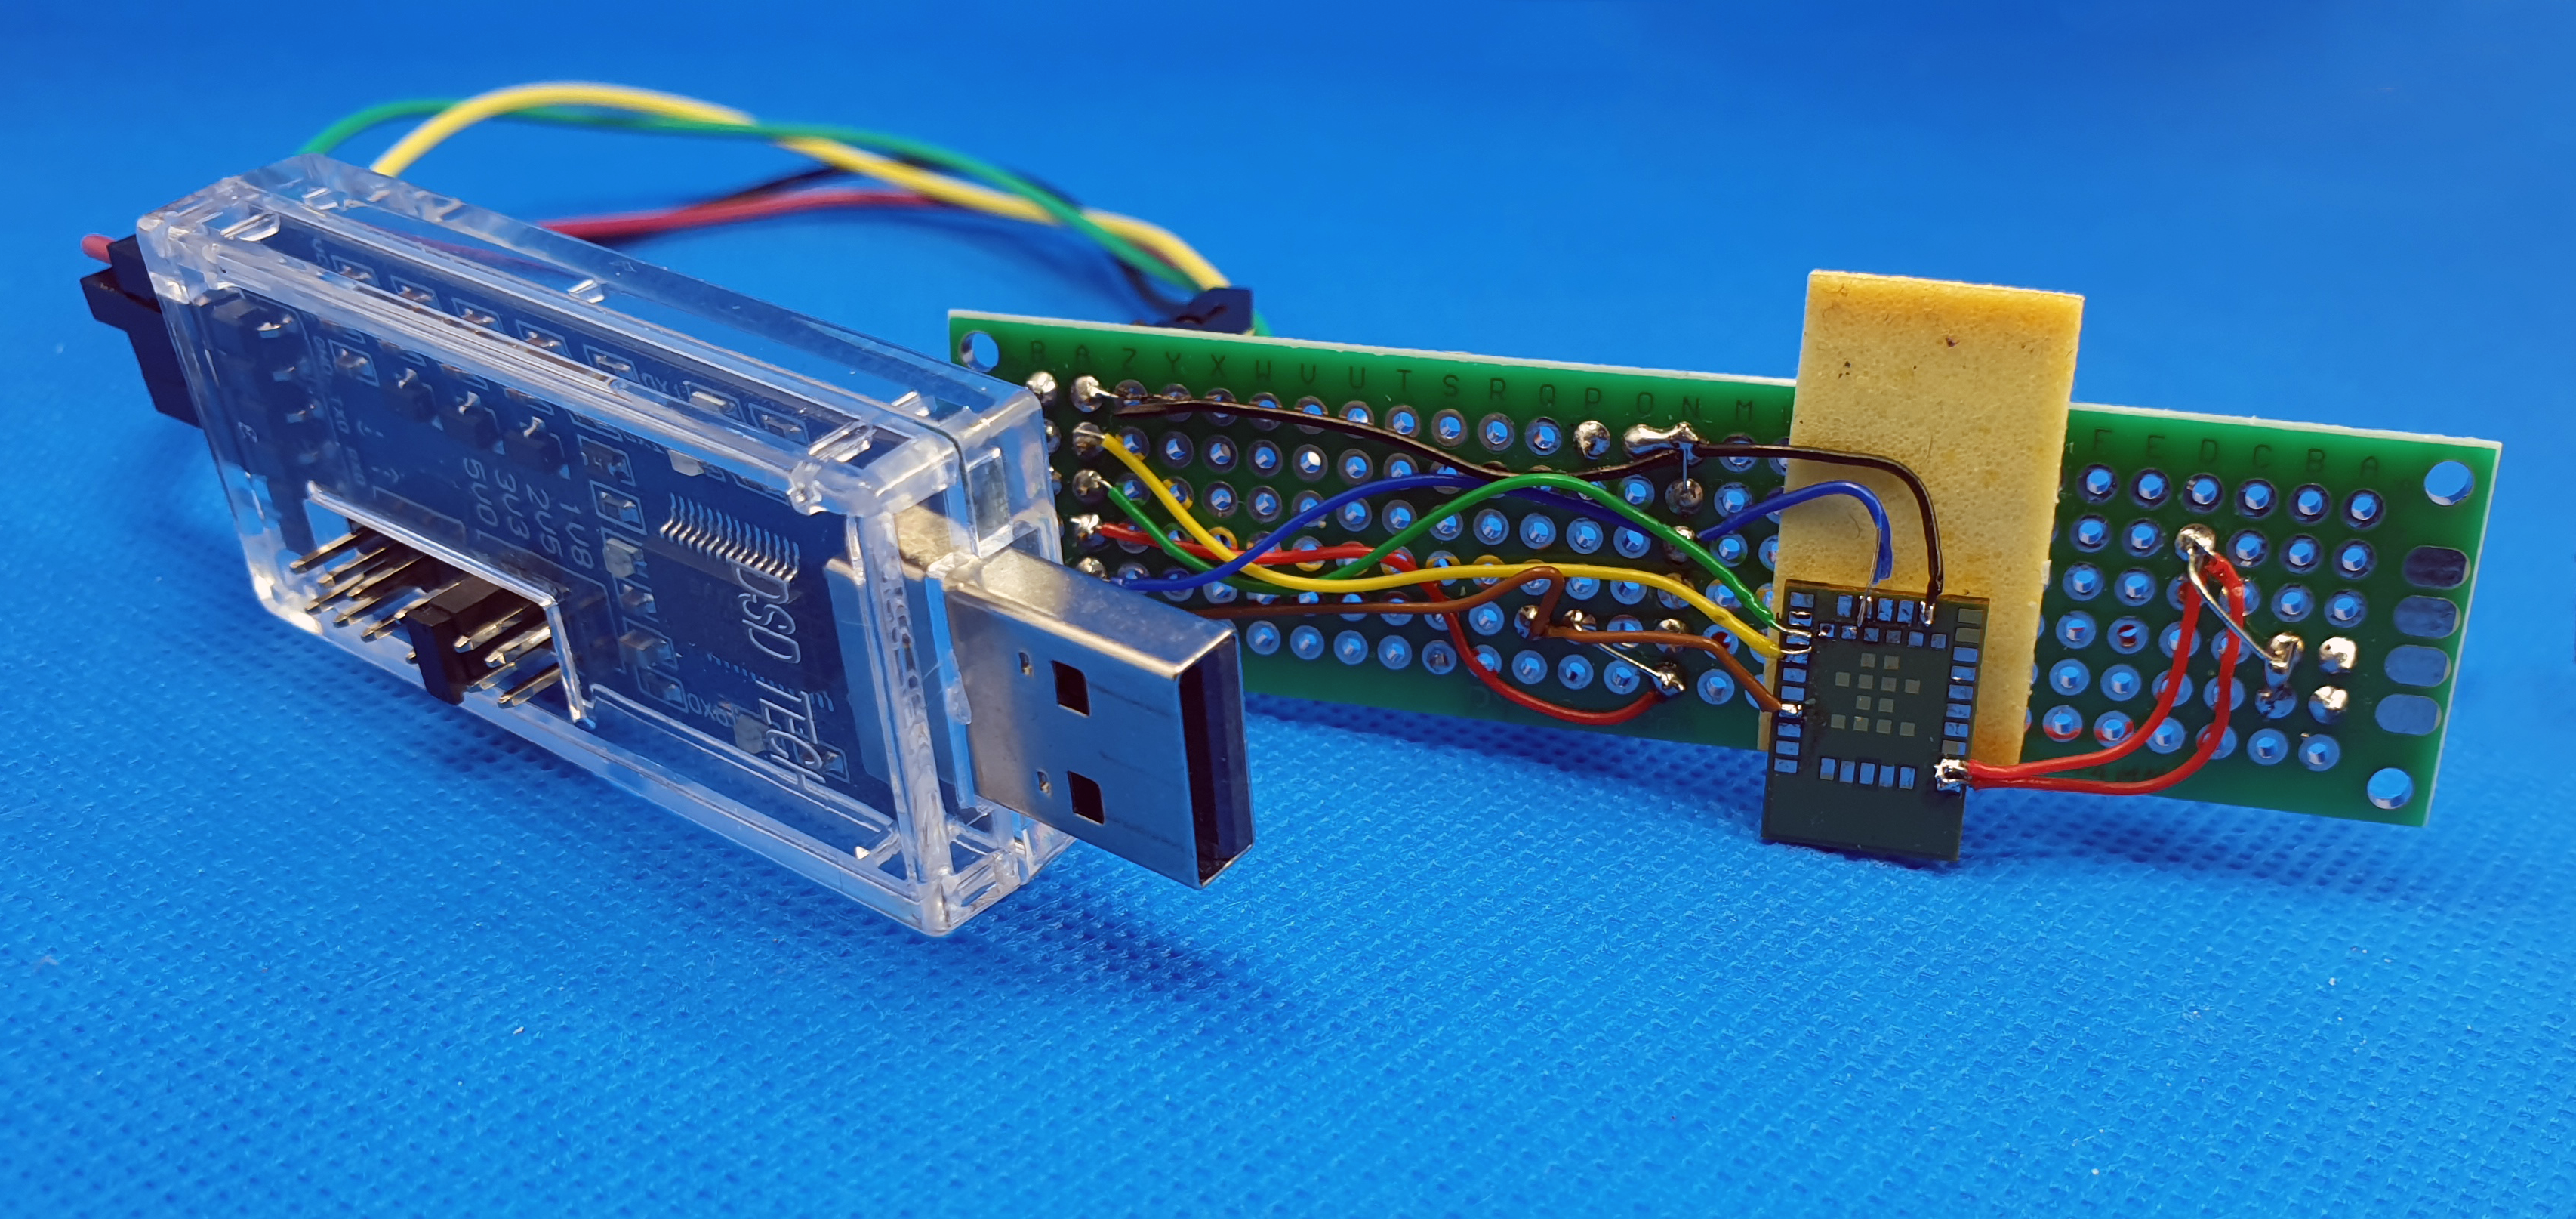
1 – use an USB to TTL UART interface, but this requires an ugly bricolage:
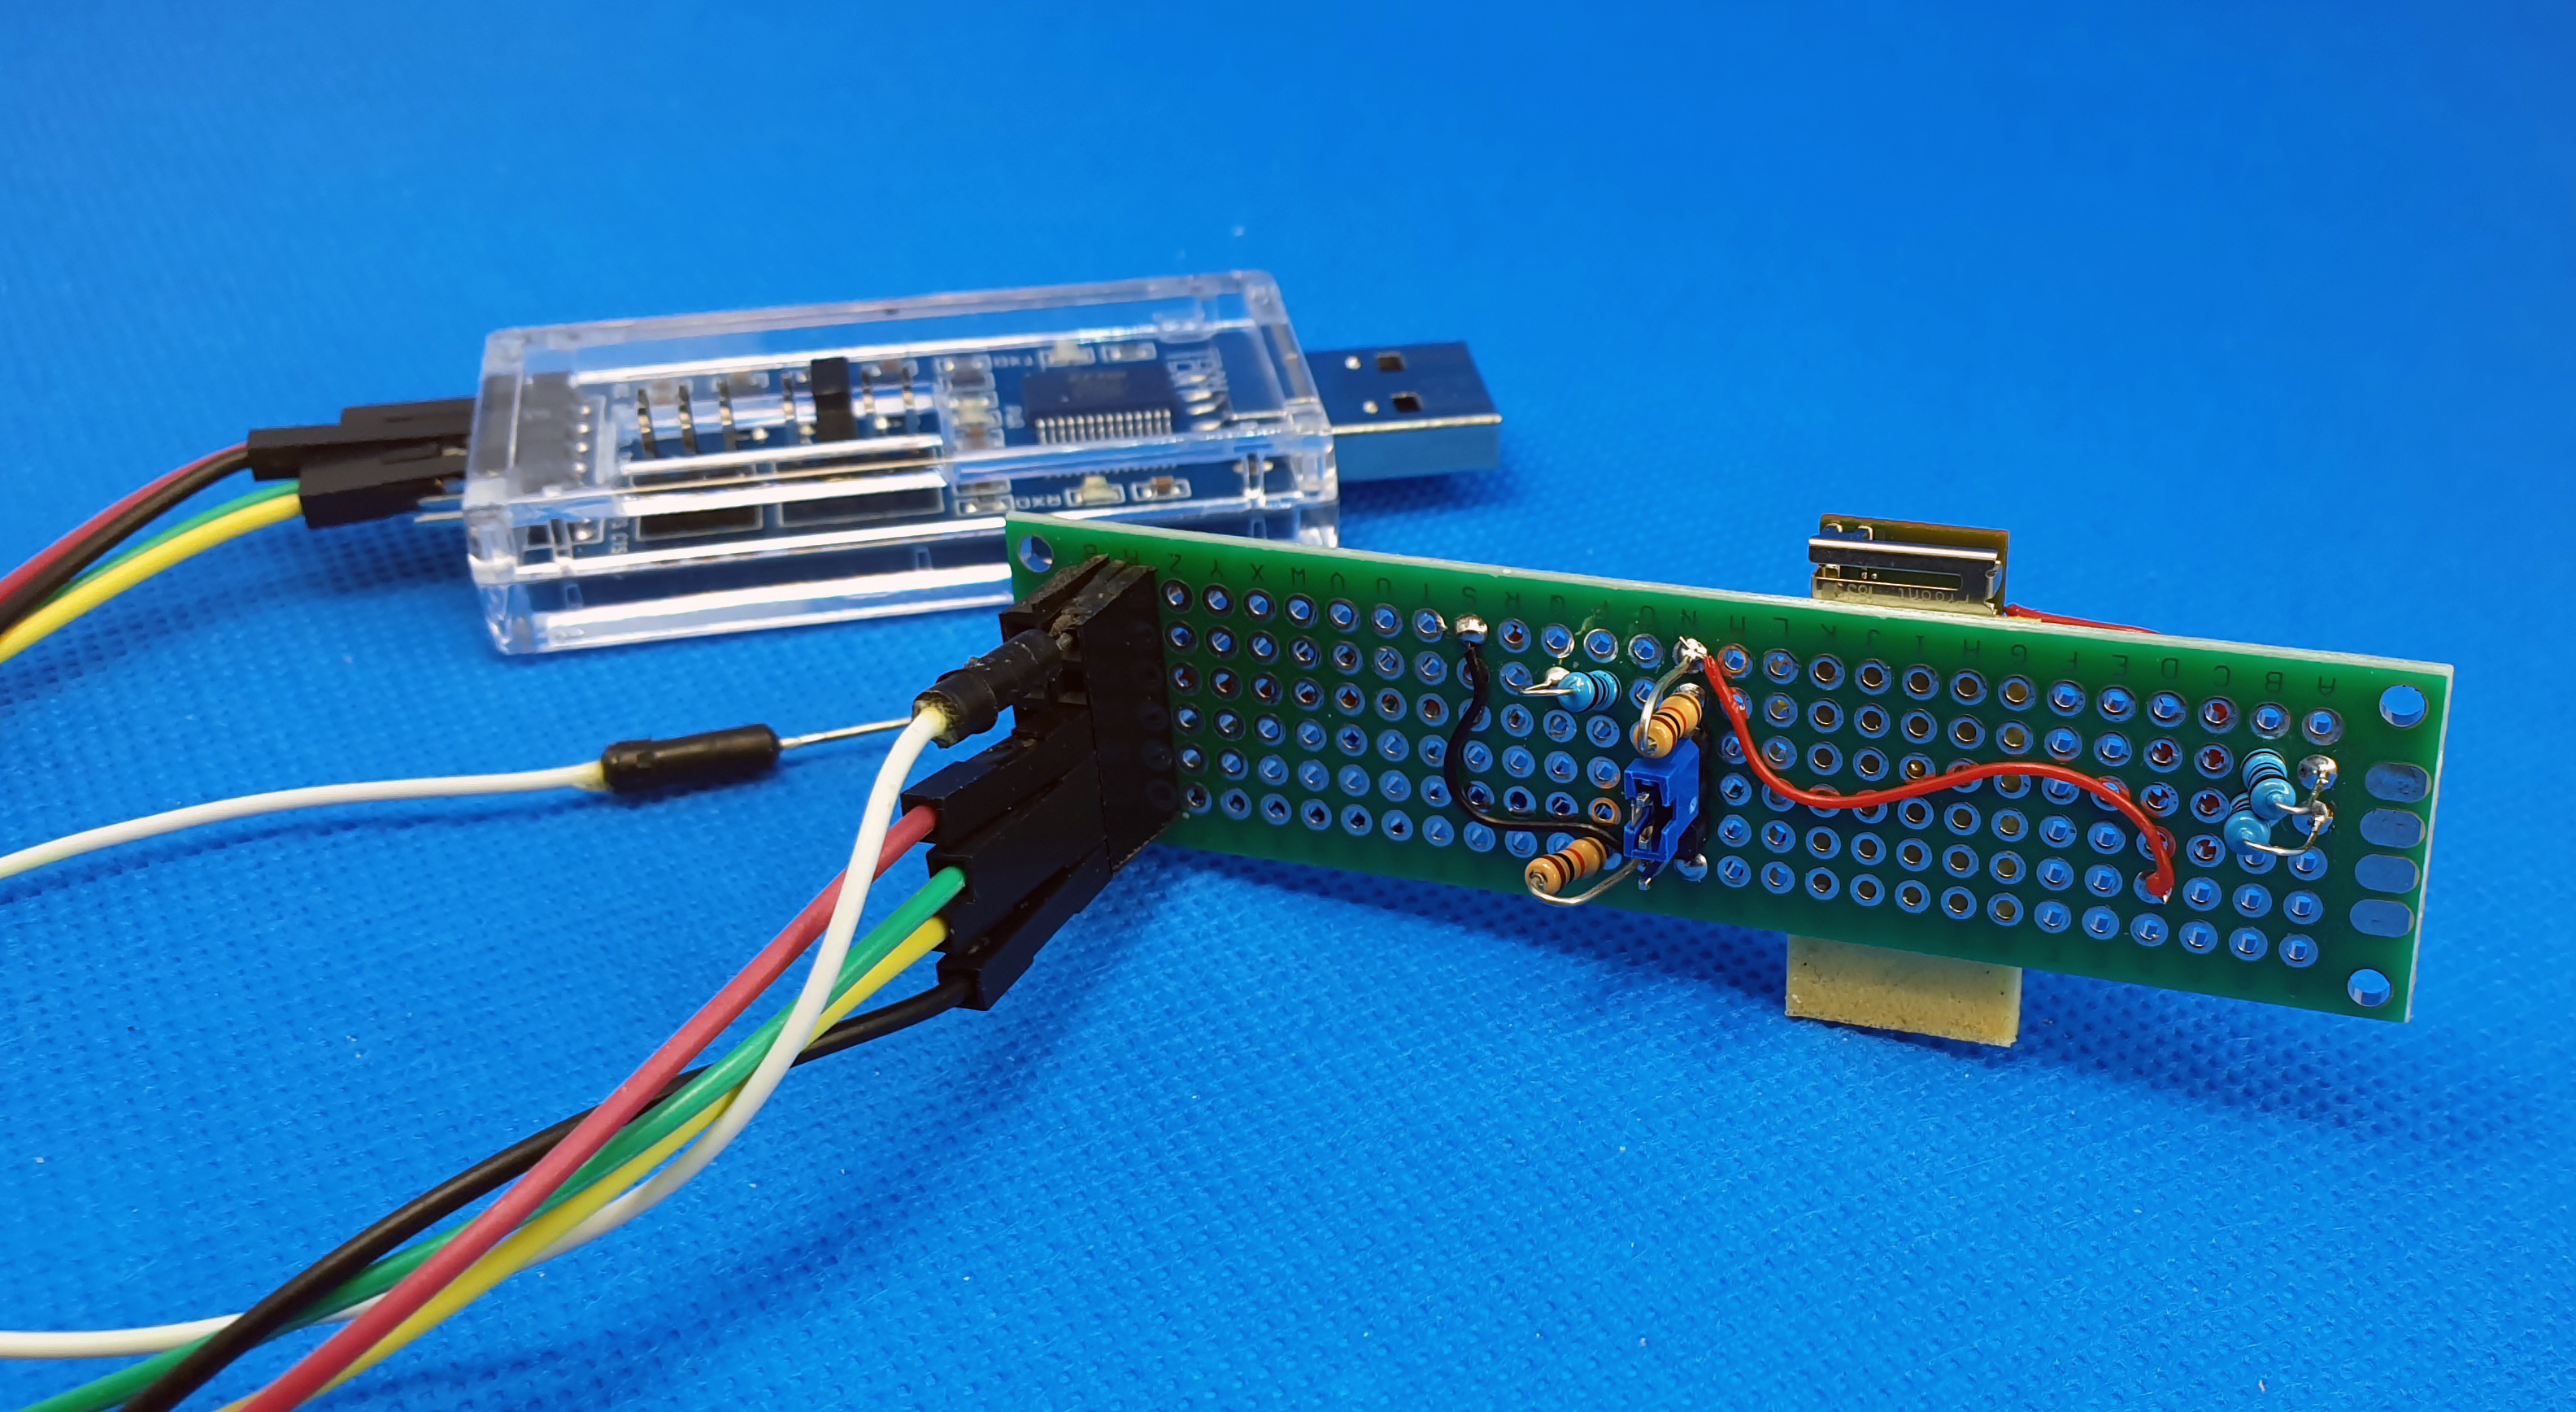
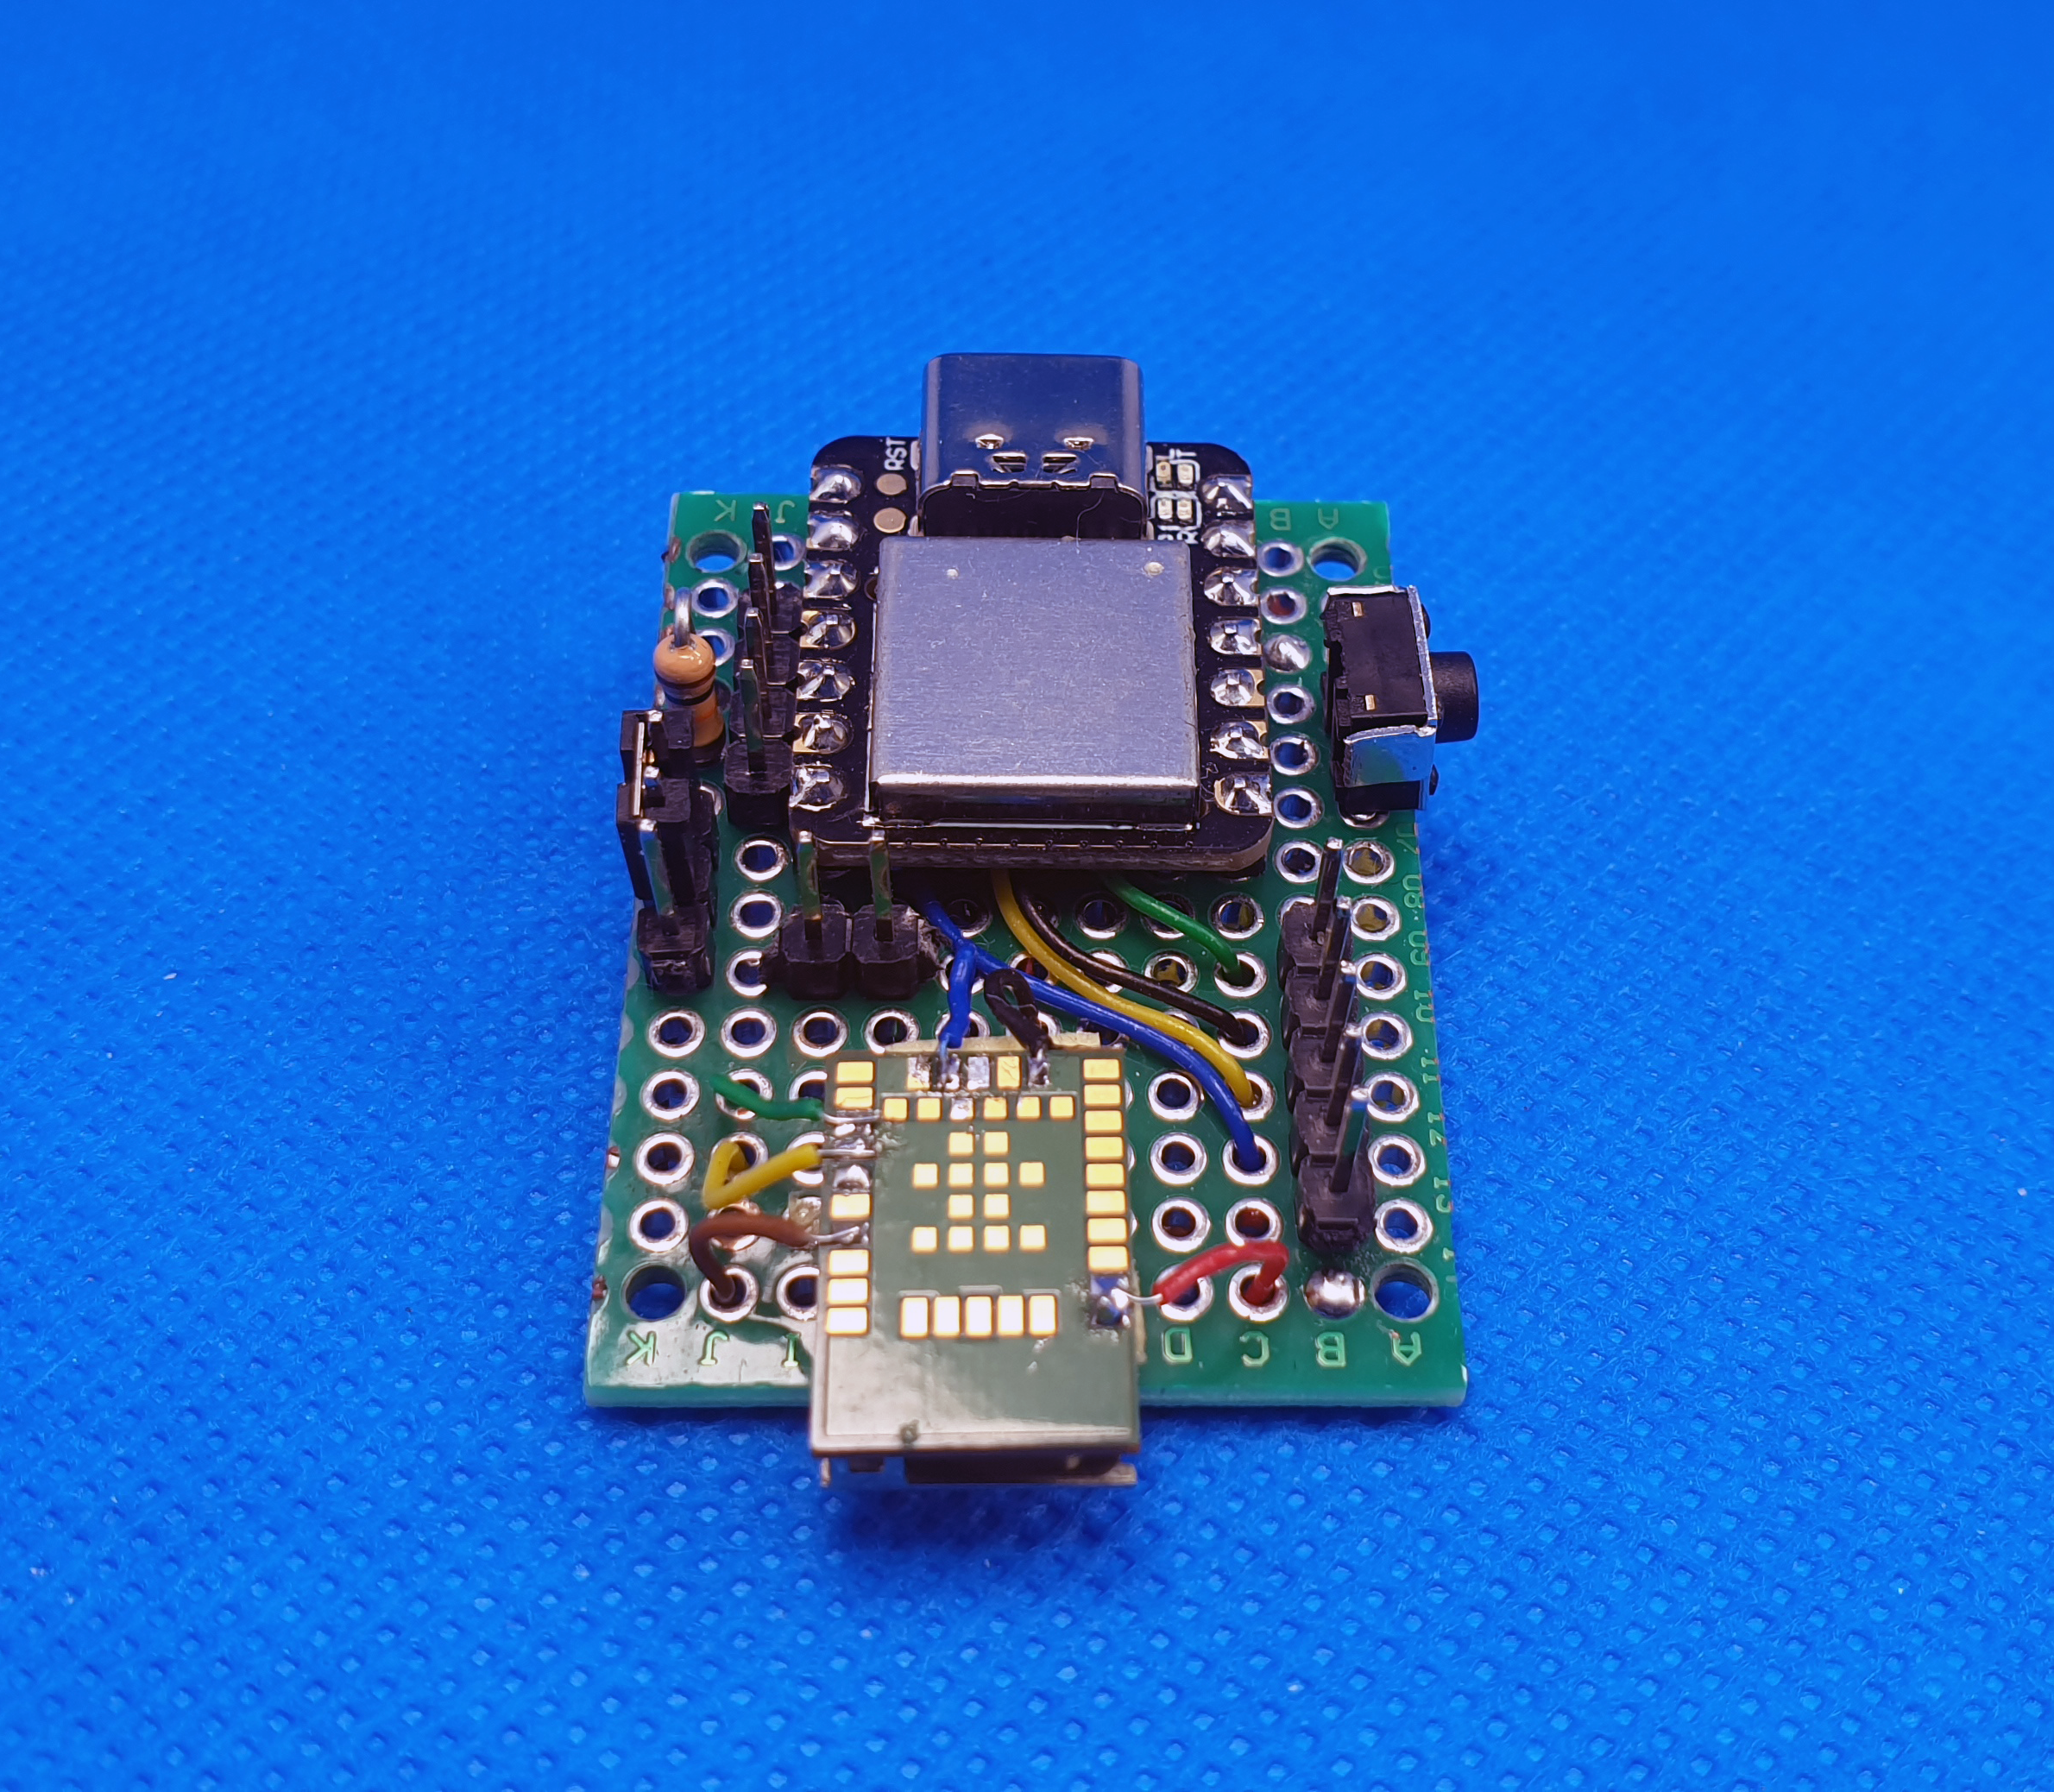
2 – flash from the bord and host CPU. In my case, it remains an ugly bricolage. A pass-though firmwire (USBserial to USART and vis-versa) is mandatory. See here (Speed shall be 115200 bauds)
For both options, connect colored pins as mentionned below:
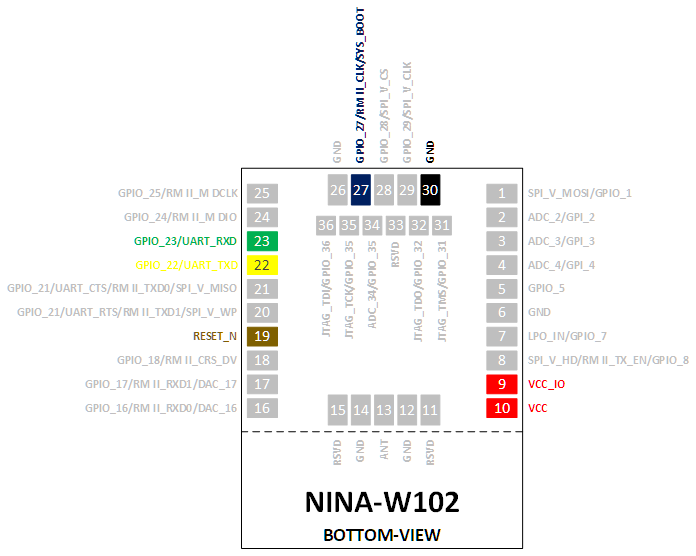
RX (pin 23) must be connected to pin TX of the host or USB adapter, and TX (pin 22) to RX. VCC (pin 10) and VCC_IO (pin 9) must be wired to 3.3v and GND (pin 30 – or any other GND pin) wired to GND. In flashing mode – our case – GPIO-27 (pin 27) must be pulled-down to GND. Reset (pin 19) must be pulled-up to VCC (3.3V) with a 10k resistor.
Plug the USB adapter or the host to the computer and identify the COM port number (go to Windows devices settings).
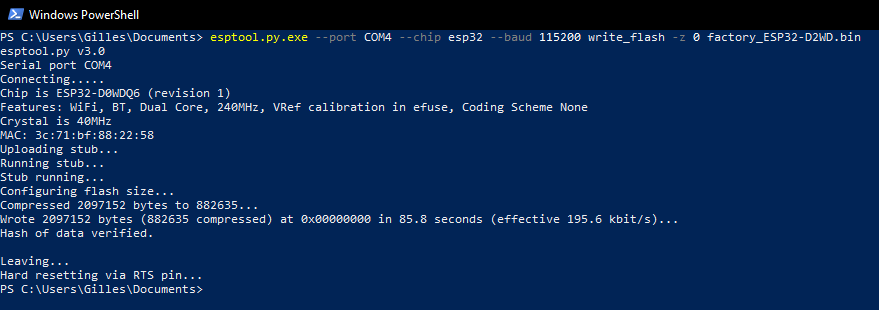
From Powershell enter following command: esptool.py.exe –port <serial-port> –chip esp32 –baud 115200 write_flash -z 0 <path-to-binary-file>, e.g.:
for option 2 – flashing from host – add option –before no_reset, e.g.:

Now, pull-up GPIO-27 (pin 27) to VCC (3.3V) with a 10k resistor and reset the module/chip.
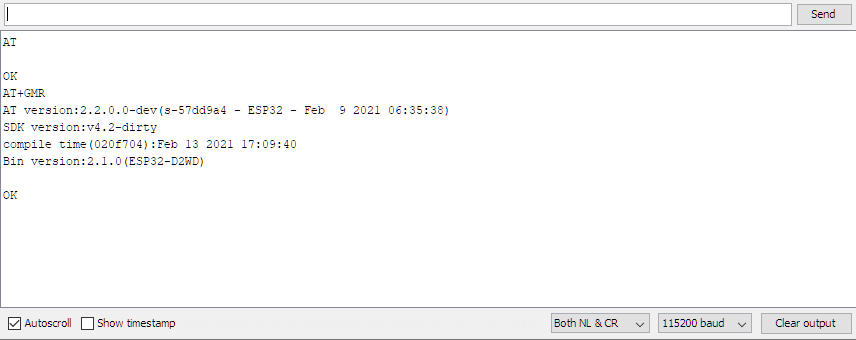
Open a terminal (115200 baud + LF+CR after pressing enter), type AT and press enter. Module/chip must reply OK. AT instructions Set and Examples are availabled here.
4) Programing other ESP32 modules
In order to build and flash e.g. ESP32-S module, just replay the section 2) and create a new folder
and move to the folder
Clone ESPRESSIF ESP-AT repository:
and move to esp-at folder:
Launch MenuConfig:
Now select the platform. Enter 1 to select ESP32:
Select the module. For ESP32-S module, enter 1 to select WROOM-32:
Enable silent mode:
and proceed as described above until this point: open file factory_param located into components/customized_partition_raw_data in order to change UART RX and TX ports:

When finished, copy factory_WROOM-32.bin file to location accessible by Windows10, e.g.:
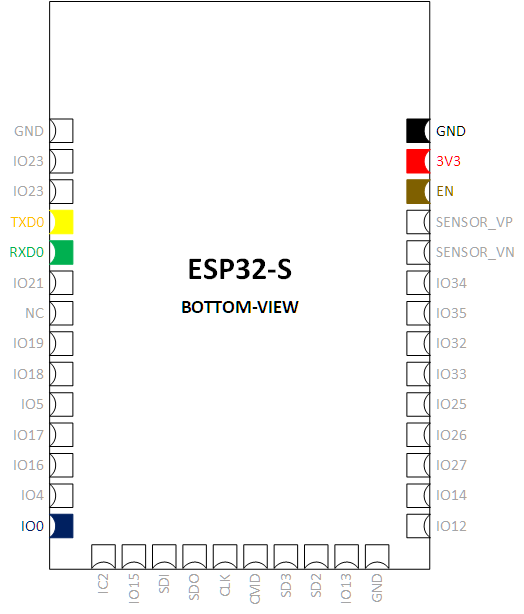
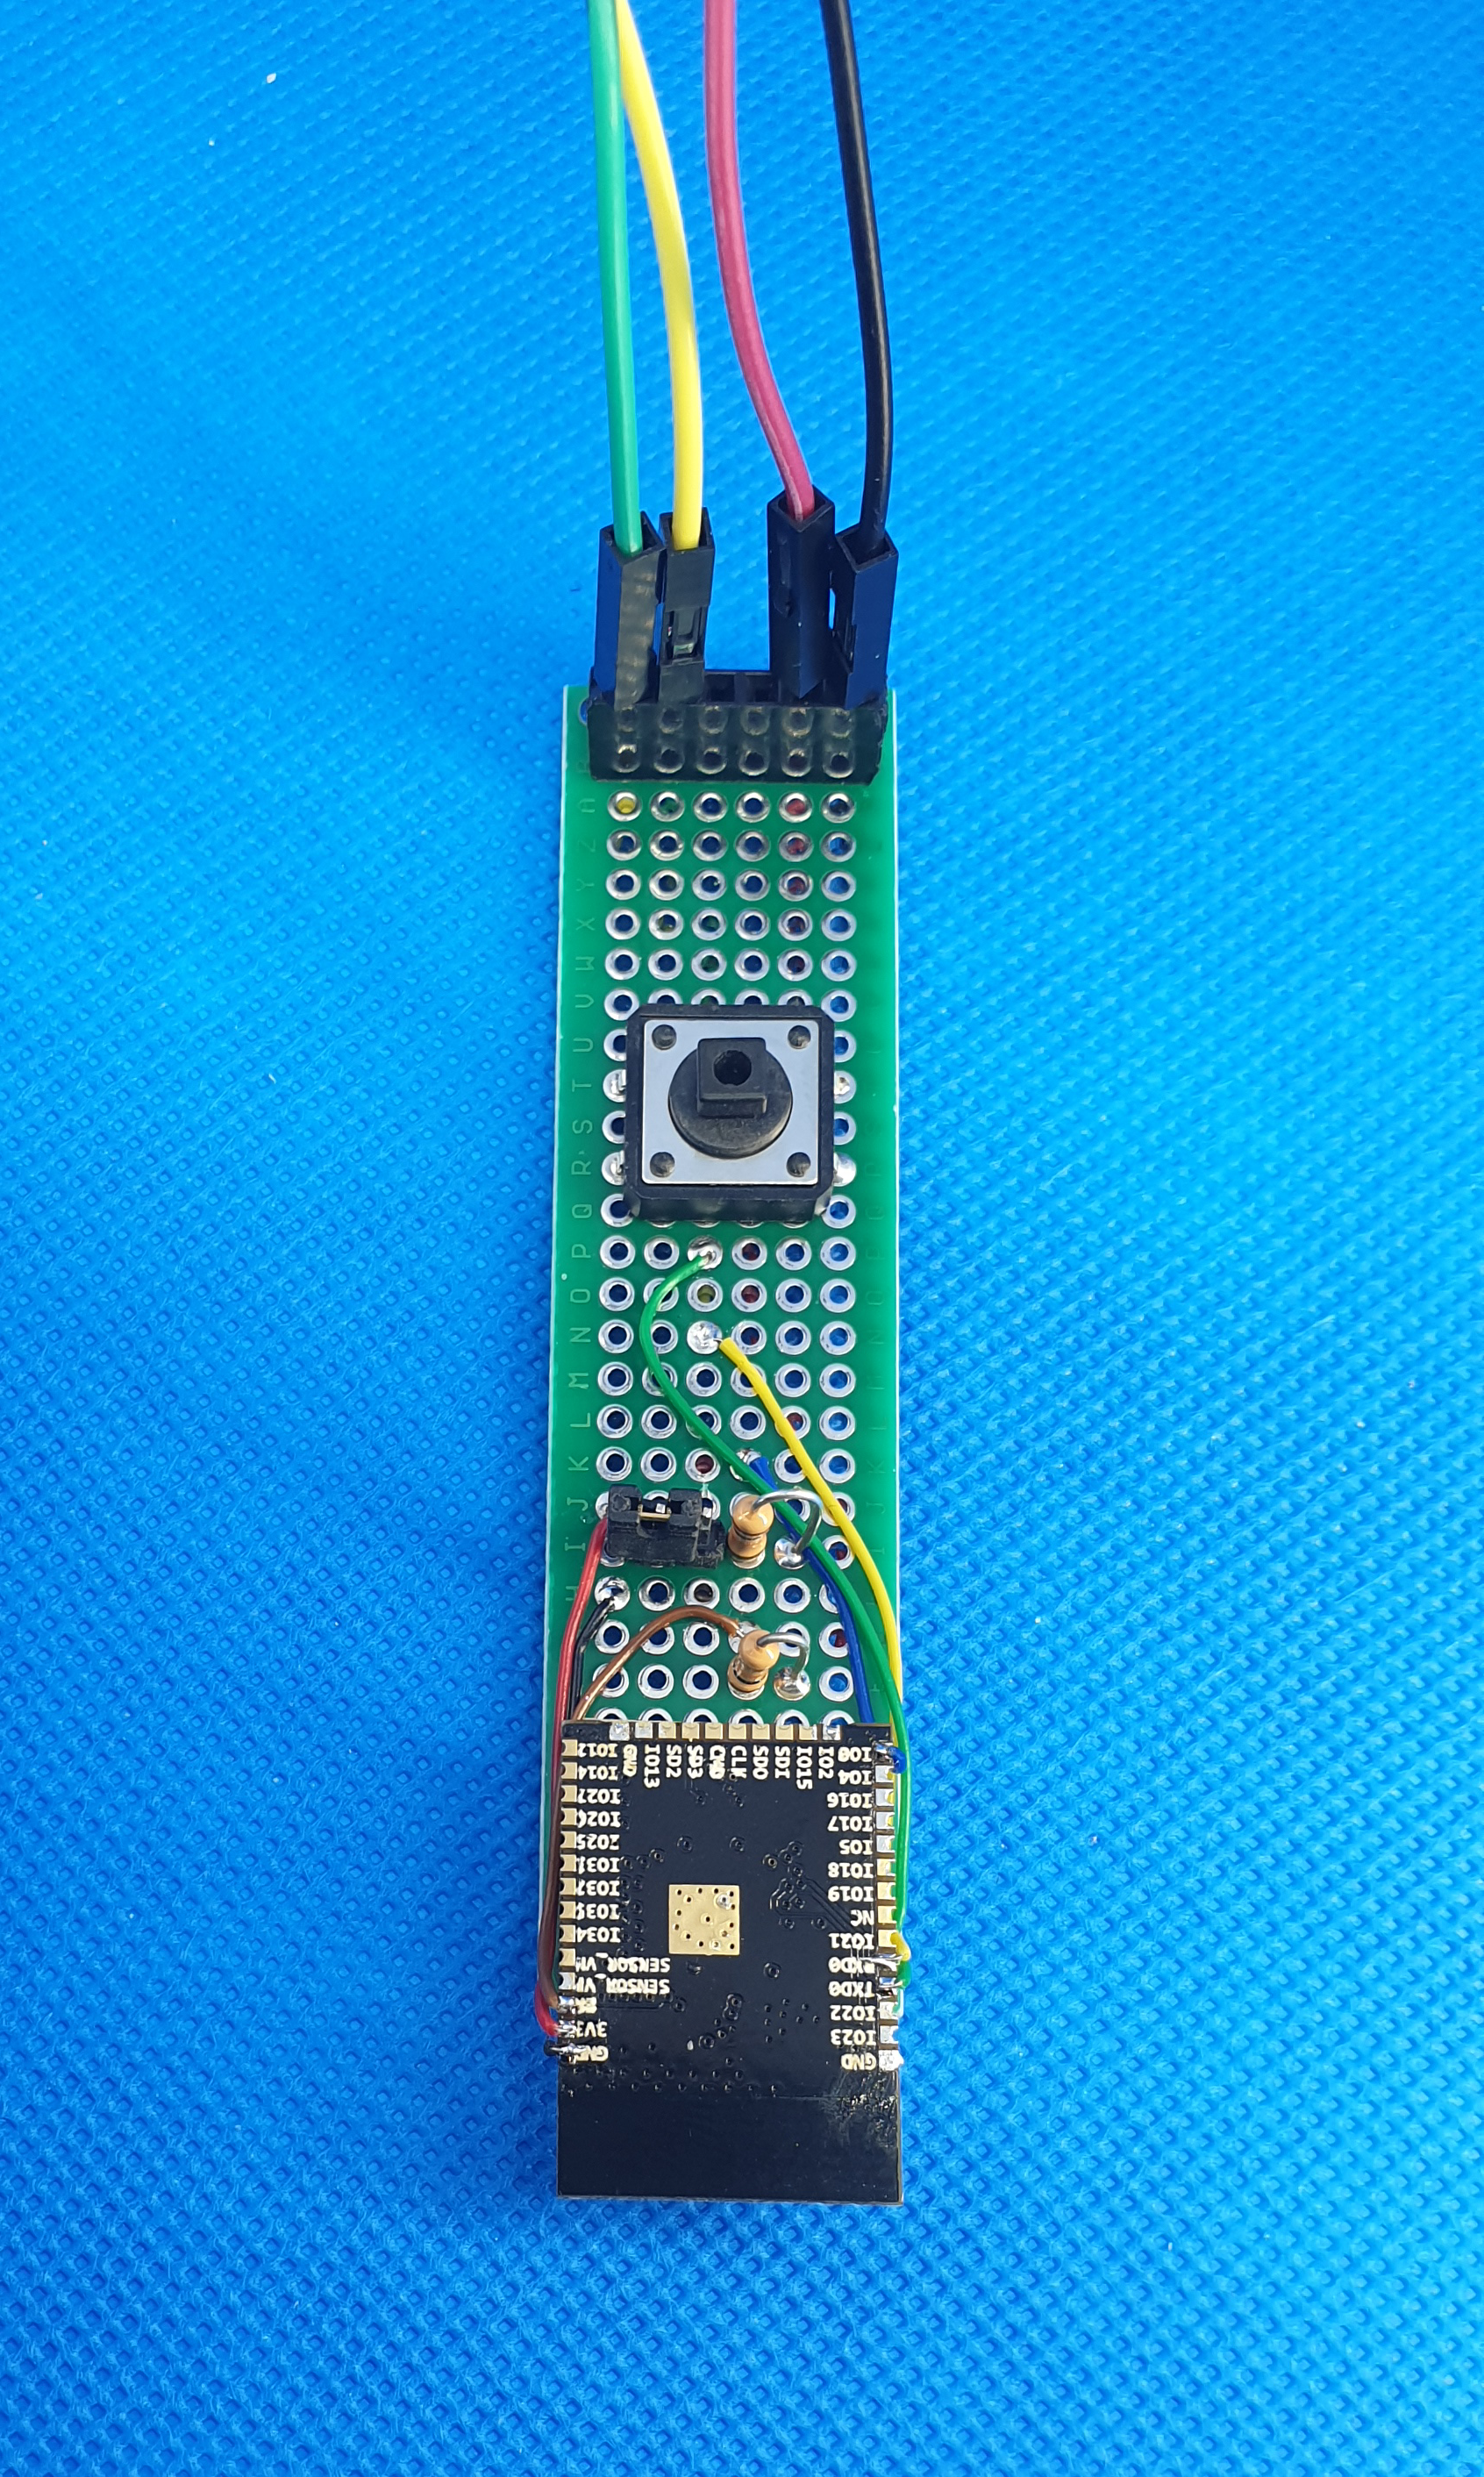
RXD0 must be connected to pin TX of the host or USB adapter, and TXD0 to RX. 3.3V and GND pins must be wired the corresponding power pins. In flashing mode, IO0 must be pulled-down to GND. EN (or reset) must be pulled-up to VCC (3.3V) with a 10k resistor.
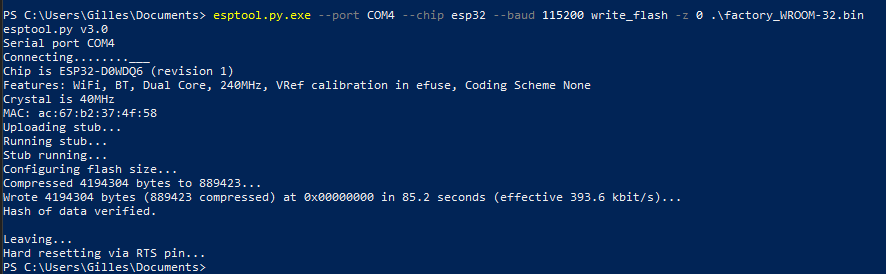
From Powershell enter following command: esptool.py.exe –port <serial-port> –chip esp32 –baud 115200 write_flash -z 0 <path-to-binary-file>, e.g.:
0 Comments